|  | | Accounts are free. Join #retro on irc.fxnet.org, identify with NickServ and type !req. |
| |
|
|  | | |
| | #retro on irc.fxnet.org
6697 ssl · 6667 plain
modern + vintage clients welcome |
| |
|
| | | |
| | 3 people in #retro
okawari, synmuffin, thelounge76
nobody on the FTP
last upload: Archived Windows 3.0 - 11 ISO B... by archiveorg, 35d ago |
| as of 21:42 EST ·  |
|
|
| | | |
| | | releases | 2,186 | | last 24h | +0 | | online | 1.7 TB | | library | 1.4 TB | | members | 1 | | updated | 2026-11-18 21:42 |
|
|
|
| | | |
| |
| | 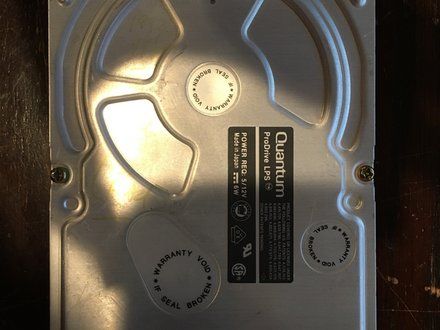
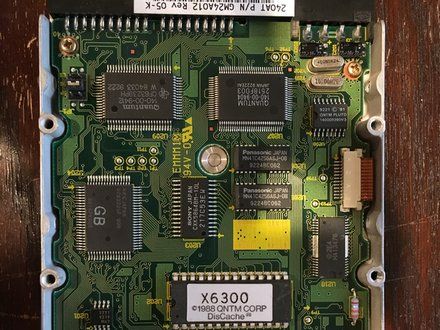
• The first picture is of the top cover of the drive, and the second picture is of the PCB on the bottom side of the drive (which got cropped - I had to cut out a bit of the board. Sorry!)
|
|
|
| | | |
| | 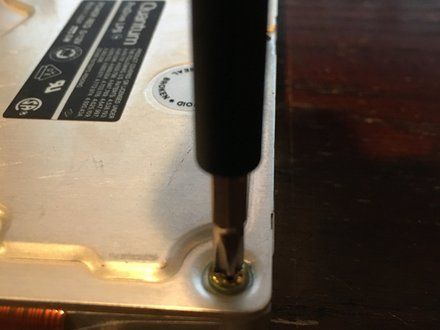
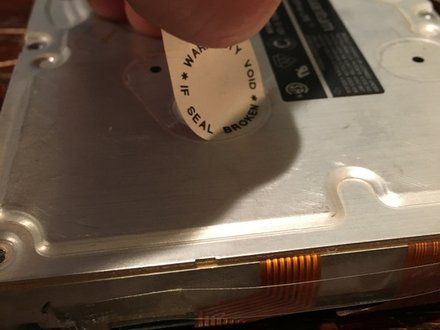
• Start by removing the six Phillips PH2 screws holding the top of the drive on. They may be a bit hard to loosen, as they're really old. Don't strip 'em! I couldn't get a good picture of all six screws to fit in the cropping area, but they are at the drive's four corners and also at the middle of each of the long sides of the rectangular body.
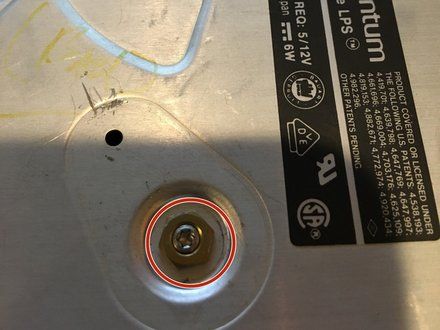
• Peel off the stickers on the drive cover as well. This voids the warranty (who cares at this point?), but is necessary to expose the rest of the screws holding the cover on. Remove these screws also (there should be 2 torx TR7 screws and a 9/32" nut (circled in red in the third picture) - remove the nut as well - you may need a socket).
|
|
|
| | | |
| | 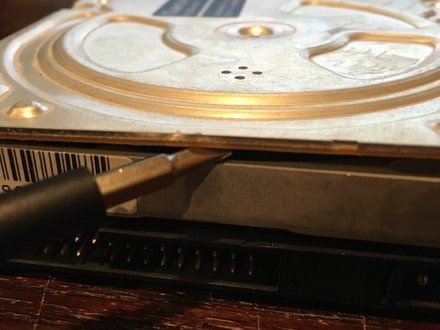
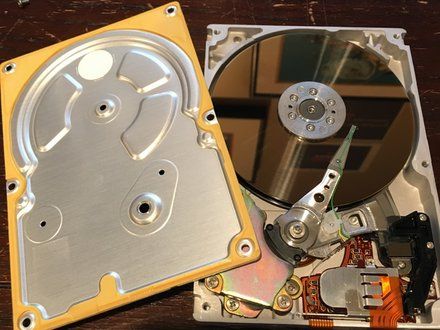
• Now, pull off the drive cover. Pry where a yellow strip of sealing rubber appears. Pull off the drive's cover, and then move on.
|
|
|
| | | |
| | 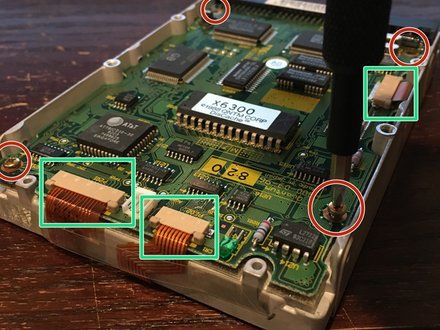
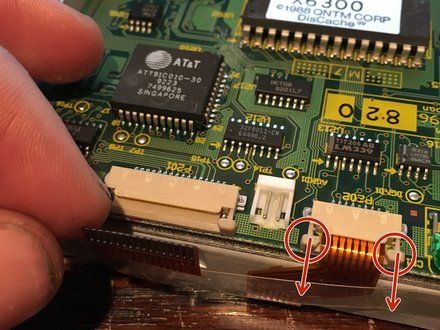
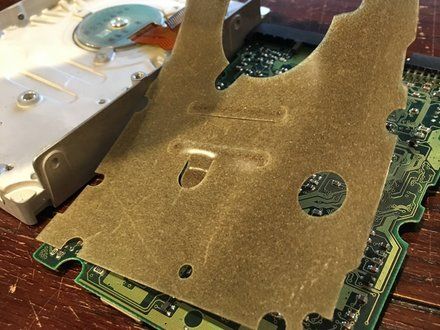
• Remove the four Phillips PH1 screws (circled in red) holding the PCB onto the back of the drive.
• Disconnect the three ribbon cables still attached to the PCB (boxed in green in the first picture) by pulling the tabs (circled in red in the second picture) on the side of each ribbon cable "holder" away from the "holder" (See arrows - there are two tabs per ribbon cable "holder.").
• Pull off the PCB from the back of the hard drive and remove the protective foam sheet from the back of the board.
|
|
|
| | | |
| | 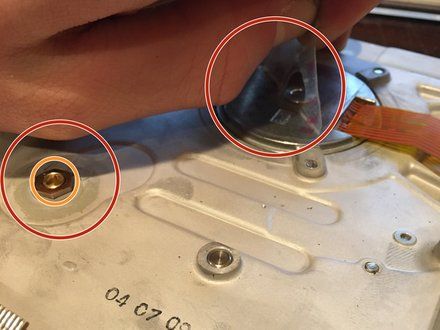
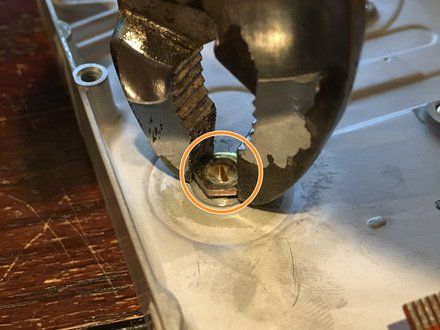
• Next, remove the two clear protective plastic stickers (circled in red) from the newly-exposed bottom of the drive.
• Remove the nut that was previously enclosed under one of the stickers mentioned above (circled in orange) (I used pliers to remove it, as I was too lazy to grab another socket). It is a bit hard to turn, as it is glued on, but apply enough force and it will come off. Also, unscrew the brass set screw in the middle of the aforementioned nut.
|
|
|
| | | |
| | 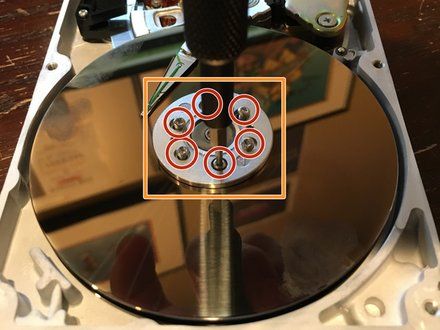
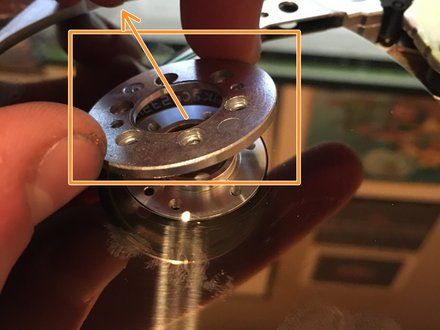
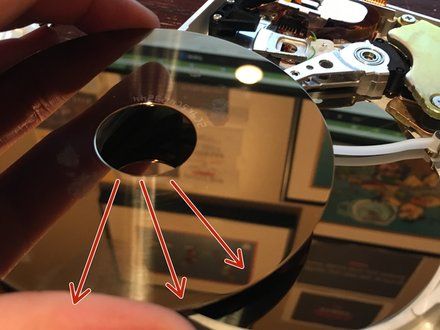
• Now, for the fun stuff! Let's remove the top platter first. Remove the six Torx TR6 screws (circled in red - one is behind my screwdriver) in the middle of the platter and then lift the ring (boxed in orange) in the center off. Then, slide the top platter out from under the read/write head (in the direction of the red arrows in the third picture).
• Don't worry about being gentle at this point - you've already destroyed all of the data by simply opening the drive up.
|
|
|
| | | |
| | 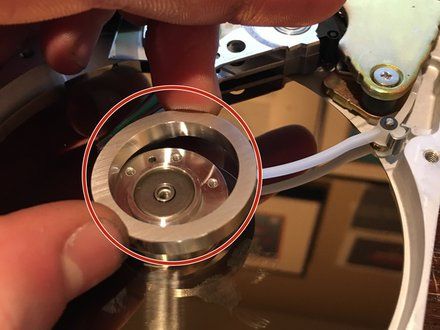
• Now, pull off the aluminum spacer (circled in red) in between the two platters (see the next step for a picture of this). We can't remove the second disk just yet, so let's move on for now.
|
|
|
| | | |
| | 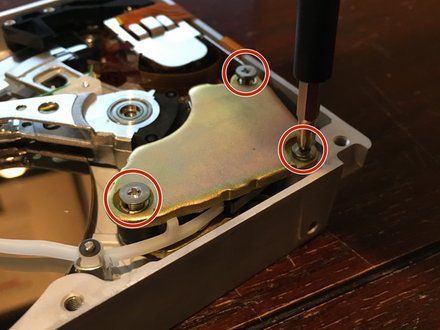
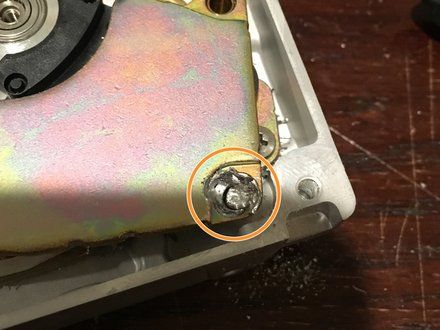
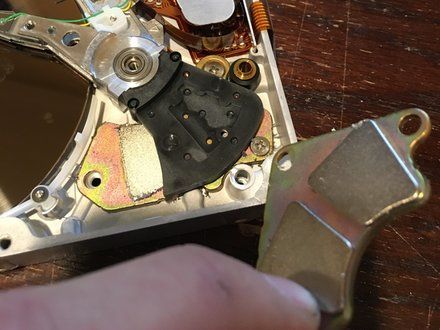
• Remove the three Phillips PH1 screws (circled in red) holding on the top Neodymium magnet. And be careful - they're pretty hard to get off! (I stripped one on accident and had to drill it out. This one is circled in orange in the second picture).
• Now, pull off the top magnet.
• CAUTION: Be careful here! You don't want to put this magnet near any electronic data storage units (i.e. computers or cellphones) as it is very strong. Also, don't get your finger stuck in between it and either the other magnet or it and a piece of metal - it will hurt! These magnets are super strong!
|
|
|
| | | |
| | 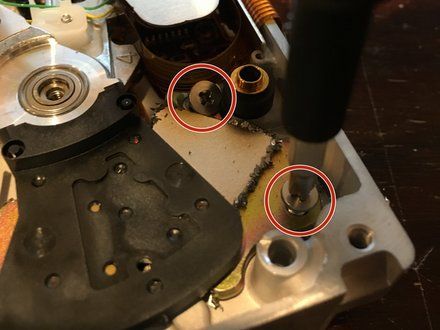
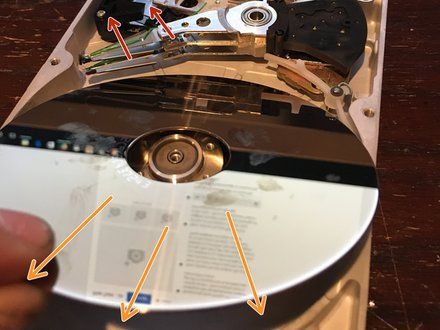
• Now, remove the two Phillips PH1 screws (circled in red) on the bottom magnet. Your magnet shouldn't have metal shavings on it like mine - this is only because I had to drill out the screw a bit ago.
• You should now be able to move the read/write head (in the direction of the red arrows) enough to remove the bottom platter (pull it in the direction of the orange arrows.).
|
|
|
| | | |
| | 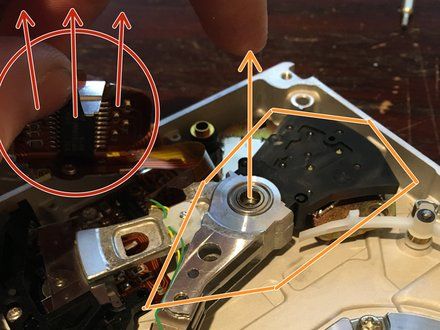
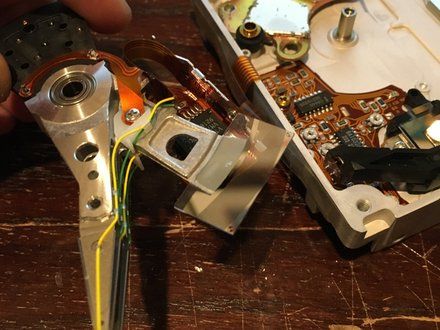
• Now, you can pull on the metal tab (circled in red), and pull off both the read/write head and some of the ribbon cables. Lift straight up to detach the read/write head ("circled" in orange - follow the orange arrows). Now, you can remove the bottom neodymium magnet. Pull it straight up, and don't put it near the other magnet!
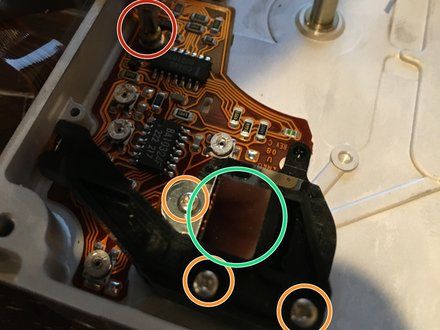
• Now, remove the remaining Phillips PH1 screw (3rd picture circled in red) on the inner PCB and the three Phillips PH0 screws (3rd picture circled in orange) on the assembly right next to the inner PCB.
• Pull the whole thing out (you have to remove the sticker strap on the outside of the drive. Pull off to remove the ribbon cables and detach the inner PCB assembly from the drive.).
• Make sure to be careful at this step. I pulled too hard and shattered the mirror assembly, which is made of very sharp and very thin glass (The mirror is circled in green in the third picture.).
|
|
|
| | | |
| | 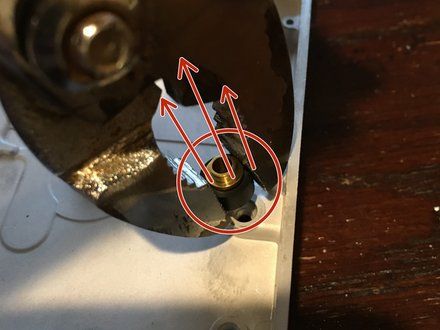
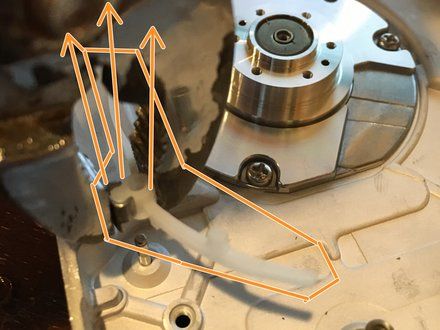
• Use a pair of pliers to remove the brass/rubber standoff (circled in red in the first picture) and the plastic bar ("circled" in orange in the second picture) from the aluminum drive body. Pull hard and pull up.
|
|
|
| | | |
| | 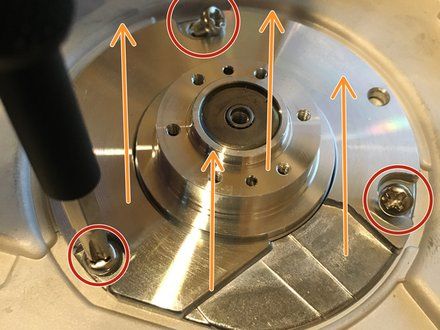
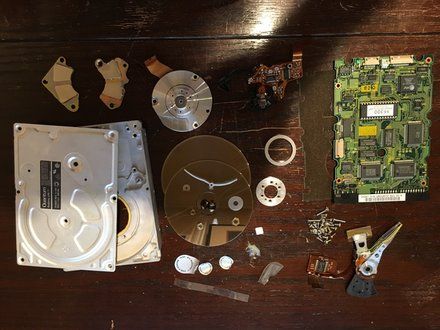
• Now, remove the three Phillips PH2 screws (circled in red) holding the drive motor to the body of the drive. Then, pull the motor straight up (in the direction of the orange arrows) and out of the drive body. Congrats - you're done!
• See the last picture for all of the parts! (Minus the two screws I drilled out...) (You can further disassemble the read/write head assembly, but it shouldn't be too hard, right...?). Thanks for viewing!!
|
|
|
| | | |
|


































