|  | | Accounts are free. Join #retro on irc.fxnet.org, identify with NickServ and type !req. |
| |
|
|  | | |
| | #retro on irc.fxnet.org
6697 ssl · 6667 plain
modern + vintage clients welcome |
| |
|
| | | |
| | 3 people in #retro
okawari, synmuffin, thelounge76
nobody on the FTP
last upload: Archived Windows 3.0 - 11 ISO B... by archiveorg, 35d ago |
| as of 21:42 EST ·  |
|
|
| | | |
| | | releases | 2,186 | | last 24h | +0 | | online | 1.7 TB | | library | 1.4 TB | | members | 1 | | updated | 2026-11-18 21:42 |
|
|
|
| | | |
| |
| | 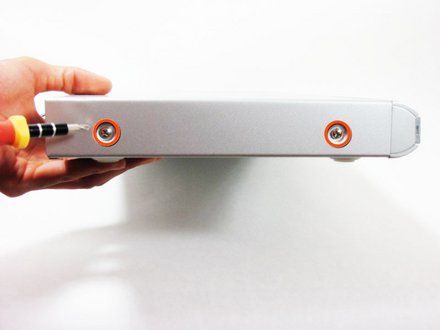
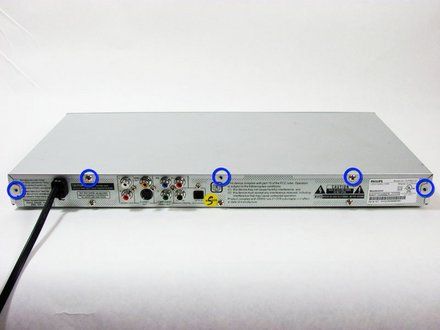
• Remove four 7.5 mm Phillips screws on the both sides (2 on each side).
• Remove five 7.5 mm Phillips screws on the back of the player.
|
|
|
| | | |
| | 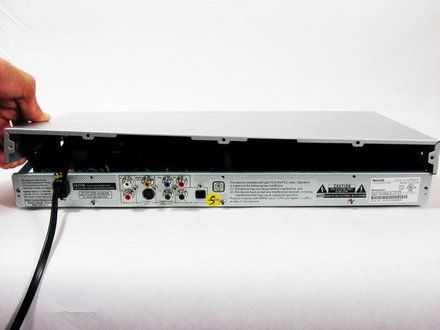
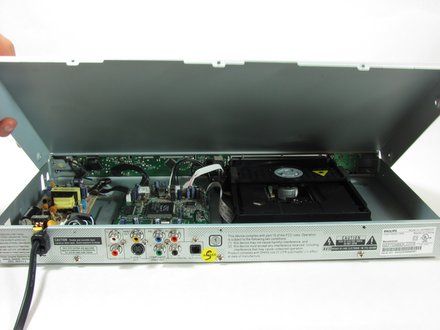
• Lift the top panel from the back and remove. It should come off without being forced. There is a lip near the front so you many need to slide the top panel back slightly to remove it.
|
|
|
| | | |
| | 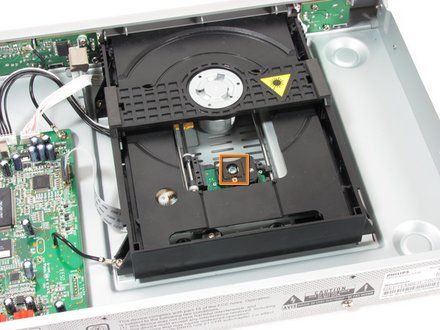
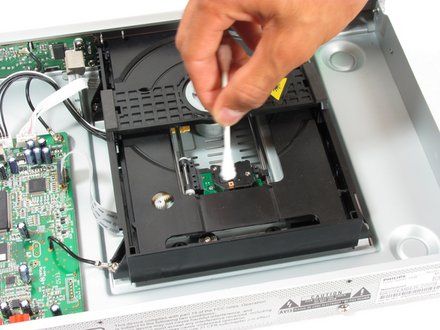
• Locate the lens on the disc drive.
• CAUTION: Make sure that there is no dust on or near the player and area you are working on. Dust can get on the lens and scratch it while you are cleaning. It is very important that the lens is not damaged because the lens is used to read the discs.
• Dip one end of a cotton swab in rubbing alcohol.
• Lightly dab the swab on the lens. Be very gentle.
• Let the lens dry before replacing the top plate of the DVD player.
|
|
|
| | | |
| | | To reassemble your device, follow these instructions in reverse order. |
|
|
| | | |
|

















