|  | | Accounts are free. Join #retro on irc.fxnet.org, identify with NickServ and type !req. |
| |
|
|  | | |
| | #retro on irc.fxnet.org
6697 ssl · 6667 plain
modern + vintage clients welcome |
| |
|
| | | |
| | 3 people in #retro
okawari, synmuffin, thelounge76
nobody on the FTP
last upload: Archived Windows 3.0 - 11 ISO B... by archiveorg, 35d ago |
| as of 21:42 EST ·  |
|
|
| | | |
| | | releases | 2,186 | | last 24h | +0 | | online | 1.7 TB | | library | 1.4 TB | | members | 1 | | updated | 2026-11-18 21:42 |
|
|
|
| | | |
| | | |
| Device | Soldering |
| Difficulty | Moderate |
| Time | 35 minutes - 1 hour |
| Steps | 7 |
This guide is by Ken on iFixit and is licensed under Creative Commons Attribution-NonCommercial-ShareAlike 3.0. ByteRot mirrors it for non-commercial preservation: formatting changed and photos resized for old browsers; full-size photos and the text are on the FTP in /DOCS/REPAIR. Original guide >>
Purpose of this guide it to show that in a pinch you can fix some really small problems without lots of money or equipment. But you must have patience.
Tools: Soldering Iron; Precision Utility Knife; Tweezers; Illuminated Magnifier Table Lamp; Helping Hands
Parts: Electrical Tape; Wire of small guage; Desoldering Braid; Flux Pen 10ml No Clean; Lead-Free Solder |
|
|
| | | |
| | 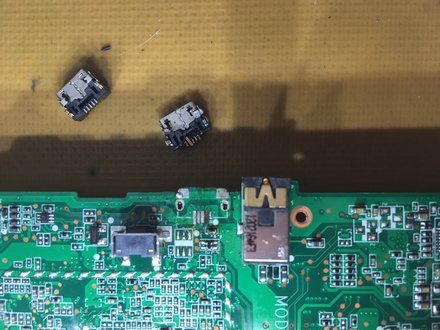
• Problem was broken power connecter on grandsons Kindle. Removed bad connector and broken trace came up with part. New connector also shown.
• I used a soldering iron with a 700 degree tip and de-solder braid to remove defective part. Hot air gun would have been a better option but I didn't have one.
• NOTE: Enlarge the image to zoom in and see fine detail. Also how I checked the work.
|
|
|
| | | |
| | 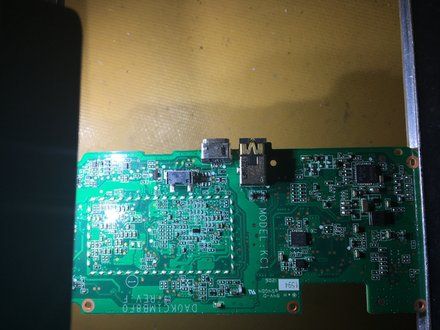
• After cleaning up the board and reseating new socket I simply resoldered in place. Now with the new socket installed, I needed to connect the unsoldered lead to the data port on board.
• NOTE: To find where the trace/lead went to I went to the Internet to find where it connected. I found many usable images to determine the path.
• To remove the coating on the board where I needed to solder , I scrapped away the coating with an Xacto knife.
|
|
|
| | | |
| | 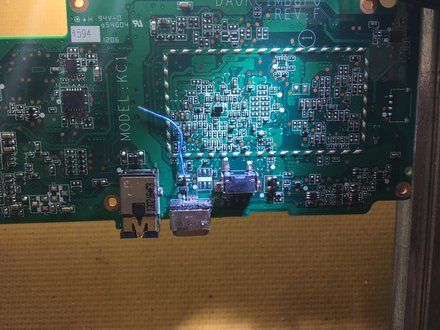
• Stripping and tinning a piece of 60mm wire I layed it in the path where I needed to attach. I bent the wire to give better leverage.
|
|
|
| | | |
| | 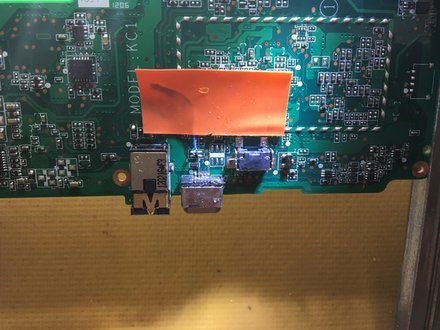
• Putting a piece of electrical tape over a bent wire kept it in place
|
|
|
| | | |
| | 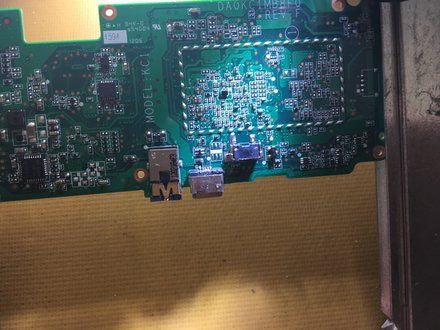
• Using a fine tip on my iron , I again used a 700 degree tip , dabbed the area with liquid flux and soldered the wire to the lead and exposed trace.
• When done I removed tape, cleaned flux off and trimmed wire to length.
• NOTE: You must have a steady grip on your iron to attach the wire. By using a long wire, you make it easier to keep it in place as you solder and it's so thin you can remove the excess wire with little stress to the repair.
|
|
|
| | | |
| | 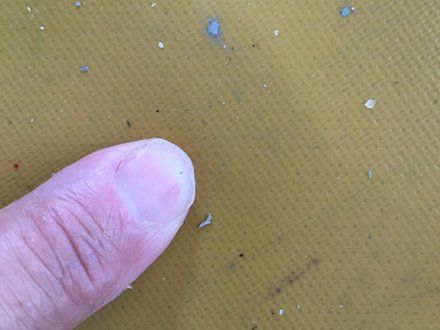
• The repair was the size of the wire next to the finger posted here
|
|
|
| | | |
| | 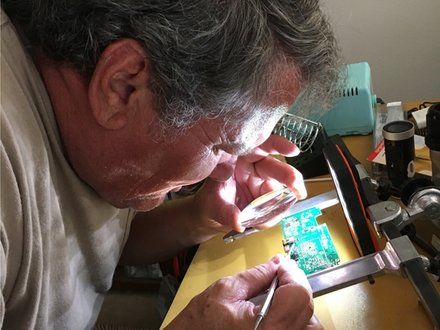
• Not very high tech, but it got me through this without a proper scope. In this image I was verifying I didn't have any solder bridges on socket.
• When everything was cleaned back up I put the Kindle back together and it charges and plays like it should.
• When I was done soldering I used my iPad Pro 9.7 to take hi resolution image that I could view and blowup to ensure the repair was intact and clean
|
|
|
| | | |
| | | using this technique, you can get yourself out of a pinch by repairing an item half the length of rice ,and half as thick. |
|
|
| | | |
|
























