|  | | Accounts are free. Join #retro on irc.fxnet.org, identify with NickServ and type !req. |
| |
|
|  | | |
| | #retro on irc.fxnet.org
6697 ssl · 6667 plain
modern + vintage clients welcome |
| |
|
| | | |
| | 3 people in #retro
okawari, synmuffin, thelounge76
nobody on the FTP
last upload: Archived Windows 3.0 - 11 ISO B... by archiveorg, 35d ago |
| as of 21:42 EST ·  |
|
|
| | | |
| | | releases | 2,186 | | last 24h | +0 | | online | 1.7 TB | | library | 1.4 TB | | members | 1 | | updated | 2026-11-18 21:42 |
|
|
|
| | | |
| |
| | 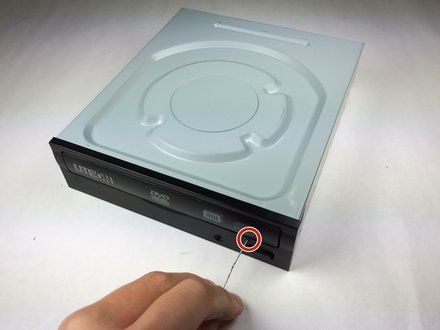
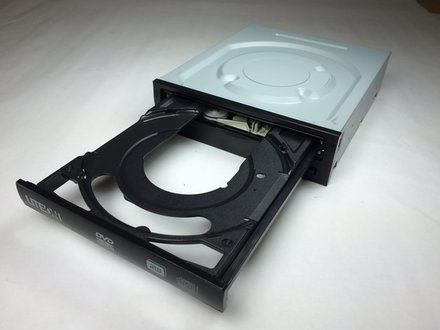
• Insert a paper clip into a small hole on the right side of the faceplate bellow the disc tray.
• NOTE: There may be resistance, do not be afraid to use force.
• The tray should then pop open.
• Pull out the tray so that it is fully extended.
|
|
|
| | | |
| | 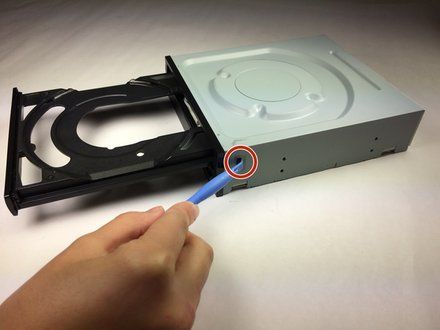
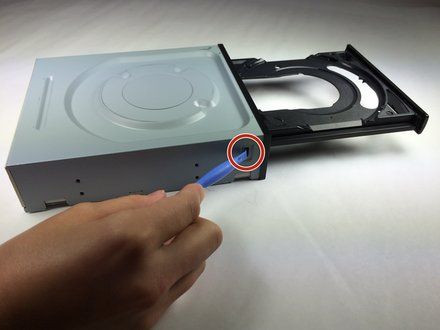
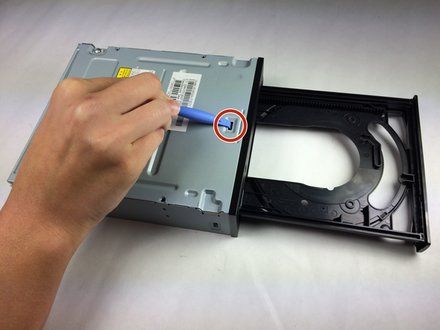
• Use a plastic opening tool to push the three tabs located on the right, left, and bottom side of the outer chassis to loosen the faceplate off.
|
|
|
| | | |
| | 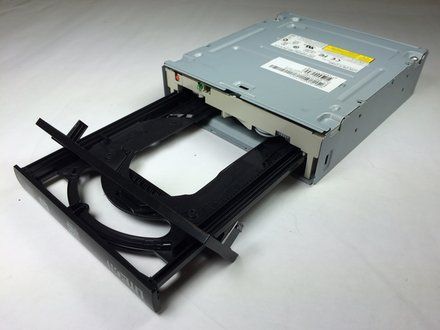
• Pull the faceplate off the chassis.
• CAUTION: Do NOT pull the faceplate all the way off the disc tray, because doing so can cause damage to the faceplate.
• NOTE: There may be resistance, do not be afraid to use force.
|
|
|
| | | |
| | 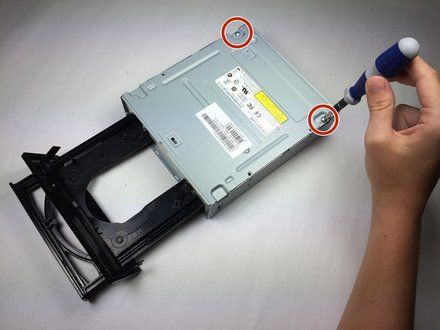
• Using the Phillips Head #2 screwdriver, unscrew the two 8.5 mm screws located on the bottom back of the chassis.
|
|
|
| | | |
| | 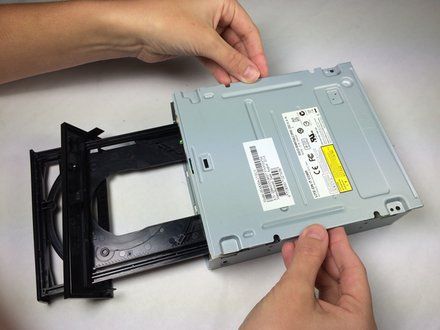
• Remove the bottom plate by lifting it off the device.
|
|
|
| | | |
| | 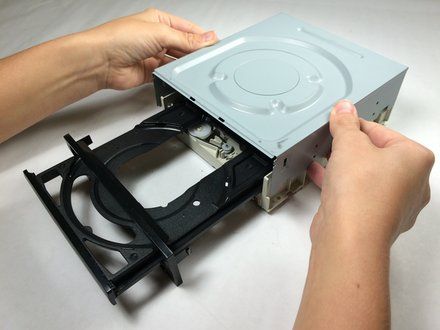
• Turn the device over.
• Remove the top plate by pulling the sides and lifting the plate off.
|
|
|
| | | |
| | 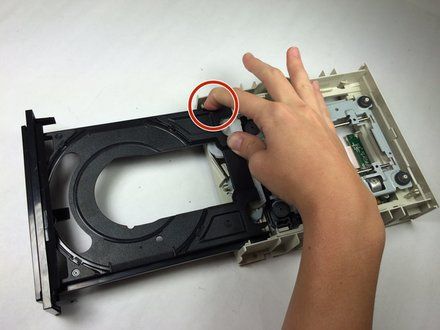
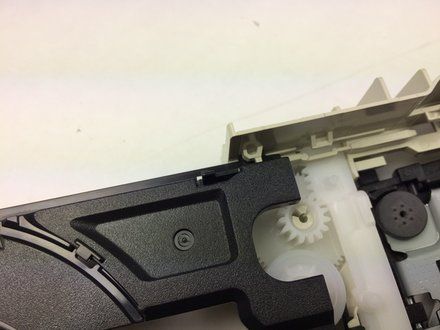
• Push the left tab in and slide the tray out on the left side.
• Pull the gray plastic casing on the right side away from the tray.
• Slide the right side of the tray out.
|
|
|
| | | |
| | 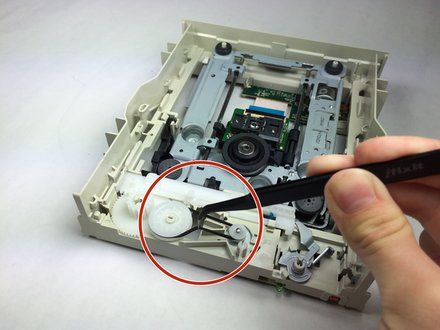
• Take tweezers (https://www.ifixit.com/en-ca/products/tweezers) and remove the black tray belt from the gears carefully.
|
|
|
| | | |
| | | To reassemble your device, follow these instructions in reverse order. |
|
|
| | | |
|


















