|  | | Accounts are free. Join #retro on irc.fxnet.org, identify with NickServ and type !req. |
| |
|
|  | | |
| | #retro on irc.fxnet.org
6697 ssl · 6667 plain
modern + vintage clients welcome |
| |
|
| | | |
| | 3 people in #retro
okawari, synmuffin, thelounge76
nobody on the FTP
last upload: Archived Windows 3.0 - 11 ISO B... by archiveorg, 35d ago |
| as of 21:42 EST ·  |
|
|
| | | |
| | | releases | 2,186 | | last 24h | +0 | | online | 1.7 TB | | library | 1.4 TB | | members | 1 | | updated | 2026-11-18 21:42 |
|
|
|
| | | |
| |
| | 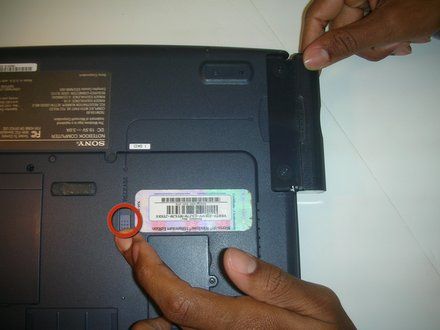
• Turn the device over so that its underside is facing up. Then, slide the blue floppy drive release button down and pull the floppy drive out of the laptop.
|
|
|
| | | |
| | 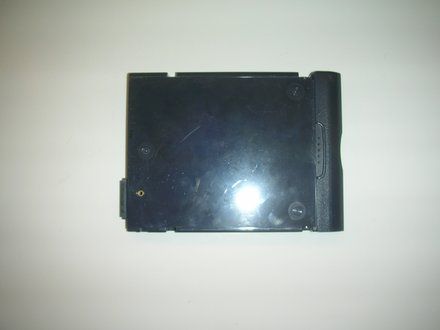
• Remove the floppy drive from the laptop.
|
|
|
| | | |
| | 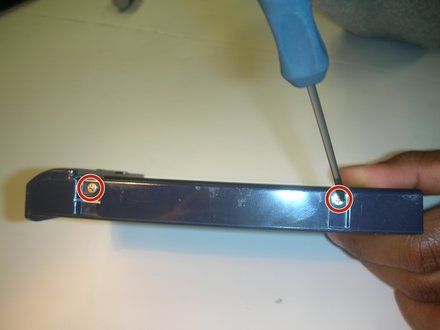
• There are two screws on each side of the floppy drive (four screws total). Remove these screws.
|
|
|
| | | |
| | 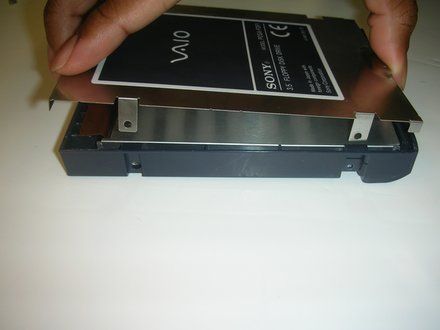
• Remove the floppy drive core from its casing.
|
|
|
| | | |
| | 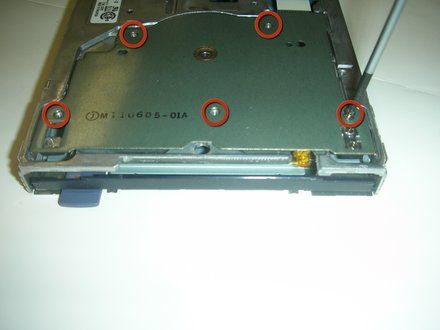
• Unscrew the five screws from the back of the optical drive.
|
|
|
| | | |
| | 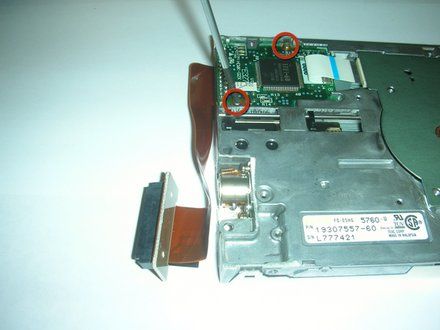
• Remove the two screws holding part of the floppy processing unit.
|
|
|
| | | |
| | 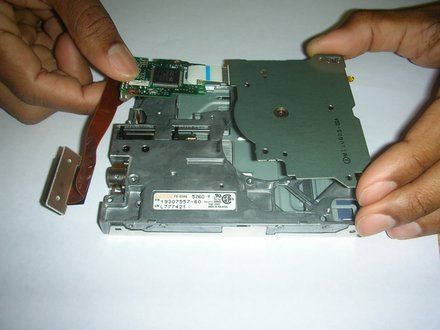
• Remove the entire floppy drive processing unit.
|
|
|
| | | |
| | 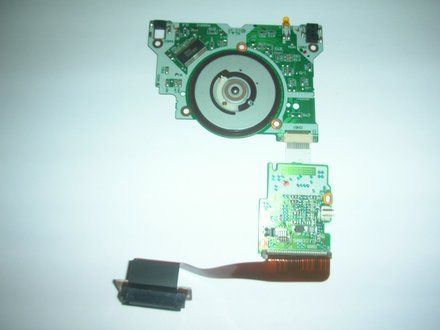
• Here is an isolated image of the core hardware of the floppy drive. This is where the floppy "magic" happens. Check for any connection failures or shortages. You may need to resolder some of the connections.
|
|
|
| | | |
| | 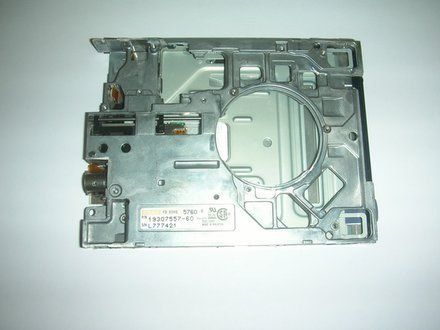
• Here is an isolated image of the floppy drive casing unit.
|
|
|
| | | |
| | | To reassemble your device, follow these instructions in reverse order. |
|
|
| | | |
|


















