|  | | Accounts are free. Join #retro on irc.fxnet.org, identify with NickServ and type !req. |
| |
|
|  | | |
| | #retro on irc.fxnet.org
6697 ssl · 6667 plain
modern + vintage clients welcome |
| |
|
| | | |
| | 3 people in #retro
okawari, synmuffin, thelounge76
nobody on the FTP
last upload: Archived Windows 3.0 - 11 ISO B... by archiveorg, 35d ago |
| as of 21:42 EST ·  |
|
|
| | | |
| | | releases | 2,186 | | last 24h | +0 | | online | 1.7 TB | | library | 1.4 TB | | members | 1 | | updated | 2026-11-18 21:42 |
|
|
|
| | | |
| |
| | 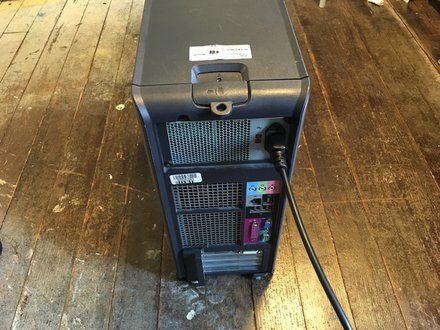
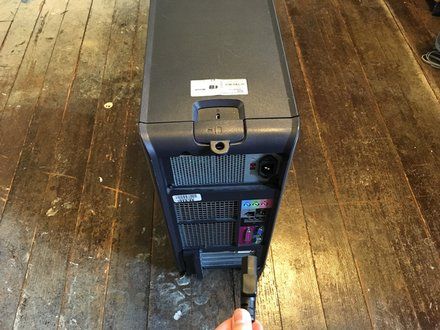
• Power down your PC and remove the power cord from the back.
|
|
|
| | | |
| | 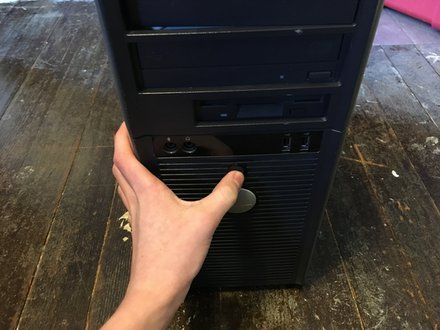
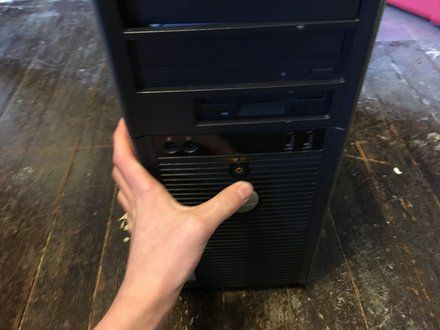
• Press and hold the power button for about 10 seconds, then release.
• NOTE: This helps drain any remaining power stored in the capacitors, so that you can safely work on the internal components.
|
|
|
| | | |
| | 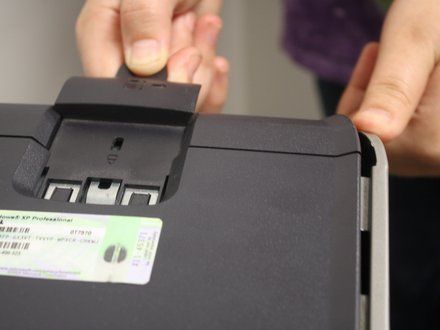
• With the computer standing upright, firmly pull on the tab at the back of the computer.
• When the side panel pops free, gently pull the panel away from the computer.
• NOTE: If you have trouble freeing the side panel from the case, you may need to pull the tab a bit harder.
|
|
|
| | | |
| | 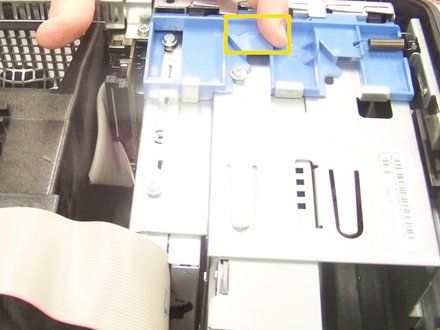
• Slide the blue latch downward until the panel can be removed from it's hinges.
|
|
|
| | | |
| | 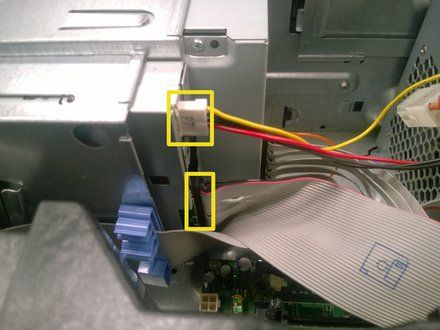
• Gently remove the floppy-drive and power cables from the back of the floppy drive.
|
|
|
| | | |
| | 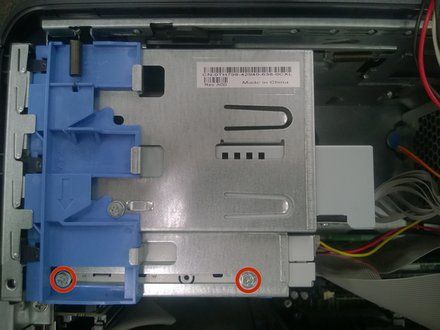
• With a Phillips #1 screwdriver, remove the screws connecting the floppy drive to the drive bay. Set the screws aside in a location where you may use them at a later time.
|
|
|
| | | |
| | 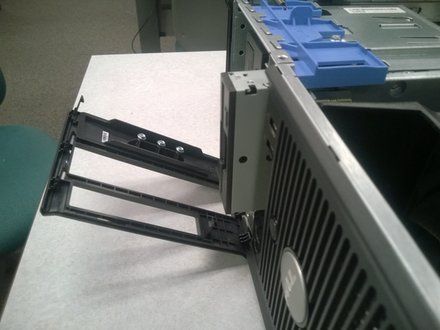
• To remove the unconnected floppy drive from the drive bay, slide the drive towards the front of the computer.
|
|
|
| | | |
| | | To reassemble your device, follow these instructions in reverse order. |
|
|
| | | |
|
























