|  | | Accounts are free. Join #retro on irc.fxnet.org, identify with NickServ and type !req. |
| |
|
|  | | |
| | #retro on irc.fxnet.org
6697 ssl · 6667 plain
modern + vintage clients welcome |
| |
|
| | | |
| | 3 people in #retro
okawari, synmuffin, thelounge76
nobody on the FTP
last upload: Archived Windows 3.0 - 11 ISO B... by archiveorg, 35d ago |
| as of 21:42 EST ·  |
|
|
| | | |
| | | releases | 2,186 | | last 24h | +0 | | online | 1.7 TB | | library | 1.4 TB | | members | 1 | | updated | 2026-11-18 21:42 |
|
|
|
| | | |
| |
| | 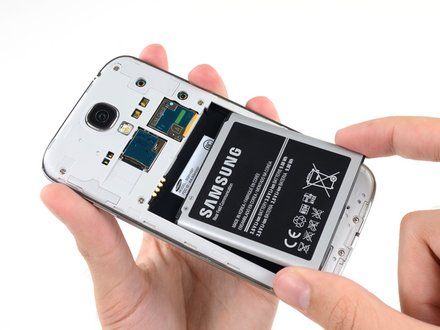
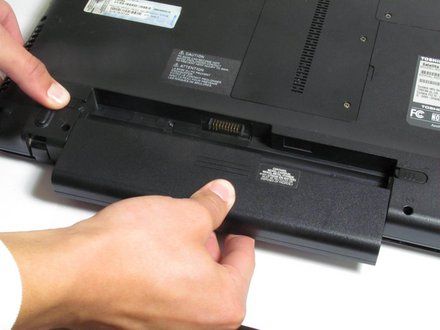
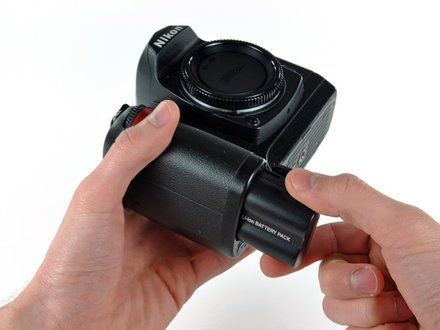
• Batteries power most modern portable devices, and they vary greatly in size, shape, and capacity.
• Batteries are generally identified by their voltage and capacity ratings, printed somewhere on the exterior.
• CAUTION: Make sure to remove (https://www.ifixit.com/Info/Device_Safety#Section_Disconnect_All_Power_Sources_Before_Opening_Your_Device) the battery from your device before taking it apart -- we don't want you to zap yourself!
|
|
|
| | | |
| | 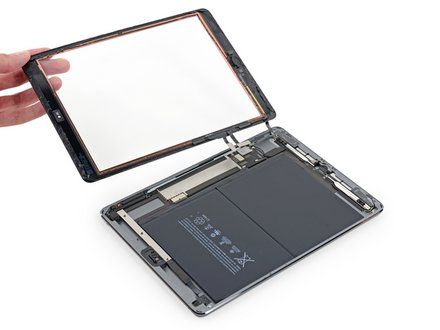
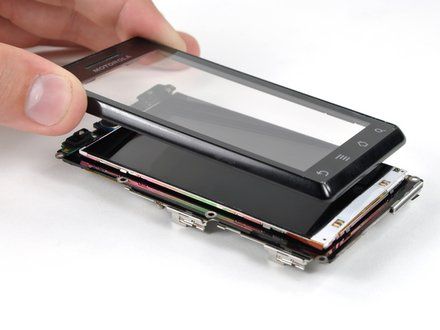
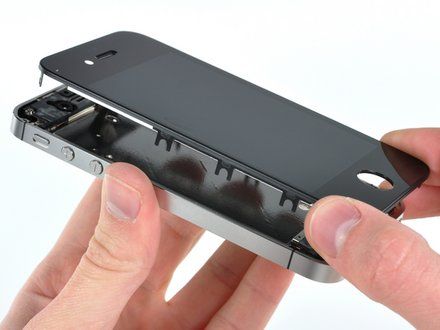
• Digitizers allow your device to recognize when and where you touch the screen. Digitizers themselves do not produce your device's visuals--that's the job of the display panel.
• They can usually be identified by a large glass panel, and a digitizer ribbon cable that connects it to the rest of the device.
• NOTE: A growing number of modern devices, such as the iPhone, are combining the digitizer and the display panel into a single display assembly. This means that if either component fails, you need to replace the entire assembly.
|
|
|
| | | |
| | 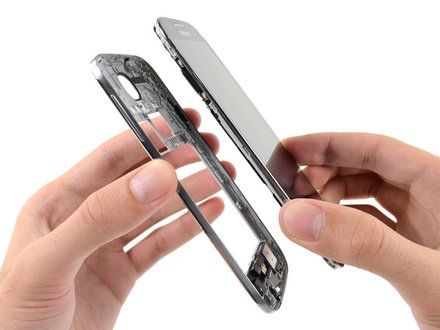
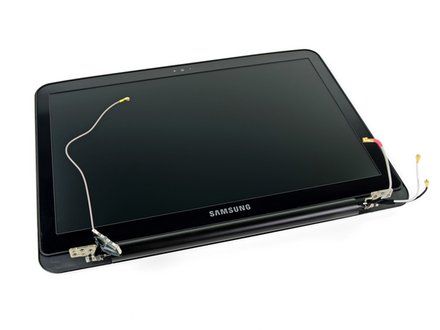
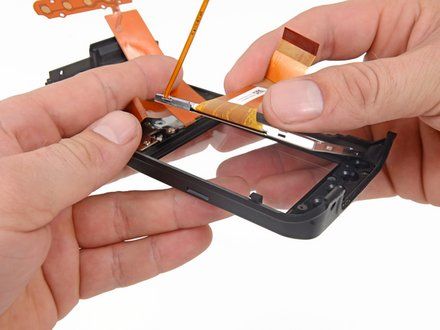
• The display panel is what shows all of your device's visuals.
• Although there are a wide variety of display panel types and sizes (LCD, LED, OLED, AMOLED), they're typically the most prominent feature of the device, which makes them very easy to identify. Look for a ribbon cable that connects the panel to the rest of the device.
• NOTE: A growing number of modern devices, such as the iPhone, are combining the digitizer and the display panel into a single display assembly. This means that if either component fails, you need to replace the entire assembly.
|
|
|
| | | |
| | 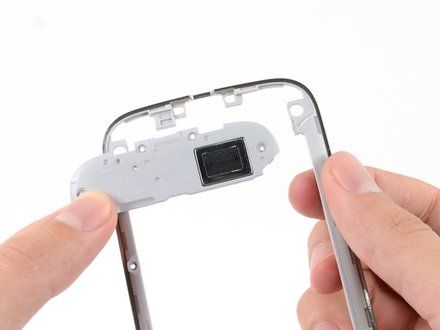
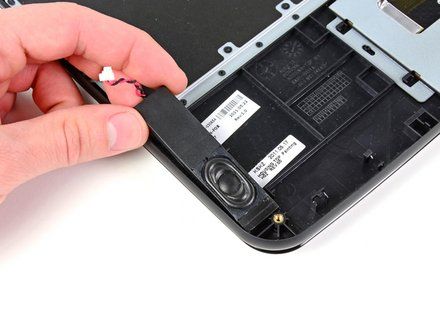
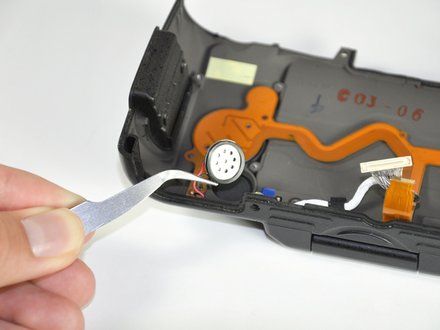
• Speakers provide sound for a wide variety of devices. They convert an electrical signal to sound by using magnets to vibrate a flexible cone inside of an acoustic chamber. This vibration creates the sound waves that your ears hear.
• Speakers come in many shapes and sizes, but are generally easily identified. To locate the speakers on a device, look for some sort of speaker grille coupled with a hollow acoustic chamber.
|
|
|
| | | |
| | 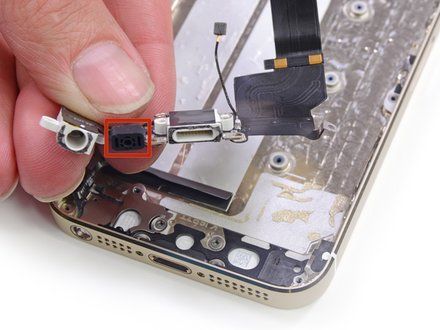
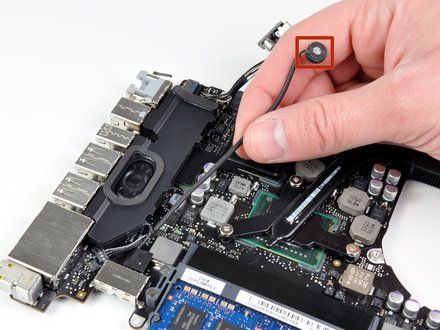
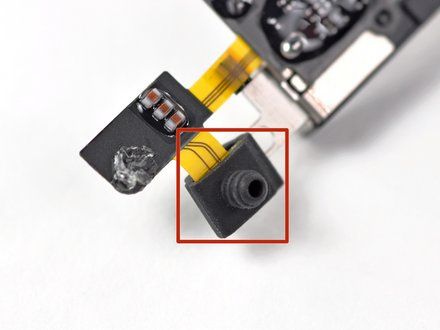
• Microphones are an integral component of many modern devices. They take sound waves and convert it to electrical signals that can then be recorded and transferred.
• To identify where the microphone is on your device, look for a small grille on the casing. Generally, the word "Mic" is written next to it, or there is a small picture of a microphone.
|
|
|
| | | |
| | 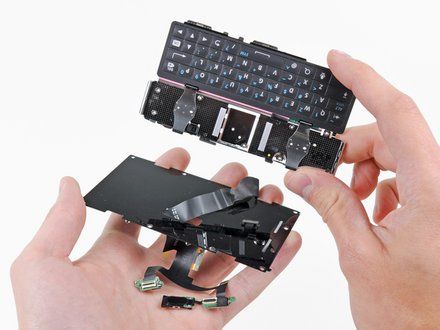
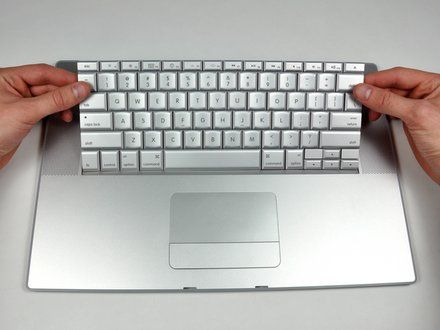
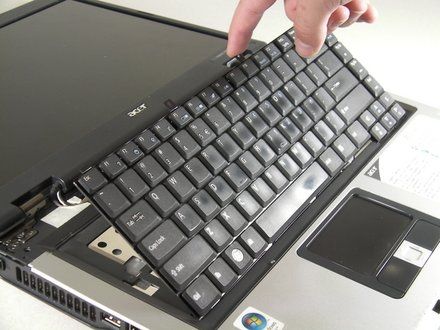
• Keyboards are another prominent component of most devices. They let the user input text into the device.
• They can be identified by several rows of keys with letters and numbers covering them. Individual keys can often be replaced, as well as the whole keyboard.
• CAUTION: Be careful when removing keyboards, because most have a fragile ribbon cable attached to them.
|
|
|
| | | |
| | 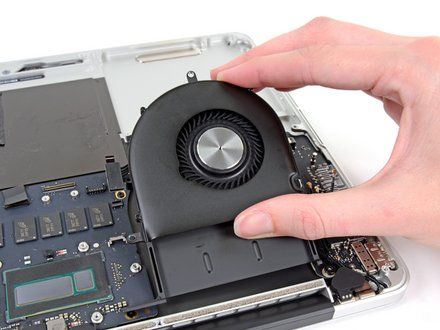
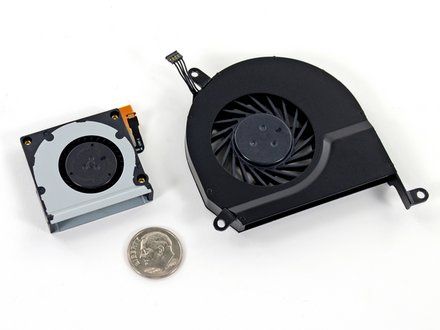
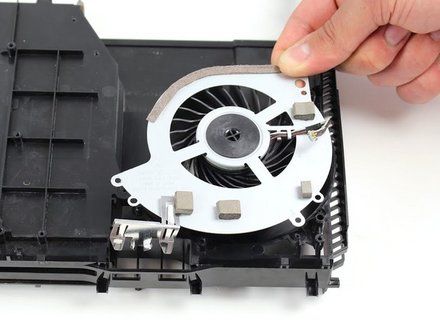
• Fans are commonly found in larger devices such as laptops, which need dedicated cooling.
• Fans can vary greatly in size and shape, so look for a component with a circular hole that has fan blades inside of it.
|
|
|
| | | |
| | 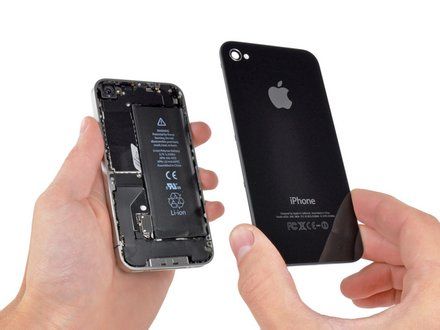
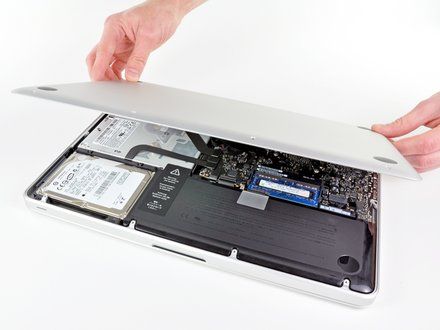
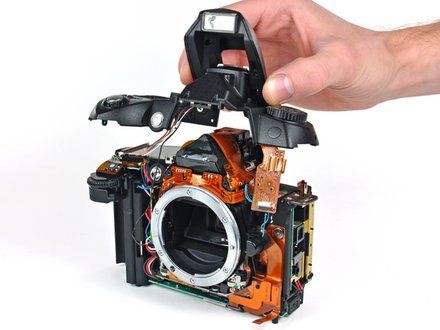
• Most devices have some sort of casing around them which protects their internal components. Casings are made from a variety of materials, including plastic, aluminum, and glass.
• Laptops often have a top and bottom case that needs to be taken apart to access the internals.
• Phones/cameras on the other hand often have front and rear cases that separate to reveal the internals.
|
|
|
| | | |
| | 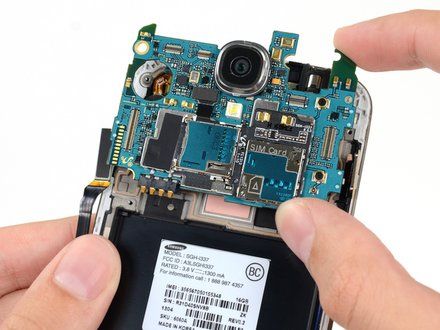
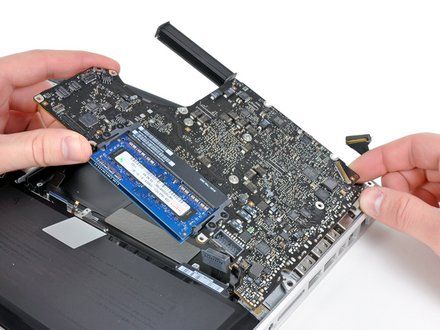
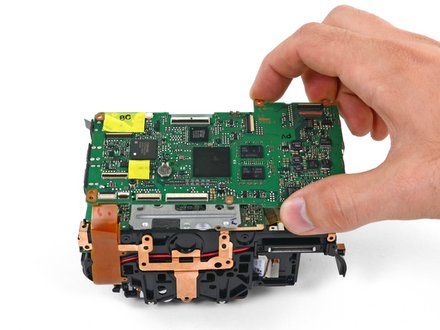
• The motherboard is like the nervous system of your device. Without a motherboard, your device is just a useless hunk of electronics!
• Motherboards are generally very easy to identify, because they're one of the largest components in your device. Many of the other components inside your device connect to the motherboard.
• NOTE: "Motherboard" is a generic name for the largest circuit board in a device. Apple calls their motherboards "Logic boards." This is brand-specific nomenclature. So unless you have an Apple device, you are working with a "motherboard."
|
|
|
| | | |
| | 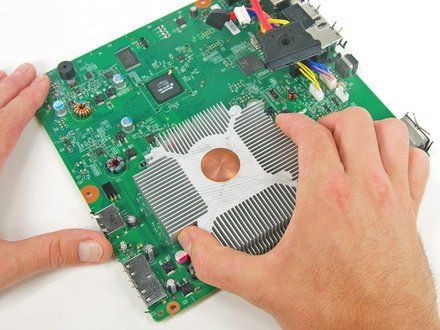
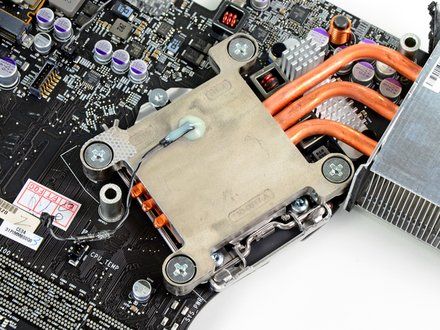
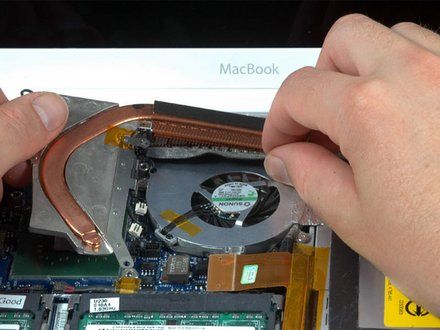
• Heatsinks keep CPUs cool by dissipating the heat into the surrounding environment.
• To identify the heatsink, look for metal fins and copper piping that help pull heat away from the CPU.
• REMINDER: When removing the heatsink, it's always good to apply (https://www.ifixit.com/Guide/How+to+Apply+Thermal+Paste/744) a new layer of thermal paste, as it helps the heatsink pull heat away from the CPU.
|
|
|
| | | |
| | 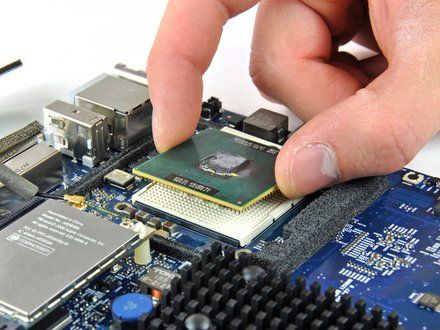
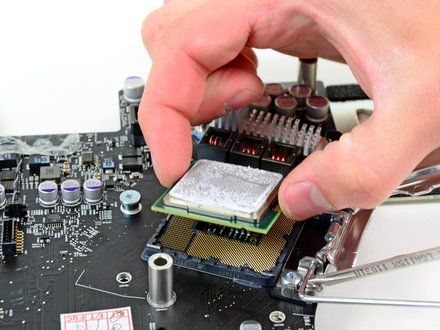
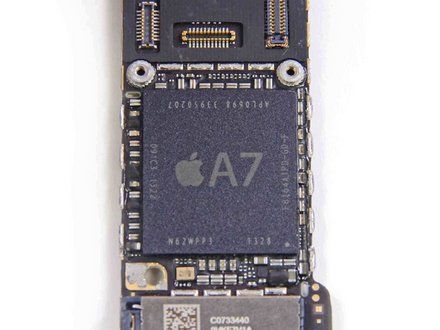
• The central processing unit (CPU) is a lot like the "brain" of a device. It handles all of the necessary calculations to run the operating system and all of your applications.
• Although CPUs can vary greatly in size, it's generally fairly easy to identify them. Most devices have a heatsink (see previous step) keeping the CPU cool. Find the heatsink, and you'll generally find the CPU hiding underneath.
• CAUTION: Be careful when removing CPUs, because they can be very delicate. Additionally, some CPUs (Apple's A7 for example) can't be removed because they are soldered into the motherboard. If a CPU doesn't come off easily, do NOT try to desolder it, as you might cause irreparable damage to it.
|
|
|
| | | |
| | 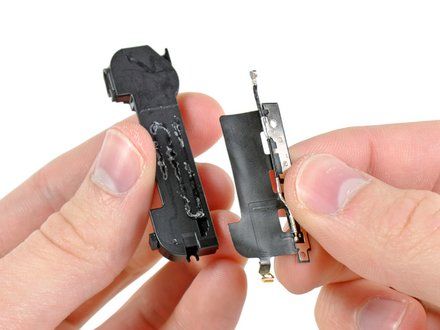
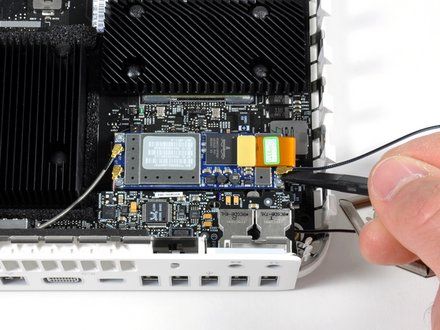
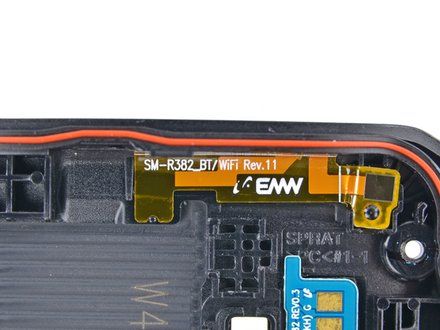
• Antennas allow devices to send and receive digital signals such as cellular, Bluetooth, and Wi-Fi. Antennas vary greatly from device to device, but there are two major antenna designs.
• The first commonly features black/white antenna cables that plug into a wireless card.
• The second is generally a flat piece of plastic that looks like a sticker. With this design, the entire piece acts as an antenna.
|
|
|
| | | |
| | 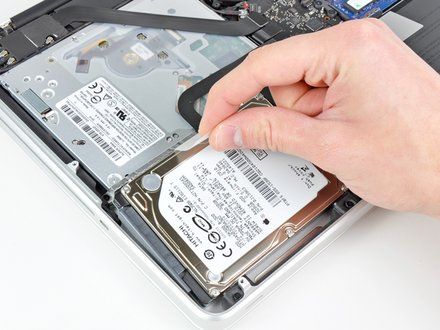
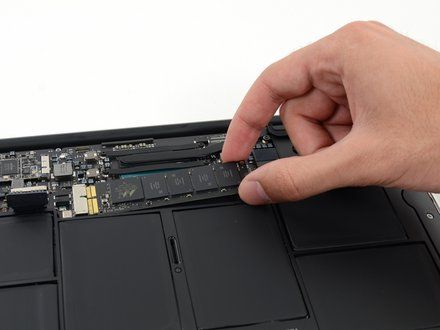
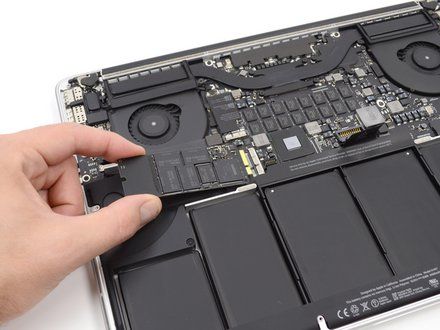
• Hard drives and solid-state drives allow for the storage of documents/pictures/etc. on a device, and are commonly found in laptops and desktop computers.
• They are generally rectangular and covered in markings that denote how big they are (500 GB, etc).
• Additionally, both types can vary greatly in size and shape. For example, some solid-state drives have no casing, leaving the memory chips exposed.
|
|
|
| | | |
| | 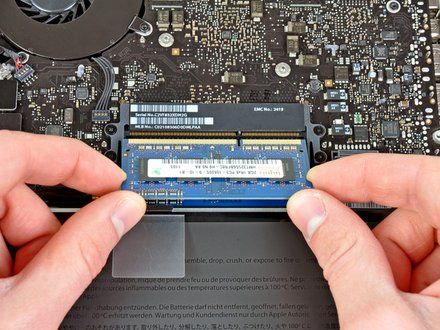
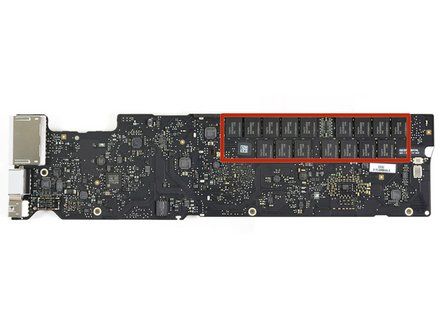
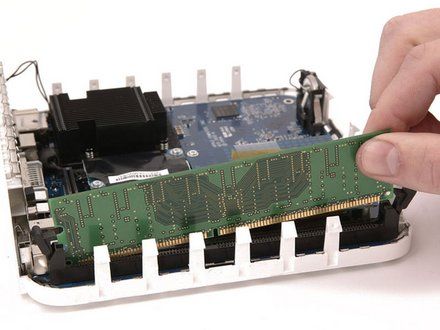
• RAM (Random access memory) can be found in almost all modern devices and generally looks like a stick with a large amount of memory chips covering it. RAM is like a sort of "temporary" memory for your device, where commonly accessed data is stored for quicker retrieval.
• Some devices, such as phones and ultra-thin laptops have non-removable RAM. Don't try to remove this RAM from the device, as it is soldered into the motherboard.
|
|
|
| | | |
| | 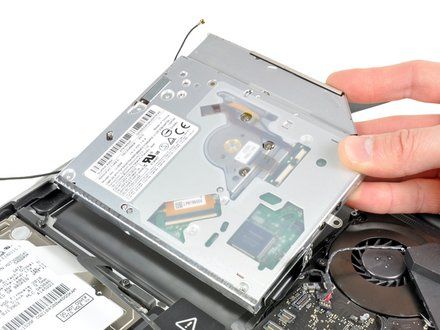
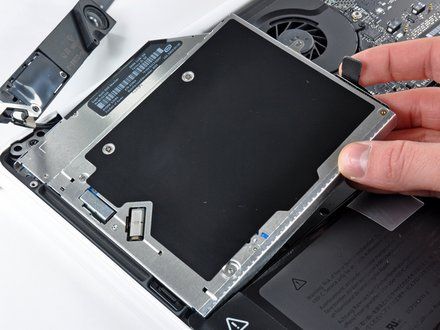
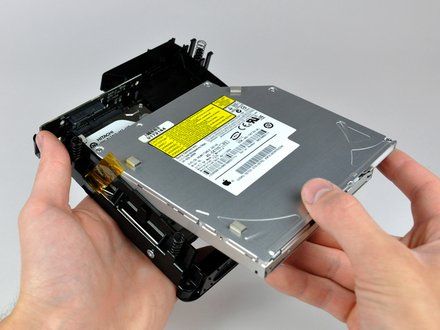
• Many laptops feature optical drives, which allow the device to read CDs and DVDs.
• To identify the optical drive, look for a large square component that has a slot or bay for a disc to be inserted into.
|
|
|
| | | |
| | 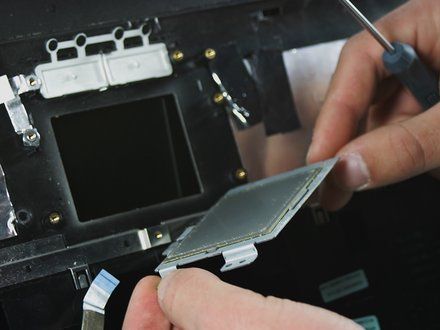
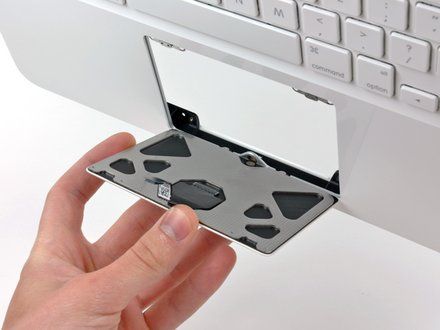
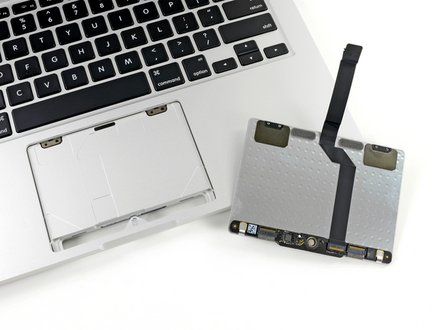
• Touchpads (or trackpads) are found on all laptops, and allow the user to interact with their device using only their fingers.
• To identify the touchpad on your device, look for the large square surface that you use to move the cursor around the screen.
|
|
|
| | | |
| | 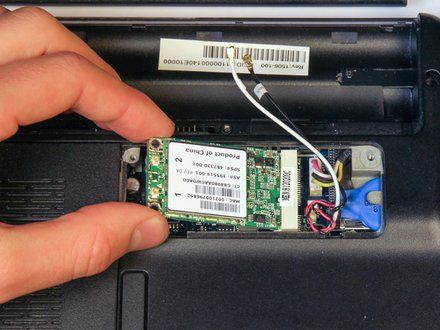
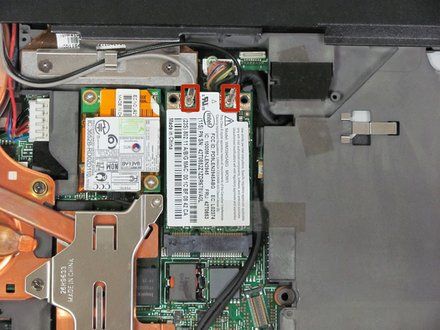
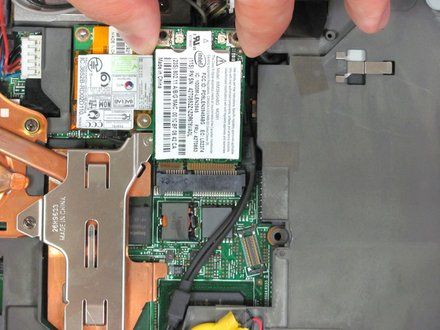
• The wireless card is a small circuit board which provides wireless connectivity to your laptop.
• It can generally be identified by two white and black antenna wires that connect to it.
|
|
|
| | | |
| | 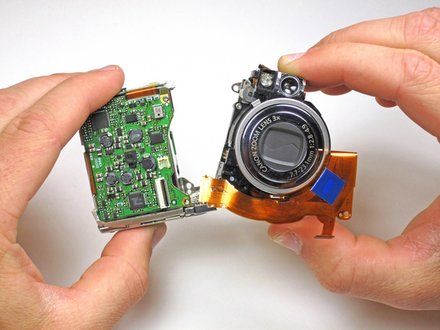
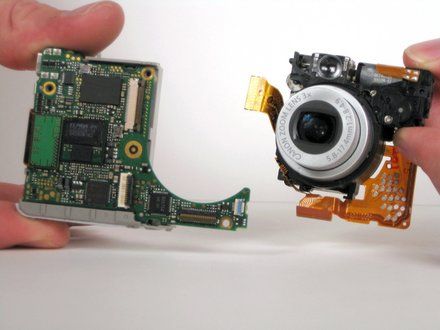
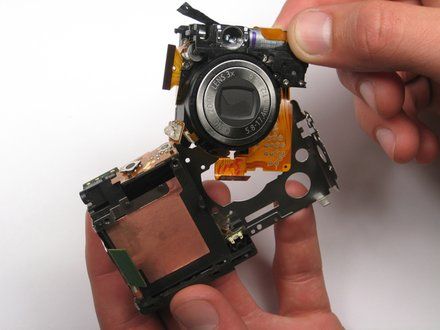
• The lens assembly of a camera houses the shutter and lens which allows your camera to take photos.
• The lens assembly is generally one of the largest components of a camera, and can be identified by a large ring that surrounds the shutter.
• NOTE: On most cameras, the lens assembly is one of the last components that can be removed. Be patient when removing it, because it is fragile.
|
|
|
| | | |
| | 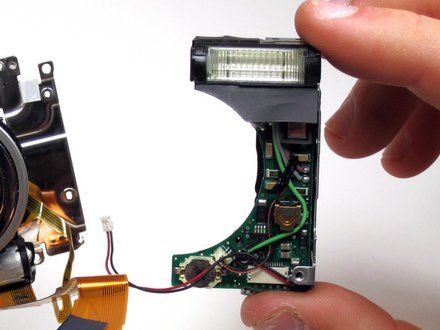
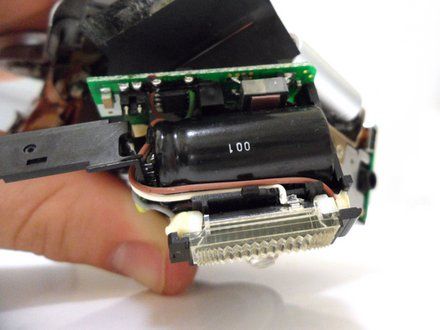
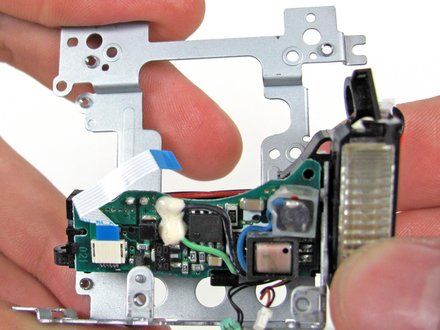
• The flash assembly of a camera provides a quick burst of light when taking a photo that can brighten up otherwise dark environments.
• To identify the flash assembly, look for a small board that attaches to the rectangular light on the front of the device.
• CAUTION: When handling the flash assembly, make sure you have removed the battery from the camera. Most flash assemblies have capacitors (https://www.ifixit.com/Info/Device_Safety#Section_Watch_Out_for_Large_Capacitors), which can shock you if you touch the leads. It's also a good idea to make sure the capacitor has been discharged (https://www.ifixit.com/Guide/Constructing+a+Capacitor+Discharge+Tool/2177) before handling it.
|
|
|
| | | |
| | 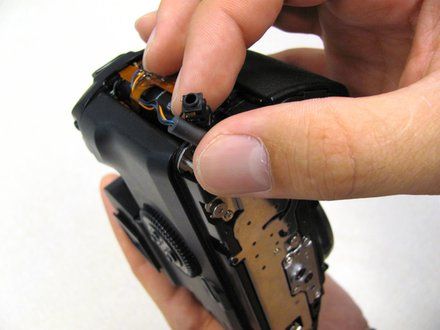
• Audio/Video(A/V) ports are commonly found on most cameras, and allow for content on your camera to be displayed on a television or monitor. They can be identified by their circular shape, and are often found near the power and memory card ports.
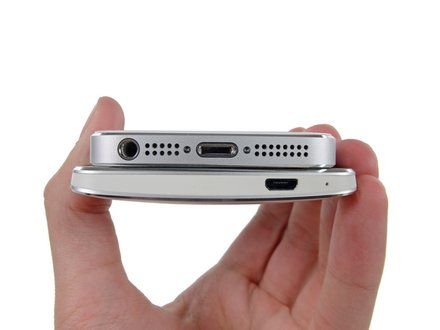
• Charging ports are found on almost all portable devices, and come in a variety of shapes and sizes. The two most common types are USB type C and Apple's Lightning connector.
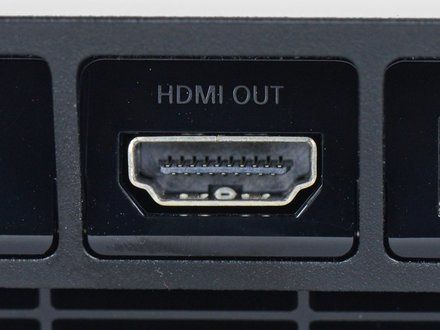
• Video ports, like A/V ports, are found on many devices and allow for content on your device to be displayed on a television or monitor. The most common types are HDMI, VGA, and Apple's Thunderbolt.
• Data ports are mainly used for transferring data between devices or networks. Common types include Ethernet ports and USB (universal serial bus) ports.
|
|
|
| | | |
| | 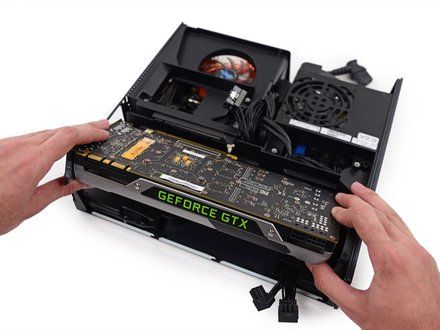
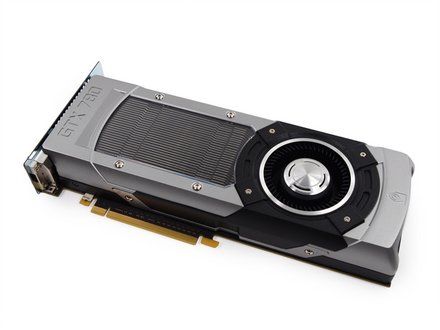
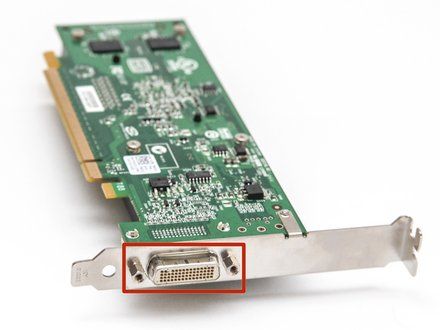
• Many higher-end desktop computers feature a dedicated graphics card which displays the visuals on the monitor.
• Graphics cards can generally be identified by their long rectangular shape, and are usually plugged into a PCI (Peripheral Component Interconnect) slot on the motherboard.
• To distinguish a graphics card from other PCI slot components (Such as TV tuner cards), look for some sort of video connector (https://www.ifixit.com/Wiki/Video_Adapter_Interfaces#Section_Adapter_display_interfaces) at the rear of it.
|
|
|
| | | |
| | 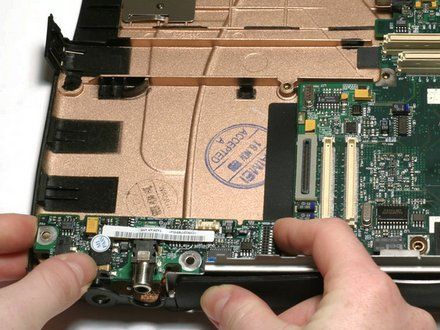
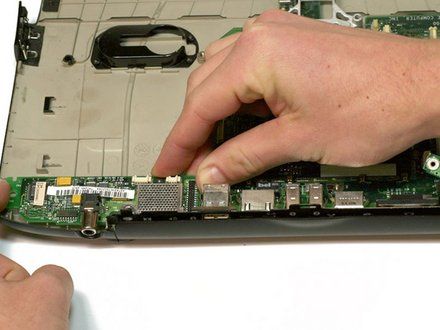
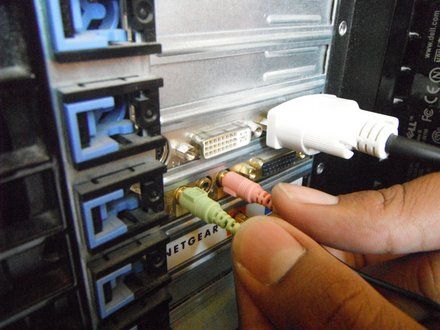
• Some desktop computers feature a sound card, which provides the audio output to the speakers.
• Sound cards can be identified by the headphone and/or microphone jacks found at the rear of the card.
• On smaller devices, look for a headphone/microphone that might be tethered to an I/O board or motherboard.
|
|
|
| | | |
| | 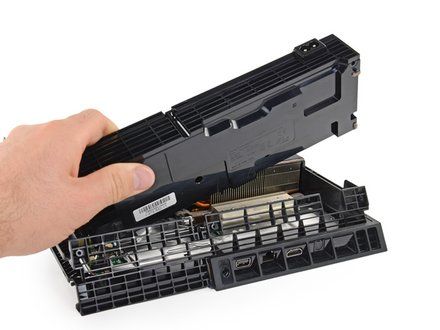
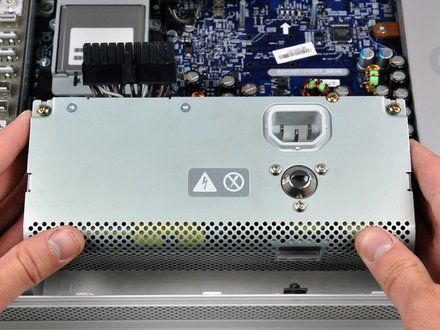
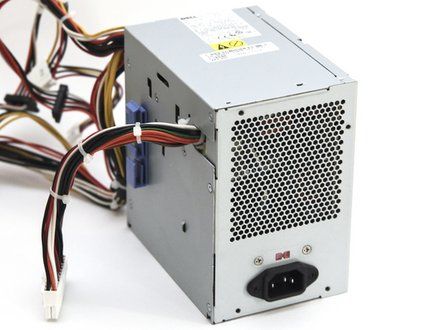
• Power supplies convert AC power from a wall socket, to DC power that your PC can use.
• To identify a power supply, look for a large rectangular component that connects your PC to a wall socket.
• CAUTION: Be careful when handling (https://www.ifixit.com/Info/Device_Safety#Section_PC_Power_Supplies) power supplies. Many contain large capacitors that can shock you if handled incorrectly.
|
|
|
| | | |
|







































