|  | | Accounts are free. Join #retro on irc.fxnet.org, identify with NickServ and type !req. |
| |
|
|  | | |
| | #retro on irc.fxnet.org
6697 ssl · 6667 plain
modern + vintage clients welcome |
| |
|
| | | |
| | 3 people in #retro
okawari, synmuffin, thelounge76
nobody on the FTP
last upload: Archived Windows 3.0 - 11 ISO B... by archiveorg, 35d ago |
| as of 21:42 EST ·  |
|
|
| | | |
| | | releases | 2,186 | | last 24h | +0 | | online | 1.7 TB | | library | 1.4 TB | | members | 1 | | updated | 2026-11-18 21:42 |
|
|
|
| | | |
| | | |
| Device | Gateway SA1 |
| Difficulty | Easy |
| Time | No estimate |
| Steps | 5 |
This guide is by Diego Carteno on iFixit and is licensed under Creative Commons Attribution-NonCommercial-ShareAlike 3.0. ByteRot mirrors it for non-commercial preservation: formatting changed and photos resized for old browsers; full-size photos and the text are on the FTP in /DOCS/REPAIR. Original guide >>
This Guide will help you replace a Gateway Disk Drive.
Tools: Phillips #00 Screwdriver; Spudger
Parts: Gateway SA1 Disk Drive |
|
|
| | | |
| | 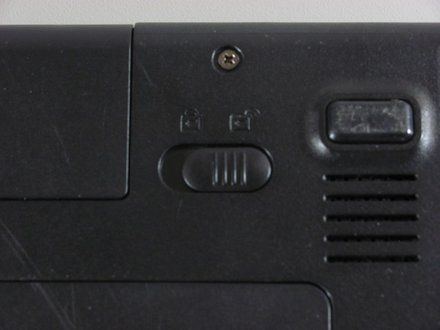
• Move the latch to the right of the battery to unlock.
|
|
|
| | | |
| | 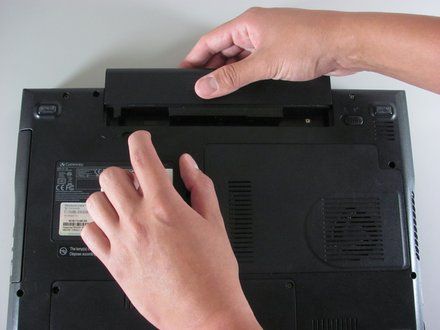
• Slide the latch on the left directly below the battery to unlock and pull out the battery as shown.
• NOTE: The latch must be held in position to remove the battery.
|
|
|
| | | |
| | 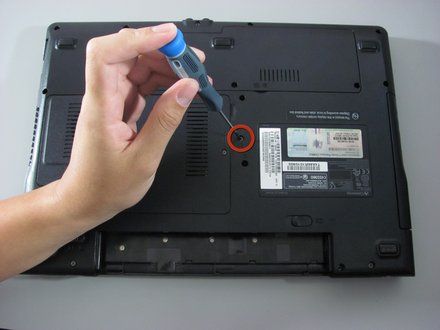
• Unscrew the marked 5.9 mm Philips screw.
|
|
|
| | | |
| | 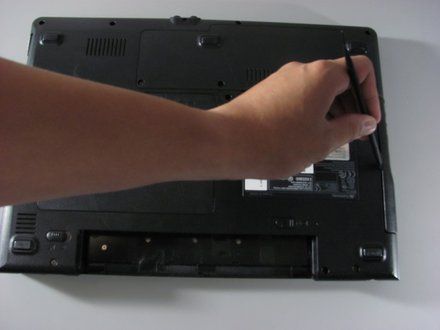
• Use the spudger to pry out the Disk dive.
|
|
|
| | | |
| | 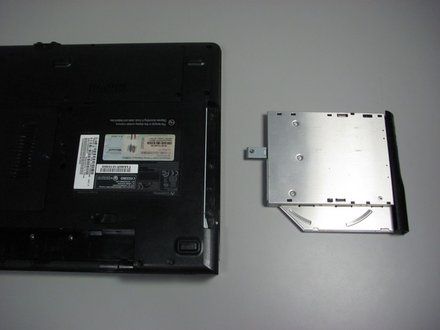
• The disk drive should easily detach and can now be replaced.
|
|
|
| | | |
| | | To reassemble your device, follow these instructions in reverse order. |
|
|
| | | |
|

















