|  | | Accounts are free. Join #retro on irc.fxnet.org, identify with NickServ and type !req. |
| |
|
|  | | |
| | #retro on irc.fxnet.org
6697 ssl · 6667 plain
modern + vintage clients welcome |
| |
|
| | | |
| | 3 people in #retro
okawari, synmuffin, thelounge76
nobody on the FTP
last upload: Archived Windows 3.0 - 11 ISO B... by archiveorg, 35d ago |
| as of 21:42 EST ·  |
|
|
| | | |
| | | releases | 2,186 | | last 24h | +0 | | online | 1.7 TB | | library | 1.4 TB | | members | 1 | | updated | 2026-11-18 21:42 |
|
|
|
| | | |
| |
| | 
• A continuity test tells us whether two things are electrically connected: if something is continuous, an electric current can flow freely from one end to the other.
• If there's no continuity, it means there is a break somewhere in the circuit. This could indicate anything from a blown fuse or bad solder joint to an incorrectly wired circuit.
• NOTE: Continuity is one of the most useful tests for electronics repair.
|
|
|
| | | |
| | 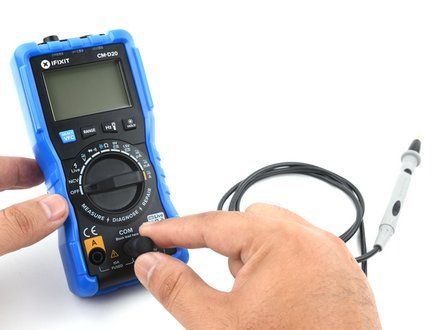
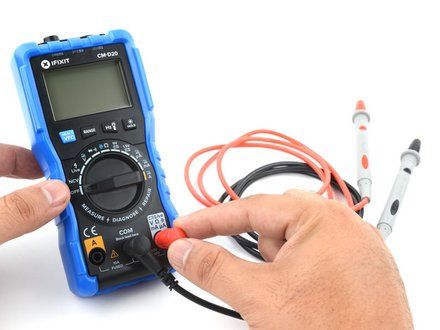
• CAUTION: To begin, make sure no current is running through the circuit or component you want to test. Switch it off, unplug it from the wall, and remove any batteries.
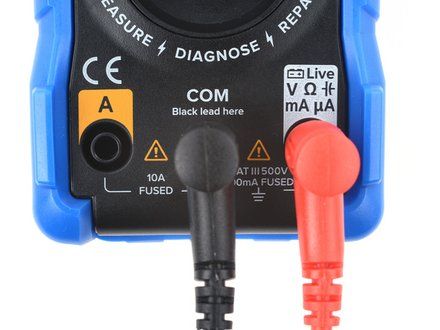
• Plug the black probe into the COM port on your multimeter.
• Plug the red probe into the port labeled with a V symbol (in this case, the right port).
|
|
|
| | | |
| | 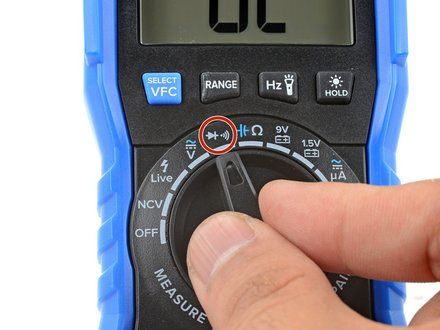
• Switch on your multimeter, and set the dial to continuity mode (indicated by an icon that looks like a sound wave).
• NOTE: Not all multimeters have a dedicated continuity mode. If yours doesn't, that's okay! Skip to step 6 (https://www.ifixit.com/Guide/How+To+Use+A+Multimeter/25632#s64999) for an alternate way to perform a continuity test.
|
|
|
| | | |
| | 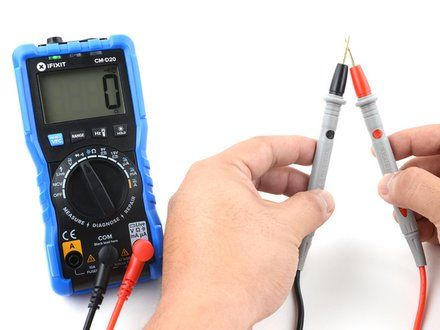
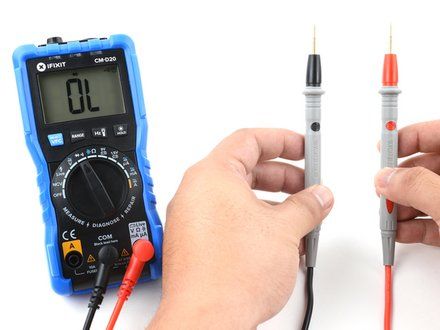
• NOTE: The multimeter tests continuity by sending a little current through one probe, and checking whether the other probe receives it.
• NOTE: If the probes are connected--either by a continuous circuit, or by touching each other directly--the test current flows through. The screen displays a value of zero (or near zero), and the multimeter beeps. Continuity!
• NOTE: If the test current isn't detected, it means there's no continuity. The screen will display 1 or OL (open loop).
|
|
|
| | | |
| | 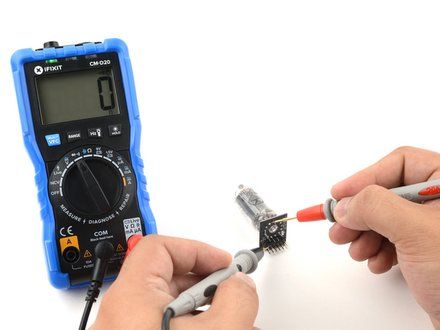
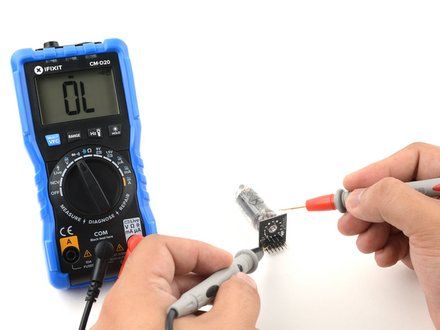
• To complete your continuity test, place one probe at each end of the circuit or component you want to test.
• NOTE: As before, if your circuit is continuous, the screen displays a value of zero (or near zero), and the multimeter beeps.
• NOTE: If the screen displays 1 or OL (open loop), there's no continuity--that is, there's no path for electric current to flow from one probe to the other.
• NOTE: Continuity is non-directional, meaning it doesn't matter which probe goes where. But there are exceptions--for instance, if there's a diode in your circuit. A diode is like a one-way valve for electricity, meaning it will show continuity in one direction, but not in the other.
• To check for this, reverse what the probes are touching and check for continuity. If the multimeter shows continuity, then it's possibly a diode.
|
|
|
| | | |
| | 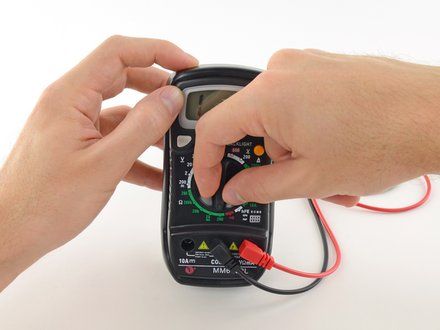
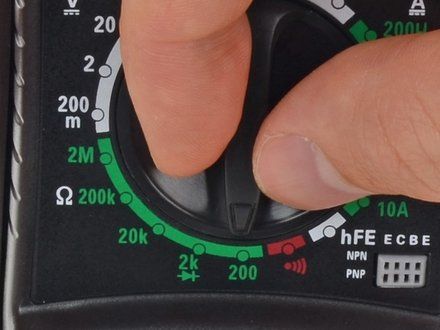
• NOTE: If your multimeter doesn't have a dedicated continuity test mode, you can still perform a continuity test.
• Turn the dial to the resistance mode.
• If your multimeter has manual ranging, set the resistance to the lowest setting.
• NOTE: Resistance is measured in ohms, indicated by the symbol ?.
|
|
|
| | | |
| | 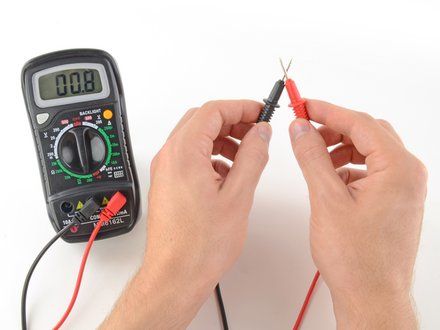
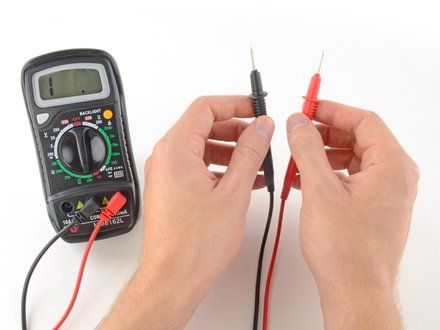
• In this mode, the multimeter sends a little current through one probe, and measures what (if anything) is received by the other probe.
• If the probes are connected--either by a continuous circuit, or by touching each other directly--the test current flows through. The screen displays a value of zero (or near zero--in this case, 0.8). Very low resistance is another way of saying that we have continuity.
• If no current is detected, it means there's no continuity. The screen will display 1 or OL (open loop).
|
|
|
| | | |
| | 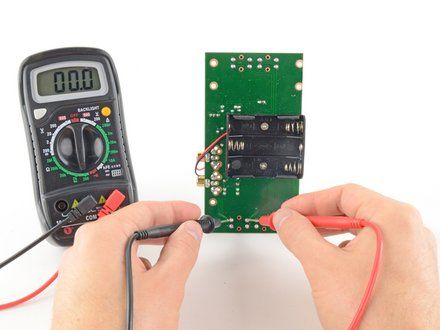
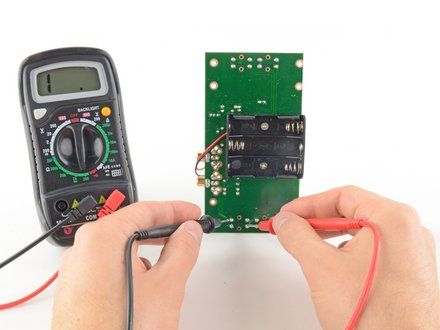
• To complete your continuity test, place one probe at each end of the circuit or component you want to test.
• NOTE: It doesn't matter which probe goes where; continuity is non-directional.
• As before, if your circuit is continuous, the screen displays a value of zero (or near zero).
• If the screen displays 1 or OL (open loop), there's no continuity--that is, there's no path for electric current to flow from one probe to the other.
|
|
|
| | | |
| | 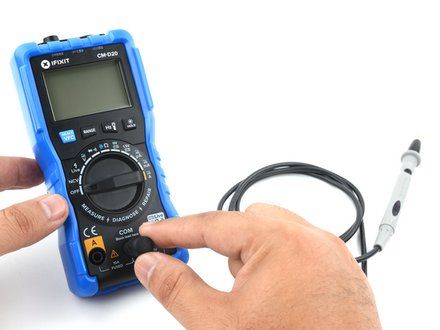
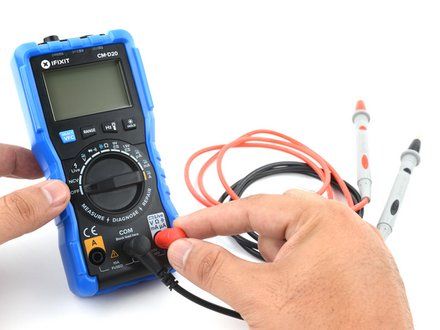
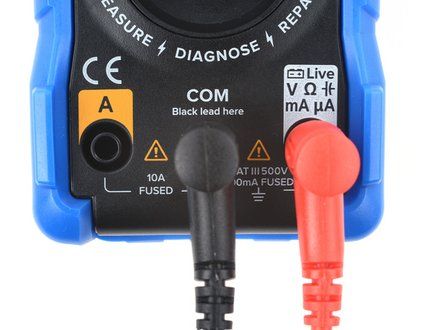
• NOTE: The next four steps will show you how to measure voltage.
• Plug the black probe into the COM port on your multimeter.
• Plug the red probe into the port labeled with a V symbol (in this case, the right port).
|
|
|
| | | |
| | 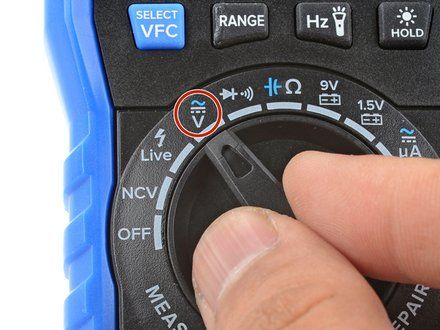
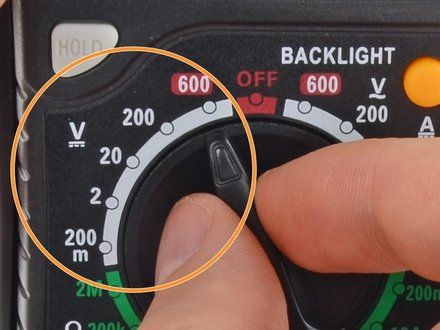
• Switch on your multimeter, and set the dial to DC voltage mode (indicated by a V with a straight line, or the symbol ?).
• NOTE: Virtually all consumer electronic devices run on DC voltage. AC voltage--the kind that runs through the lines to your house--is considerably more dangerous, and beyond the scope of this guide.
• NOTE: Your multimeter may be auto-ranging or manual ranging. An auto-ranging multimeter (such as the iFixit multimeter) will automatically determine the best measuring range. All you have to do is set what kind of measurement you want to take.
• NOTE: If your multimeter is manual ranging, you'll also need to set the correct range for the voltage you expect to measure.
• Each setting on the dial lists the maximum voltage it can measure. So for example, if you expect to measure more than 2 volts but less than 20, use the 20 volt setting.
• If you're not sure, start with the highest setting.
|
|
|
| | | |
| | 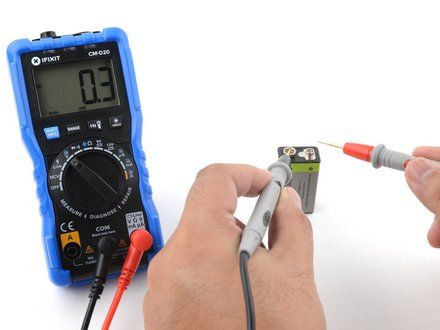
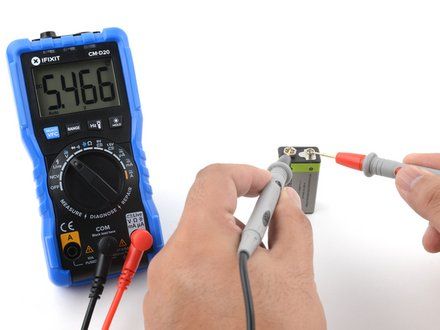
• NOTE: If your multimeter is manual ranging, skip to the next step.
• Place the red probe on the positive terminal, and the black probe on the negative terminal. The multimeter will display the measured voltage.
• NOTE: Reversing the probes won't do any harm; it just gives a negative reading.
• Skip the next step, which describes how to measure voltage using manual ranging multimeters.
|
|
|
| | | |
| | 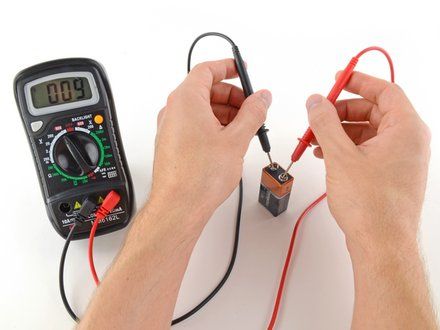
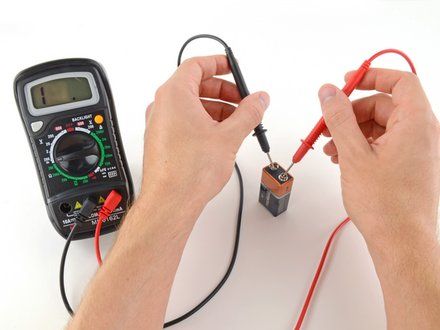
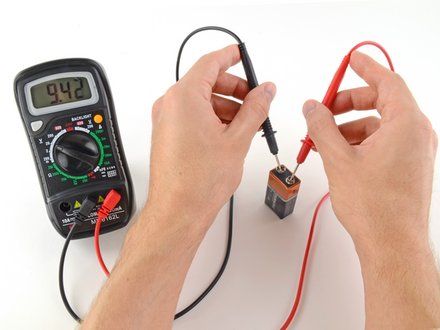
• NOTE: Follow this step to measure voltage with a manual ranging multimeter.
• Place the red probe on the positive terminal, and the black probe on the negative terminal.
• If your range was set too high, you may not get a very precise reading. Here the multimeter reads 9 volts. That's fine, but we can turn the dial to a lower range to get a more precise.
• If you set the range too low, the multimeter simply reads 1 or OL, indicating that it is overloaded or out of range. This won't hurt the multimeter, but we need to set the dial to a higher range.
• NOTE: With the range set correctly, we get a reading of 9.42 volts.
• NOTE: Reversing the probes won't do any harm; it just gives us a negative reading.
|
|
|
| | | |
| | 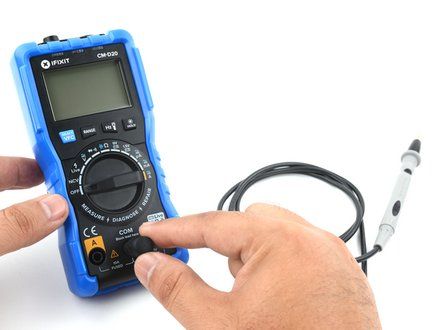
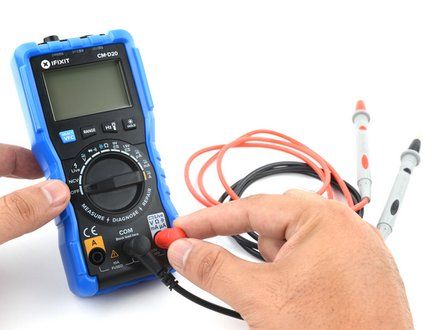
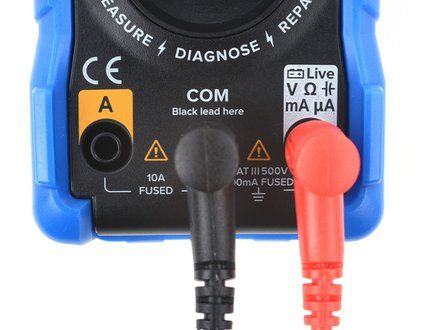
• NOTE: The next three steps will show you how to measure resistance with your multimeter.
• To begin, make sure no current is running through the circuit or component you want to measure. Switch it off, unplug it from the wall, and remove any batteries.
• NOTE: Remember that you'll be measuring the resistance of the entire circuit. If you want to measure an individual component such as a resistor, measure it by itself--not with it soldered in place!
• Plug the black probe into the COM port on your multimeter.
• Plug the red probe into the port labeled with an ? symbol (in this case, the right port).
|
|
|
| | | |
| | 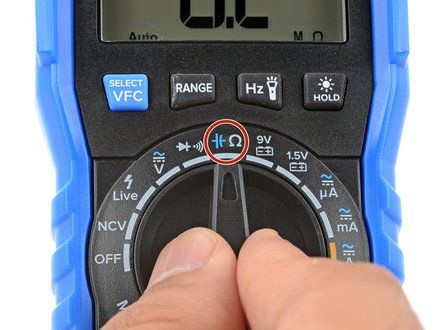
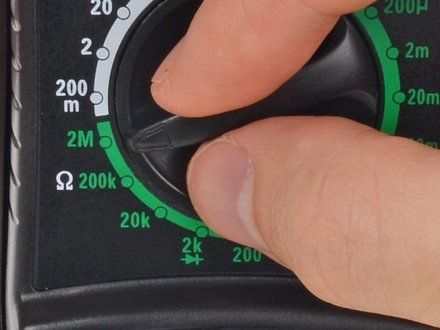
• Switch on your multimeter, and set the dial to resistance mode.
• NOTE: Resistance is measured in ohms, indicated by the ? symbol.
• NOTE: The iFixit multimeter is auto-ranging, meaning it will automatically determine the best measuring range.
• NOTE: If your multimeter is manual ranging, you will need to set the correct range for the resistance you expect to measure. If you're not sure, start with the highest setting.
|
|
|
| | | |
| | 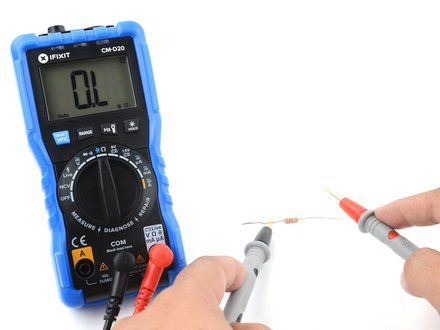
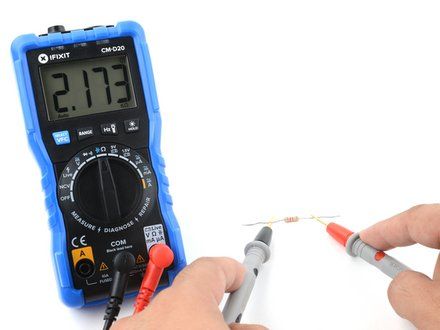
• Place one probe at each end of the circuit or component you want to measure.
• NOTE: It doesn't matter which probe goes where; resistance is non-directional.
• If your multimeter is manual ranging:
• If your multimeter reads close to zero, the range is set too high for a good measurement. Turn the dial to a lower resistance range.
• If you set the range too low, the multimeter simply reads 1 or OL, indicating that it is overloaded or out of range. This won't hurt the multimeter, but we need to set the dial to a higher range.
• NOTE: The other possibility is that the circuit or component you are measuring doesn't have continuity (https://www.ifixit.com/Guide/How+To+Use+A+Multimeter/25632#s64987)--that is, it has infinite resistance. A non continuous circuit will always read 1 or OL on a resistance test.
|
|
|
| | | |
|





























