|  | | Accounts are free. Join #retro on irc.fxnet.org, identify with NickServ and type !req. |
| |
|
|  | | |
| | #retro on irc.fxnet.org
6697 ssl · 6667 plain
modern + vintage clients welcome |
| |
|
| | | |
| | 3 people in #retro
okawari, synmuffin, thelounge76
nobody on the FTP
last upload: Archived Windows 3.0 - 11 ISO B... by archiveorg, 35d ago |
| as of 21:42 EST ·  |
|
|
| | | |
| | | releases | 2,186 | | last 24h | +0 | | online | 1.7 TB | | library | 1.4 TB | | members | 1 | | updated | 2026-11-18 21:42 |
|
|
|
| | | |
| |
| | • Digital multimeter with capacitance and resistance modes
• Insulated test leads or alligator clips
• Discharge resistor (15 k?-50 k?, appropriate wattage)
|
|
|
| | | |
| | • Capacitors can retain electrical charge even after power is disconnected.
• Always discharge a capacitor before handling or testing it.
• Failure to do so can result in electric shock, damage to the multimeter, or injury.
• Never short a capacitor directly with a screwdriver, as this may cause sparks, arcing, or component damage.
|
|
|
| | | |
| | • Use a resistor connected across the capacitor terminals to discharge stored energy safely. Hold the resistor in place for several seconds to ensure the voltage drops to a safe level.
• Confirm with the multimeter (DC voltage mode) that the residual voltage is close to zero before proceeding.
|
|
|
| | | |
| | • For accurate measurements, remove the capacitor from the circuit board or disconnect at least one of its leads.
• Testing a capacitor in-circuit can lead to incorrect readings due to parallel components such as resistors or inductors.
|
|
|
| | | |
| | 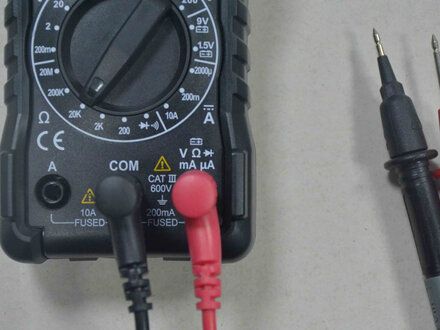
• Most modern digital multimeters include a dedicated capacitance mode, typically marked with a capacitor symbol. Set the multimeter to capacitance mode.
• Connect the red probe to the positive terminal and the black probe to the negative terminal (for polarized capacitors). Wait for the reading to stabilize on the display.
• Compare the measured value to the capacitance rating printed on the capacitor body. In general, a capacitor is considered acceptable if the measured value is within ±10-20% of its rated capacitance. Values significantly lower than the rating usually indicate degradation or failure.
|
|
|
| | | |
| | 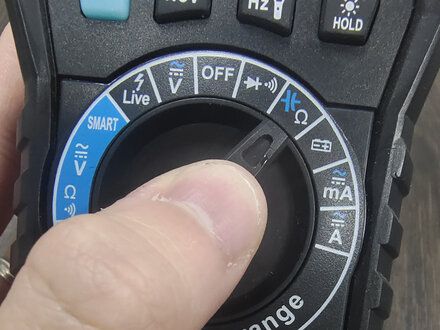
• If your multimeter doesn't support capacitance measurement, resistance mode can still provide useful information. You can set the multimeter to a medium resistance range (e.g., 1 k? or 10 k?). Then connect the probes to the two terminals of the capacitor and observe the changes on the display.
• A normal capacitor will initially show a low resistance value, which then gradually increases to a very high resistance value as it charges. If the reading remains close to zero, the capacitor is short-circuited. If the reading always shows infinity and doesn't change, the capacitor may be open-circuited and damaged.
|
|
|
| | | |
| | • Another simple method is to check if the capacitor can retain its charge. We briefly charge the capacitor using a low-voltage DC power supply below its rated voltage. After disconnecting the power, set the multimeter to DC voltage mode and measure the voltage across the capacitor.
• If the capacitor retains a voltage close to the applied voltage (briefly), it is likely working correctly. If the voltage immediately drops to zero, the capacitor may be faulty.
|
|
|
| | | |
| | A multimeter with capacitance mode provides the most direct and reliable results, while resistance- and voltage-based methods can serve as practical alternatives. For a more detailed explanation of capacitor behavior, safety standards, and advanced testing methods, see this in-depth guide:
How to Test a Capacitor with a Multimeter - Detailed Guide (https://mestekinstruments.com/how-to-check-a-capacitor-with-a-multimeter/) |
|
|
| | | |
|


























