|  | | Accounts are free. Join #retro on irc.fxnet.org, identify with NickServ and type !req. |
| |
|
|  | | |
| | #retro on irc.fxnet.org
6697 ssl · 6667 plain
modern + vintage clients welcome |
| |
|
| | | |
| | 3 people in #retro
okawari, synmuffin, thelounge76
nobody on the FTP
last upload: Archived Windows 3.0 - 11 ISO B... by archiveorg, 35d ago |
| as of 21:42 EST ·  |
|
|
| | | |
| | | releases | 2,186 | | last 24h | +0 | | online | 1.7 TB | | library | 1.4 TB | | members | 1 | | updated | 2026-11-18 21:42 |
|
|
|
| | | |
| |
| | 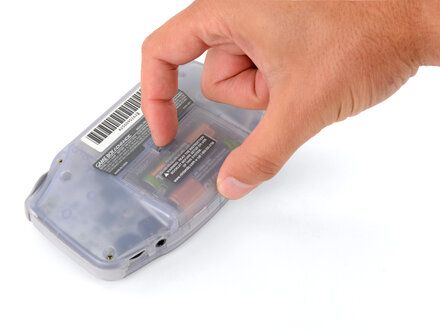
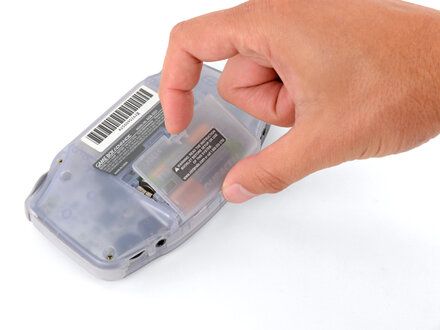
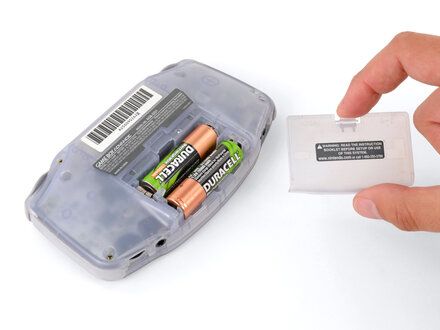
• Release the battery cover tab with your finger and swing the cover away from your Game Boy to remove it.
• REMINDER: During reassembly, insert the tabs on the bottom edge of the cover into their cutouts and press the cover into place.
|
|
|
| | | |
| | 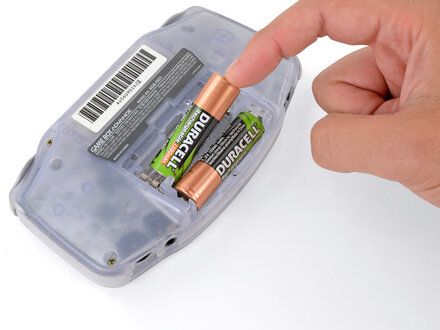
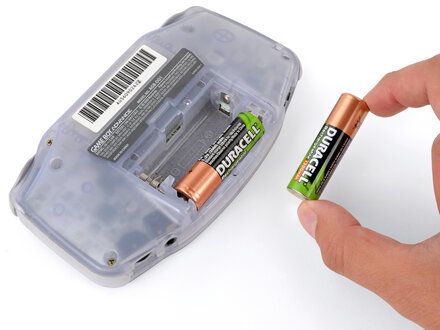
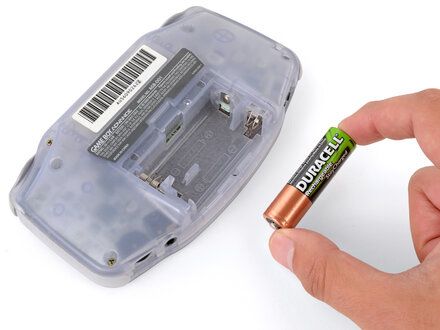
• Remove the two AA batteries.
• NOTE: If the metal terminals are corroded, follow this guide (https://www.ifixit.com/Guide/How+to+Clean+Corroded+Battery+Terminals/164164) to clean them.
• REMINDER: When installing batteries, use the diagram (https://guide-images.cdn.ifixit.com/igi/CuXVhApCfFZ6DpLL.full) in the battery well to properly orient them.
|
|
|
| | | |
| | 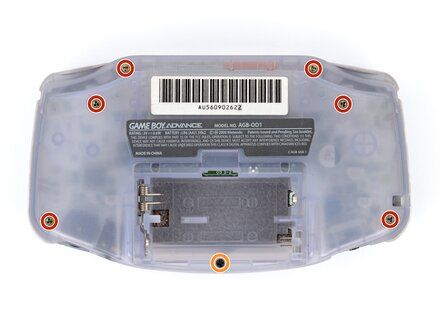
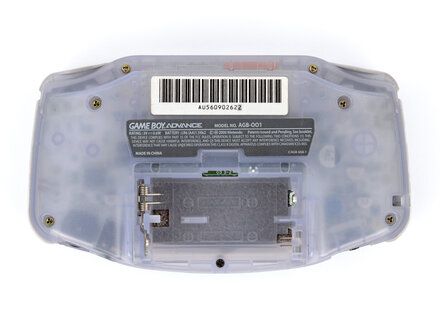
• Remove the seven screws securing the back shell:
• Six 9.4 mm?long tri?point Y0 screws
• One 8.5 mm?long JIS 1 screw
• NOTE: You can try to use a non-iFixit Phillips driver in a pinch, but you risk damaging or stripping screws. Push down firmly on the driver and twist slowly.
|
|
|
| | | |
| | 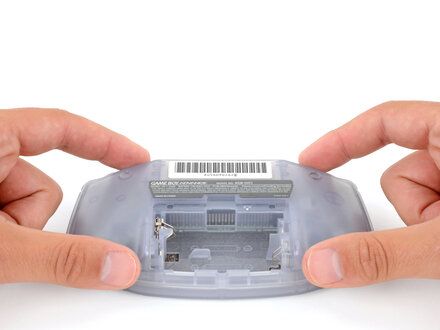
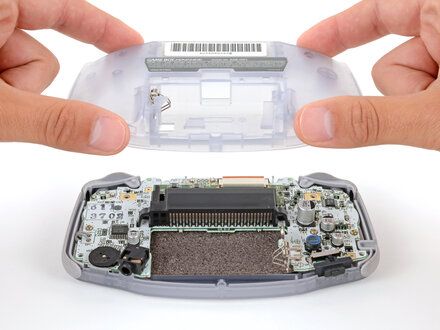
• Lift the back shell straight up and remove it.
• REMINDER: During reassembly, squeeze the shell firmly around the edges and ensure the shoulder buttons and bumpers are properly seated with no large gaps. Gently test the buttons to make sure everything feels correct.
|
|
|
| | | |
| | 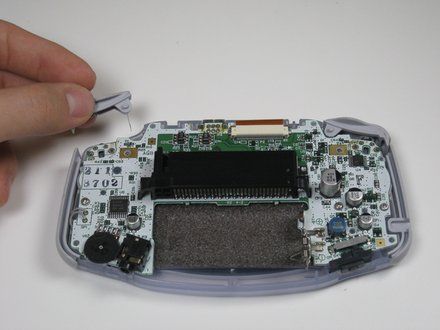
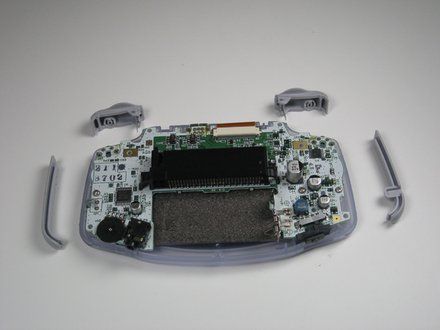
• Remove left and right triggers by lifting and pulling them away from the system.
• Do the same for side panels
• NOTE: For finicky or jammed triggers only! Adjust and correct triggers and reassemble. Most jammed triggers are caused by buttons misplaced or jammed in its enclosure.
|
|
|
| | | |
| | 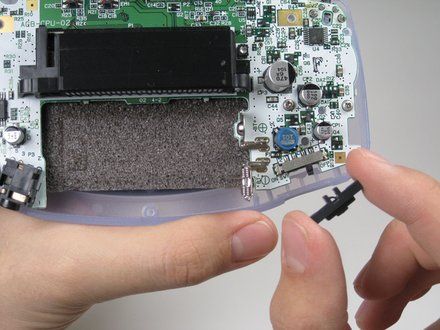
• Remove the gray On/Off Switch by pulling up and away from the unit. Replace with another switch if necessary.
|
|
|
| | | |
| | 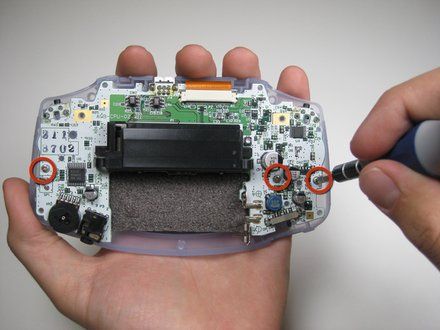
• Remove the three screws on the circuit board with a Phillips #1 screw driver.
|
|
|
| | | |
| | 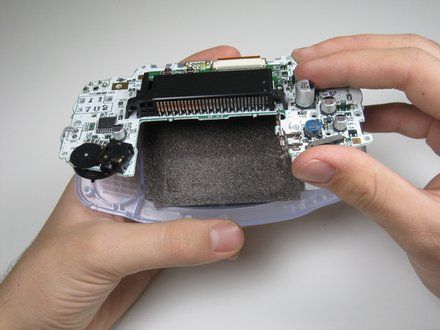
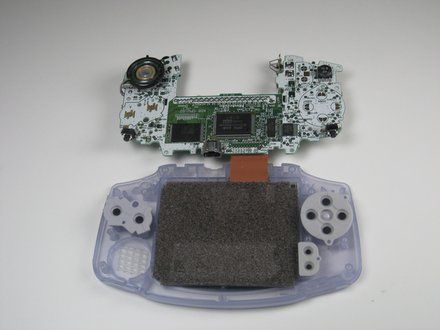
• Pull circuit board away from the front panel by pulling up at the bottom of the circuit board, keeping the top ribbon still connected.
• CAUTION: Handle with care! The ribbon connecting the circuit board to the LCD screen can easily be damaged and will require replacement if broken.
|
|
|
| | | |
| | 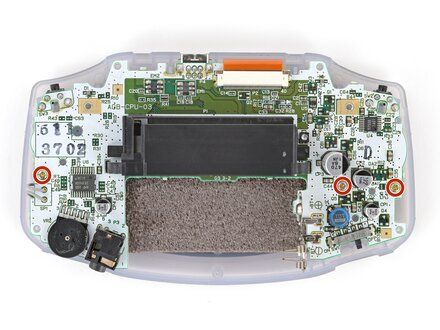
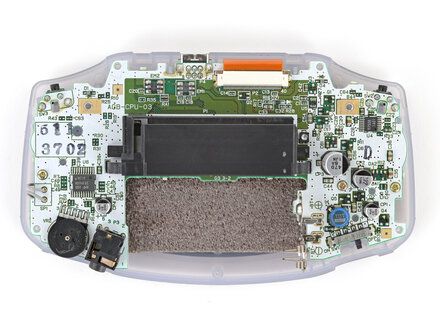
• Use a JIS 1 screwdriver to remove the three 7 mm?long screws securing the motherboard.
|
|
|
| | | |
| | 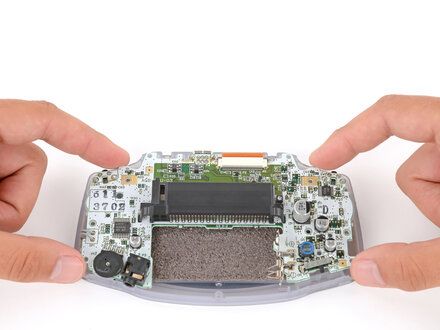
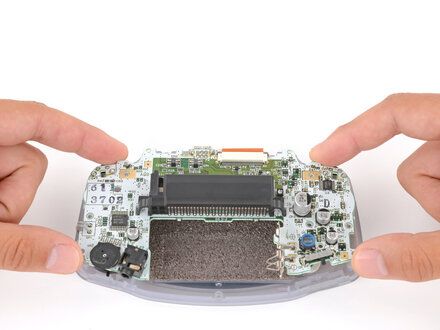
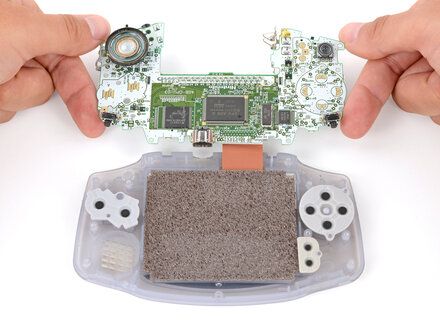
• CAUTION: Be careful not to strain the screen cable that connects the motherboard.
• Carefully flip the motherboard over the top edge of your Game Boy and rest it on your work surface.
• REMINDER: During reassembly, make sure the speaker gets correctly slotted into its circular cutout (https://guide-images.cdn.ifixit.com/igi/x1QDoetSDKmN5B52.full) (including a small tab on the bottom (https://guide-images.cdn.ifixit.com/igi/6Qd4mIWOsVSFVWRY.full)) when lowering the motherboard into place.
|
|
|
| | | |
| | 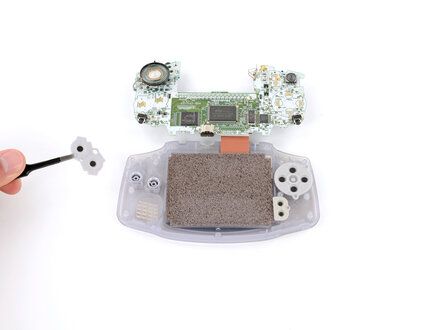
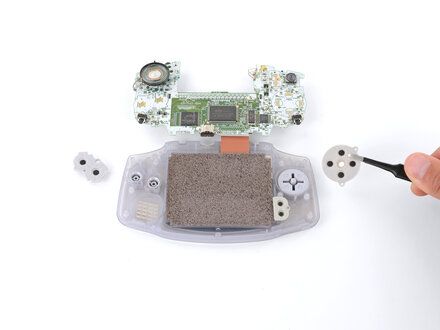
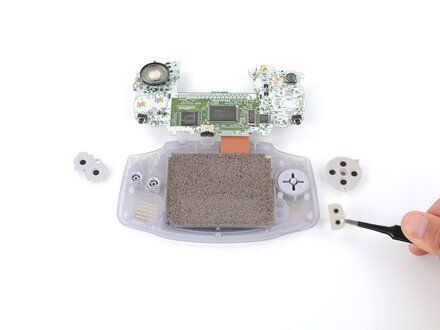
• Use tweezers or your fingers to remove the three silicone pads covering the buttons (A and B, the D?pad, and Start/Select ).
• NOTE: If any of the pads are missing, they may be stuck to their corresponding spot (https://guide-images.cdn.ifixit.com/igi/pWD445ULSBEWbpGt.full) on the motherboard.
• REMINDER: During reassembly, use your fingers to press each pad into place, using the alignment pegs (https://guide-images.cdn.ifixit.com/igi/3wsf4ciwEXtJPgCB.full) to properly orient them.
|
|
|
| | | |
| | 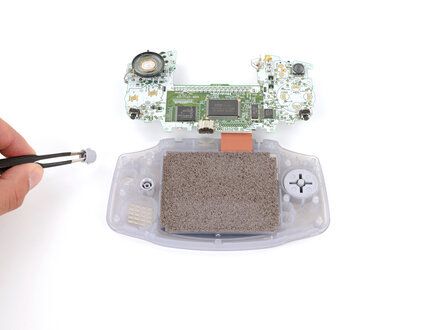
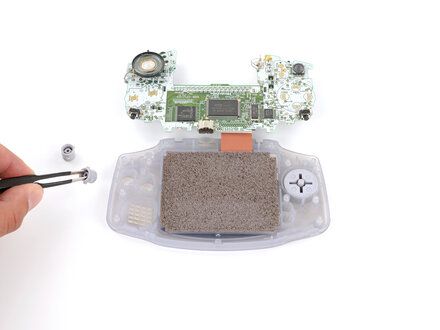
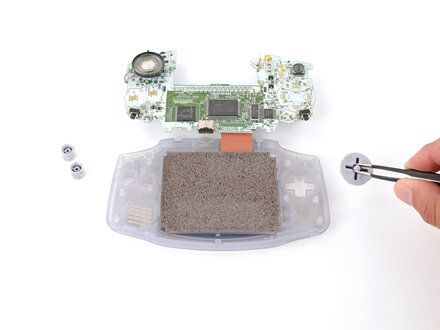
• Use tweezers or your fingers to remove the buttons (A and B as well as the D?pad).
• NOTE: The Start/Select buttons are part of the silicone pad--there are no other buttons to remove.
• REMINDER: When re?inserting the action buttons, note that each one is keyed specifically for its recess and proper orientation.
|
|
|
| | | |
| | 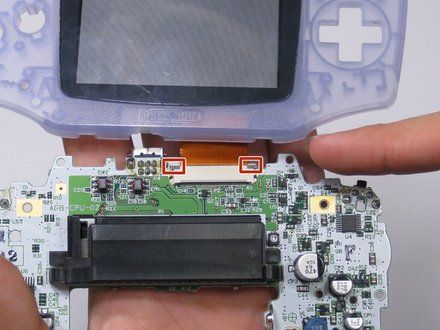
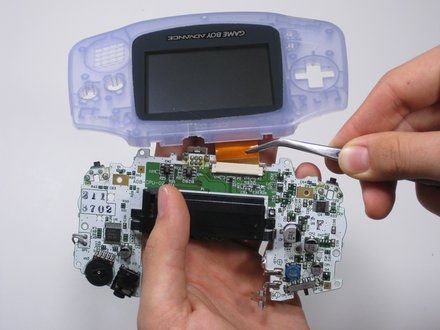
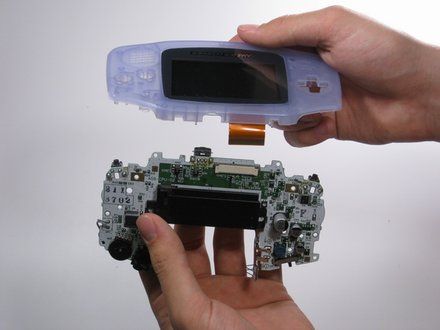
• Use a spudger/tweezers (https://www.ifixit.com/en-ca/products/tweezers)/fingernail to unlatch the LCD ribbon port by pulling the grey tabs on the sides upwards (towards the top edge of the PCB).
• Once the LCD ribbon port has been unlatched, the LCD ribbon should very easily slide out and can be removed with zero force using fingers or tweezers.
|
|
|
| | | |
| | 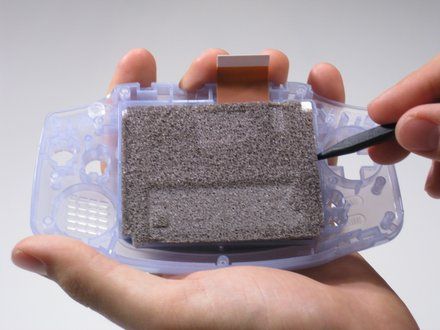
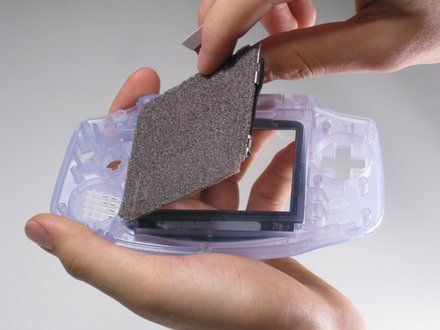
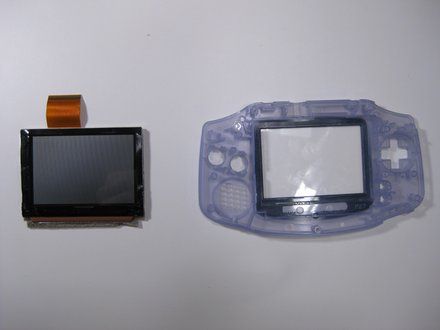
• Use the spudger to lift the screen from the front panel. Place the spudger in the space directly left of the D-pad.
• CAUTION: The screen and the front panel is connected by a black tape that could rip if not removed carefully.
|
|
|
| | | |
| | | To reassemble your device, follow these instructions in reverse order. |
|
|
| | | |
|






























