|  | | Accounts are free. Join #retro on irc.fxnet.org, identify with NickServ and type !req. |
| |
|
|  | | |
| | #retro on irc.fxnet.org
6697 ssl · 6667 plain
modern + vintage clients welcome |
| |
|
| | | |
| | 3 people in #retro
okawari, synmuffin, thelounge76
nobody on the FTP
last upload: Archived Windows 3.0 - 11 ISO B... by archiveorg, 35d ago |
| as of 21:42 EST ·  |
|
|
| | | |
| | | releases | 2,186 | | last 24h | +0 | | online | 1.7 TB | | library | 1.4 TB | | members | 1 | | updated | 2026-11-18 21:42 |
|
|
|
| | | |
| | | |
| Device | Soldering |
| Difficulty | Easy |
| Time | No estimate |
| Steps | 9 |
This guide is by Connor Bassolino on iFixit and is licensed under Creative Commons Attribution-NonCommercial-ShareAlike 3.0. ByteRot mirrors it for non-commercial preservation: formatting changed and photos resized for old browsers; full-size photos and the text are on the FTP in /DOCS/REPAIR. Original guide >>
Benjamin Franklin once said that "an ounce of prevention is worth a pound of cure," and that's no different when it comes to keeping your soldering iron tip in working condition.
The working area of soldering iron tips are, in fact, iron-plated, due to both its conductive abilities and the fact that it is not readily dissolved by molten solder. Once that iron coating is damaged, it's gone for good. Extending the life of iron tips is all about keeping that iron coating intact and buildup-free.
A well-maintained soldering iron tip can last for years, and the biggest factor in tip lifespan and effective soldering is keeping it cleaned and tinned.
Use this guide to keep your soldering iron tip in tip-top shape.
Tools: Smart Soldering Iron; iFixit Soldering Tip Cleaner; Safety Glasses; DIY Soldering Kit Soldering Fume Extractor; Magnifying Glass; Detailing Brush; Smoke Absorber Hakko FA-400
Parts: Lead-Free Solder; Tip Cleaning Paste Hakko FS100-01; 600 Grit Sandpaper |
|
|
| | | |
| | 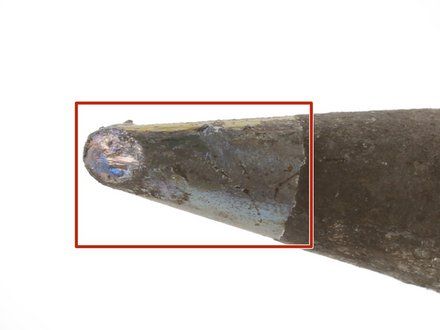
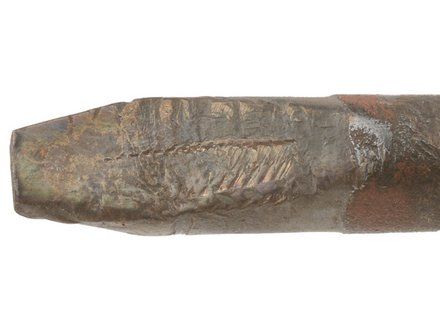
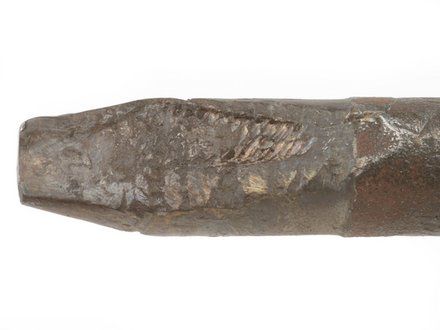
• NOTE: Oxidized soldering tips can be revived and serve you for years to come, but the first step is to evaluate your tip's condition to determine if it needs cleaning or replacement.
• While the iron is cool, inspect the working area.
• NOTE: The "working area" is the layer of exposed iron/nickel at the very end of a soldering iron tip. All soldering is completed with the working area.
• Bits of oxidation (rust), charred buildup, or superficial scratches (as shown in the first photo) on the working area happen with normal use and can be addressed with this guide.
• If you notice pits, holes, cracks, deformations, exposed copper, or other signs of physical damage (as shown in photos two and three), save yourself the headache and just replace the tip.
• NOTE: For a closer look, use a magnifying glass.
|
|
|
| | | |
| | 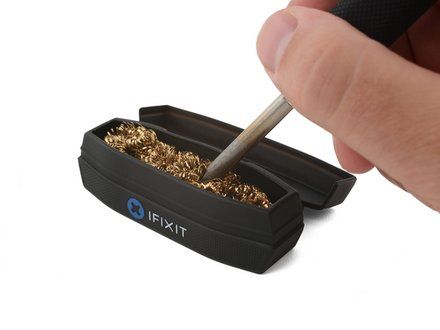
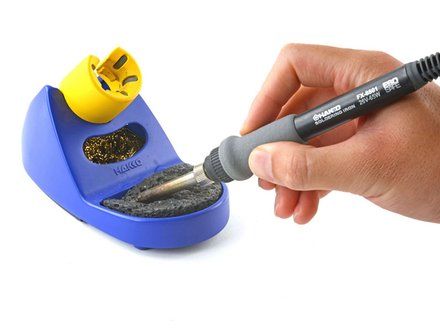
• As you're soldering, regularly wiping off the hot iron tip with a brass or damp cellulose sponge is your first line of defense in keeping the tip functional.
• Brass sponge: Small brass coils that have a similar texture to steel wool, but more wiry. Also called "brass wool (https://www.ifixit.com/en-ca/products/ifixit-soldering-tip-cleaner)," "brass tip cleaner," or "brass cleaning ball." Many solderers prefer it because it's long-lasting, low maintenance, and doesn't drop tip temperature.
• Cellulose sponge: Usually come with most soldering workstations. Not as long-lasting as a brass sponge and must be kept damp (not soaking wet!) with distilled water while in use.
• CAUTION: Synthetic sponges can melt and damage your iron tip. If you're using a sponge, be sure it's made out of cellulose.
• NOTE: P.S: Most kitchen sponges are synthetic!
|
|
|
| | | |
| | 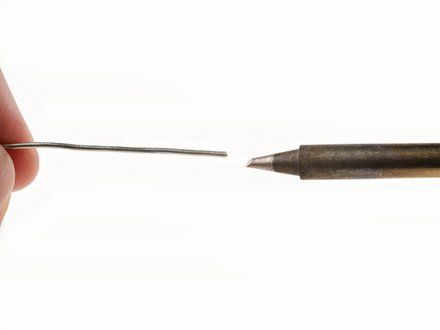
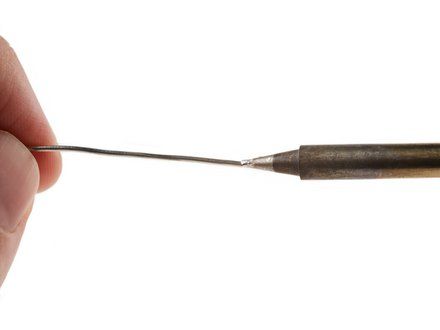
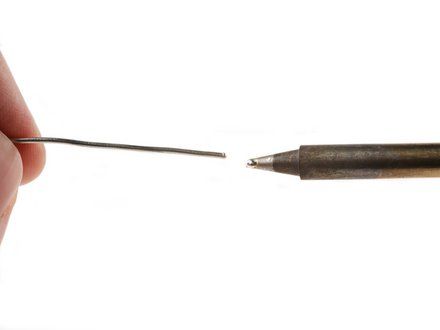
• After cleaning off buildup with your brass or damp cellulose sponge, immediately feed some fresh rosin-core solder (https://www.ifixit.com/products/lead-free-solder) onto the entire working surface of the tip.
• NOTE: If the tip is clean and hot, solder should readily wet (melt and flow onto) the tip.
• REMINDER: Coating the working area of a tip in a layer of solder is called "tinning."
|
|
|
| | | |
| | 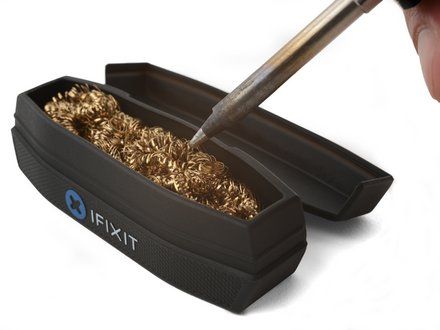
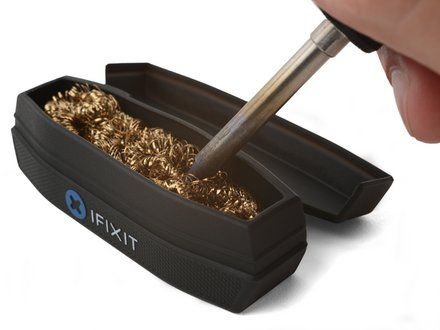
• After the entire working surface of the iron tip has been coated with solder, clean off any excess solder with your brass or damp cellulose sponge.
• NOTE: "Stabbing" the brass sponge or wiping the tip with a damp cellulose sponge a few times should do the job.
• Whether you're actively soldering or about to store your iron, you should always keep your tip tinned for these two reasons:
• A tinned tip transfers heat much more effectively, making soldering a breeze.
• The coat of solder creates a barrier between the tip and environment, dramatically reducing the rate of oxidation.
|
|
|
| | | |
| | 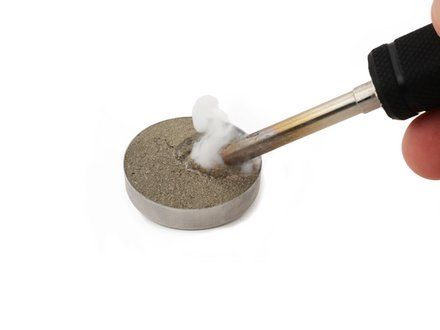
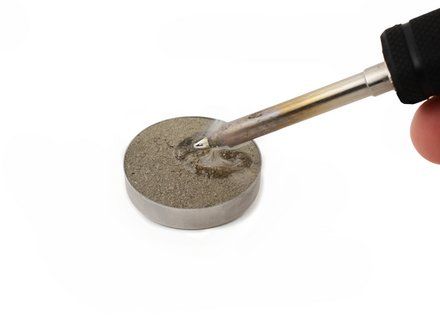
• NOTE: If your tip is still oxidized after attempting to tin the tip, it's time to bust out tip tinner (https://www.ifixit.com/products/tip-cleaning-paste-hakko-fs100-01), also known as cleaning paste, reactivation paste, or chemical paste. Tip tinner is generally a mix of aggressive flux and solder, serving the dual purpose of eating away oxidation while tinning the tip.
• CAUTION: Just like when you're soldering, always tin your tip in a well-ventilated area.
• Heat the soldering iron to working temperature and insert the tip into the pot of tip tinner. Rotate the tip in the tinner for 3-4 seconds and ensure that the entire working area is exposed to the compound.
• Clean off excess tinner with your brass or cellulose sponge.
• CAUTION: Overuse of tip tinner will reduce tip lifespan. The aggressive flux in tip tinner will, over time, degrade the iron plating. If you're keeping the tip clean and tinned, you shouldn't need to use tip tinner any more than every 20-30 sessions.
|
|
|
| | | |
| | 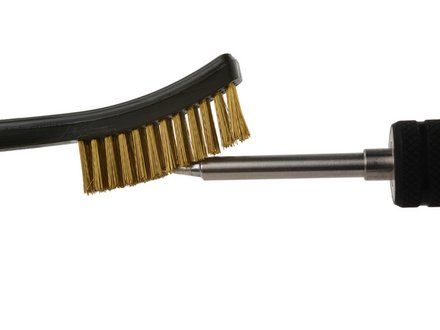
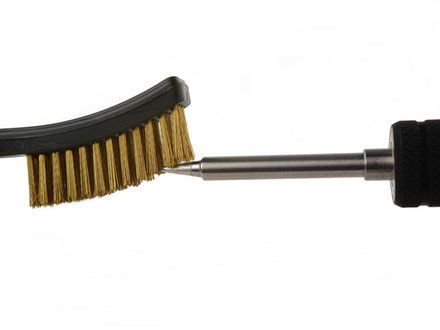
• CAUTION: The use of abrasives, such as sandpaper, wire brushes, or polishing bars, should only be turned to as an absolute last resort when completing the job is more important than preserving the tip. These methods quickly strip away the working area iron plating, drastically shortening tip lifespan.
• If oxidation/buildup remains after using the tip tinner, gently sweep the oxidation or buildup off with a brass wire brush.
• After the larger bits of oxidation and buildup are removed, complete another round of tip tinning (Steps 2-4).
|
|
|
| | | |
| | 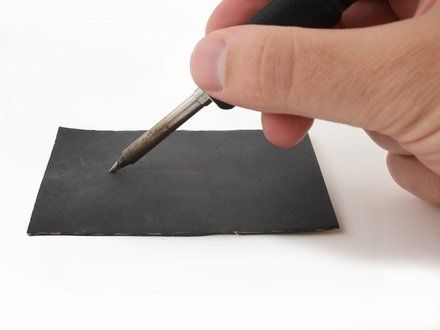
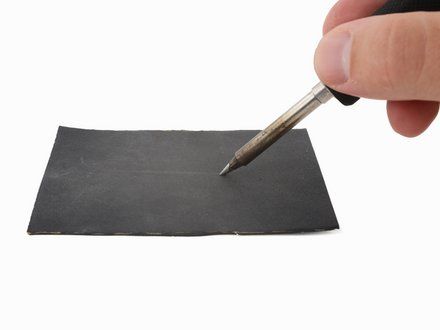
• If tip tinner and wire brushing didn't bring your tip back to working condition, and you really need to finish that last connection or two, bust out some high-grit (600 or more) sandpaper.
• NOTE: If you're at the point where you're sanding your tip, it's time to pick up a new tip.
• Gently drag the tip across the surface of a polishing bar or high-grit sandpaper, following the shape of the tip.
• NOTE: Be sure to evenly abrade the working surface.
• CAUTION: Stop as soon as the stubborn oxidation is removed.
• Complete another round of tip tinning (Steps 2-4).
|
|
|
| | | |
| | 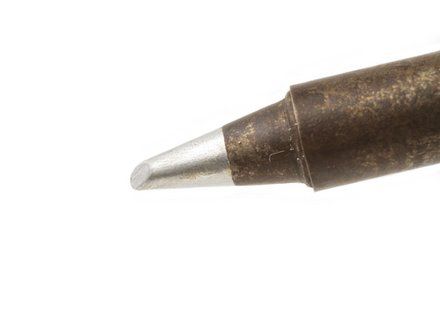
• NOTE: As a point of reference, this is what we're striving for: A shiny tip coated in solder, free of oxidation and buildup.
• NOTE: If you're using lead-free solder, your tip won't be quite as bright and shiny; just make sure that the working area is coated in solder and you're good to go!
|
|
|
| | | |
| | 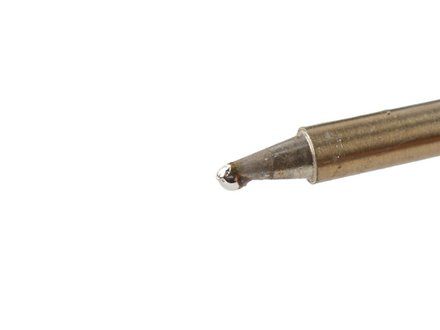
• When you're finished soldering or storing the iron, always leave a glob of solder on the working area of the tip. This protective coating prevents oxidation by sealing the tip from exposure to air and moisture.
• NOTE: Be sure to cover the entire working surface with a glob of solder, not just the very tip as depicted in the attached photo.
• When you're ready to solder again, simply heat the iron, wipe off the excess solder with a brass or damp cellulose sponge, and re-tin the tip.
|
|
|
| | | |
| | | Keep your tips tinned and happy soldering! |
|
|
| | | |
|































