|  | | Accounts are free. Join #retro on irc.fxnet.org, identify with NickServ and type !req. |
| |
|
|  | | |
| | #retro on irc.fxnet.org
6697 ssl · 6667 plain
modern + vintage clients welcome |
| |
|
| | | |
| | 3 people in #retro
okawari, synmuffin, thelounge76
nobody on the FTP
last upload: Archived Windows 3.0 - 11 ISO B... by archiveorg, 35d ago |
| as of 21:42 EST ·  |
|
|
| | | |
| | | releases | 2,186 | | last 24h | +0 | | online | 1.7 TB | | library | 1.4 TB | | members | 1 | | updated | 2026-11-18 21:42 |
|
|
|
| | | |
| |
| | 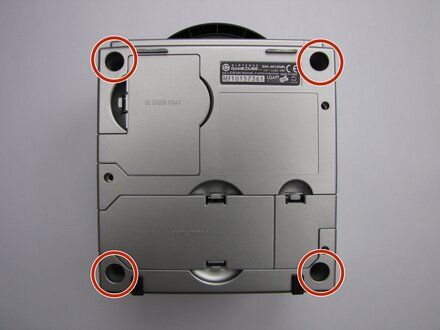
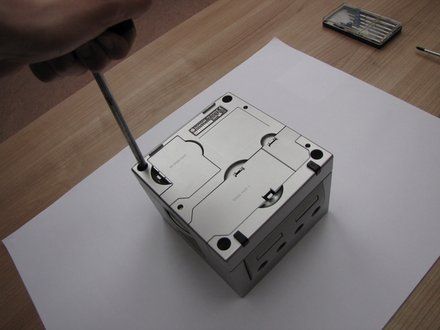
• Flip the unit upside down and remove the screws sitting in the four deep holes in the corners using a 4.5mm gamebit driver. Don't remove the enclosure yet!
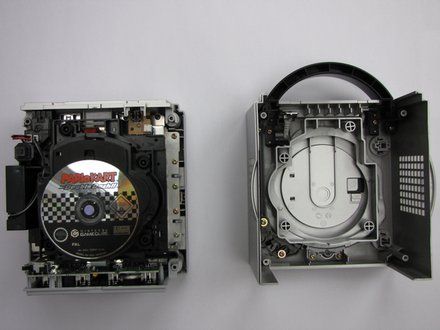
• Turn the device right side up again, and now lift the top case off. It'll come up easily.
|
|
|
| | | |
| | 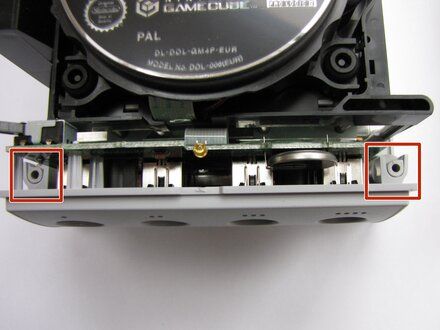
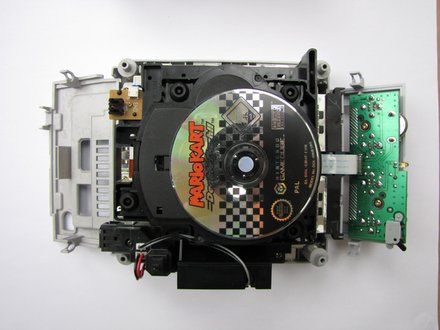
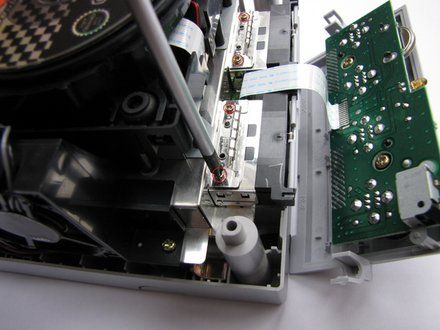
• Unsnap the controller port cover and the rearmost I/O-cover by unsnapping the two snaps on the sides of each cover. Don't remove the controller panel yet.
• Then remove the ground connections on top of the memory card slots (necessary step).
|
|
|
| | | |
| | 
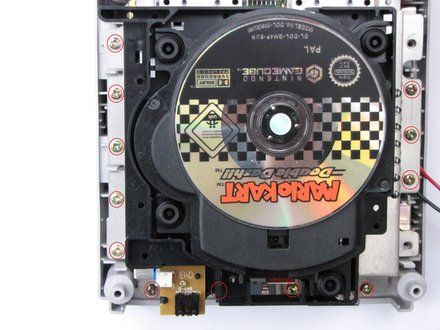
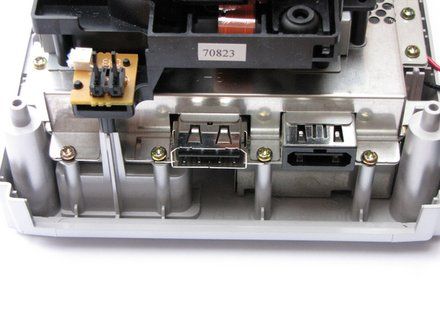
• Now start removing the 'normal' Phillips #2 screws.
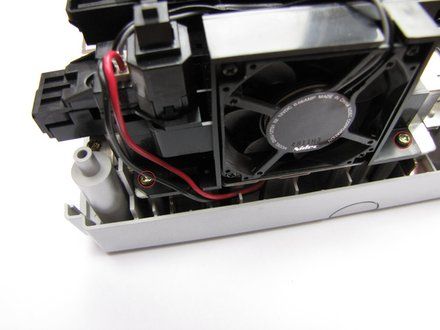
• Start by removing the fan assembly.
• then unscrew the 12 visible screws on the edging of the now not so cube-shaped GameCube.
|
|
|
| | | |
| | 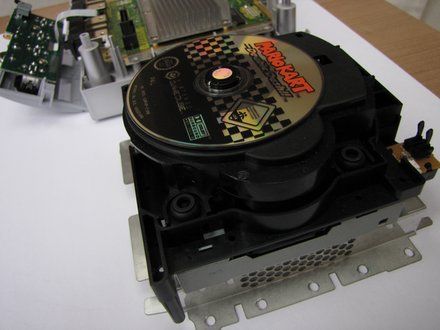
• Now you can lift the drive assembly up. You maybe have to loosen it a bit with a screwdriver or a heavy duty spudger (https://www.ifixit.com/products/heavy-duty-spudger).
• The mainboard is now visible.
|
|
|
| | | |
| | 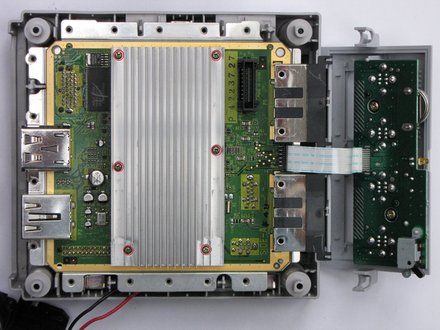
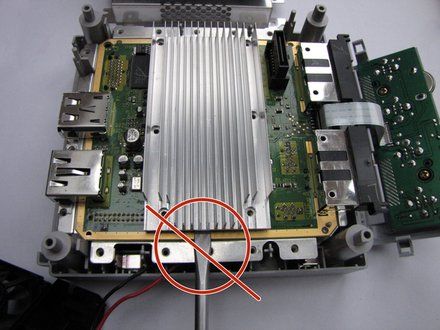
• Now remove the heatsink. Unscrew the six screws holding it.
• Now use anything flat and durable to carefully lift up the heatsink by putting it under the aluminum and using it gently as a lever.
• CAUTION: Be careful using a tool to lift up the heatsink. If removing the heat sink is difficult, use a hairdryer or heat gun to warm the thermal pads and gently twist the heatsink off by hand.
|
|
|
| | | |
| | 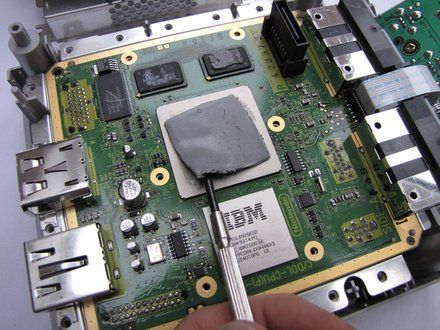
• If there are thermal pads remaining on the processors and/or ram chips, remove them with a plastic spudger.
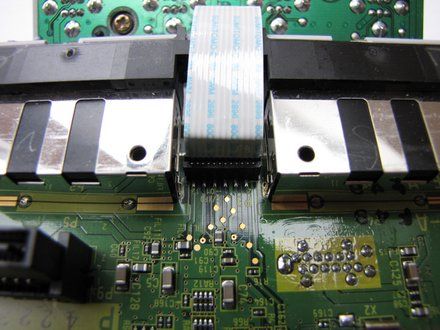
• Now disconnect the controller port panel connector by lifting and jiggling it carefully. It should come off easily.
|
|
|
| | | |
| | 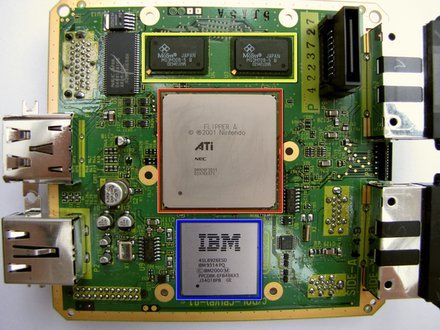
• 24 MB MoSys 1T-SRAM
• ATI 'Flipper' GPU, 162 MHz with 3 MB 1T-SRAM embedded within the die
• IBM 'Gekko' CPU, 486 MHz (PowerPC 750CXe-based core)
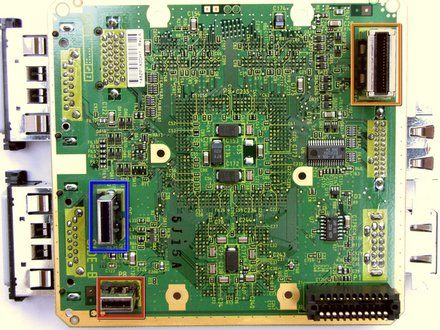
• Connectors (2nd pic):
• 'Hi Speed Port'
• 'Serial Port 1'
• 'Serial Port 2'
|
|
|
| | | |
| | 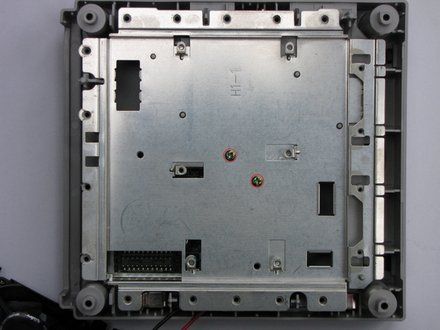
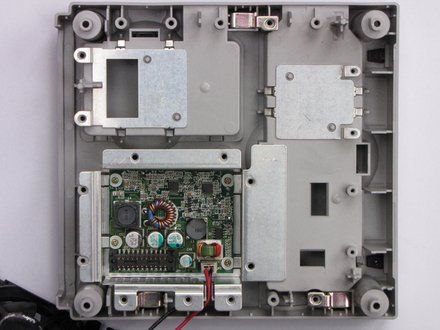
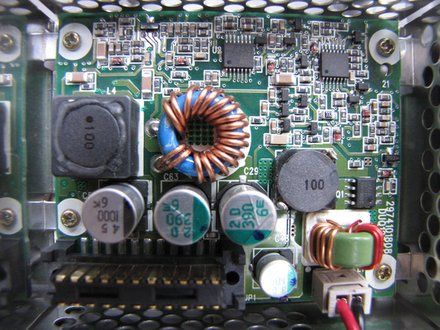
• If you lift the mainboard up, you'll see a metal plate, probably for EMI-protection. Remove the two screws holding it and you have access to the internal power supply.
|
|
|
| | | |
|

















