BYTEROT - retro PCs, consoles and lost software
homearticleshow-toswhat's newlibraryrepaircommunityconnectcontributelinks
» ftp ftp.byterot.net  ::  irc #retro on irc.fxnet.org (3 here)  ::  2,186 releases  ::  25,577 library files18.11.2026
MAIN MENU::
HOME01
ARTICLES02
HOW-TOS03
WHAT'S NEW04
LIBRARY05
> REPAIR06
COMMUNITY07
CONNECT08
CONTRIBUTE09
LINKS10

GET AN ACCOUNT::
Accounts are free. Join #retro on irc.fxnet.org, identify with NickServ and type !req.
[how]

IRC::
#retro on irc.fxnet.org
6697 ssl · 6667 plain
modern + vintage clients welcome
[vintage how-to]

WHO'S AROUND::
3 people in #retro
okawari, synmuffin, thelounge76
nobody on the FTP
last upload: Archived Windows 3.0 - 11 ISO B... by archiveorg, 35d ago
as of 21:42 EST · [community]

SECTIONS::

OS


1551

DRIVERS


61

SOFTWARE


22

GAMES


10

UTILS


37

DOCS


505

INCOMING


0

REQUESTS


0

LIBRARY


25577

SOME STATS::
releases2,186
last 24h+0
online1.7 TB
library1.4 TB
members1
updated2026-11-18 21:42

NINTENDO NES ADVANTAGE B BUTTON
REPLACEMENT::
DeviceNintendo NES Advantage
DifficultyModerate
Time15 minutes
Steps8
This guide is by Aksel Andreassen on iFixit and is licensed under Creative Commons Attribution-NonCommercial-ShareAlike 3.0. ByteRot mirrors it for non-commercial preservation: formatting changed and photos resized for old browsers; full-size photos and the text are on the FTP in /DOCS/REPAIR. Original guide >>

If you are having problems with your Nintendo NES Model NES-026 Advantage's B Button, you'll need to remove it to investigate potential issues.

The B button is used to send inputs to the device. You'll need to remove your B Button if it is stuck in the pressed position or too stiff to move.

Before you start working on this guide, make sure the device is unplugged from any external sources.

Tools: Spudger; Flathead 3/32" or 2.5 mm Screwdriver; Tweezers; Phillips #0 Screwdriver


STEP 1::
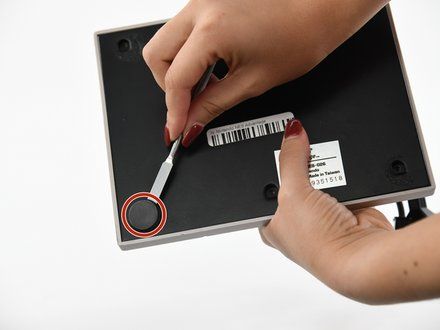
[step 1 photo]
• Remove the four sticky pads from the bottom of the device.
• NOTE: If the pads are stuck, use a spudger to remove them.

STEP 2::
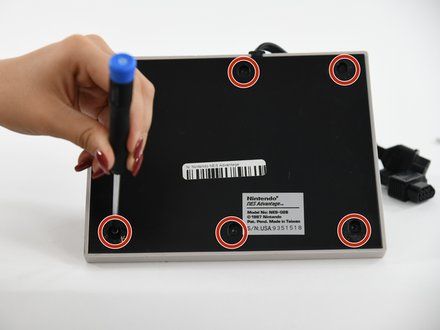
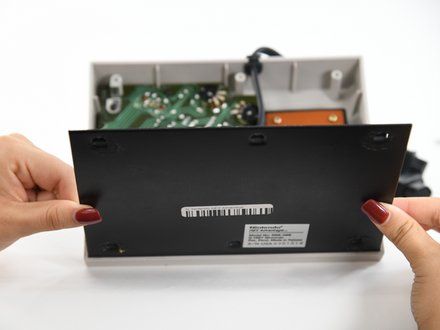
[step 2 photo] [step 2 photo]
• Remove the six 8 mm screws from the bottom of the device with a Phillips #0 screwdriver.
• Use your hands to pull the back panel away from the controller.

STEP 3::
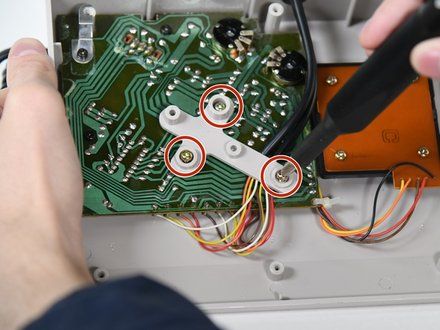
[step 3 photo] [step 3 photo]
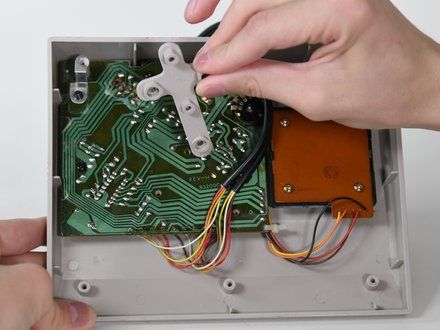
• Remove the three 14 mm screws from the gray cross with a Phillips #0 screwdriver.
• Lift the gray component away from the device.

STEP 4::
[step 4 photo]
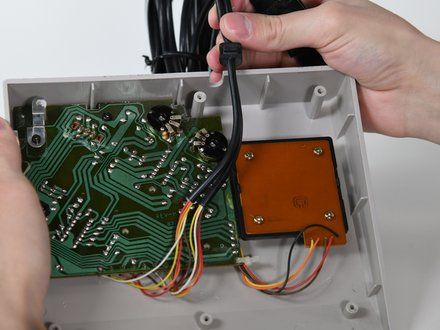
• Lift up the black wire and move it to the side.

STEP 5::
[step 5 photo] [step 5 photo] [step 5 photo]
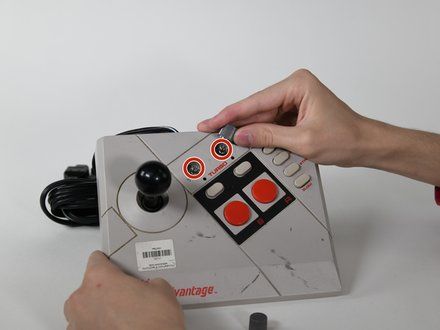
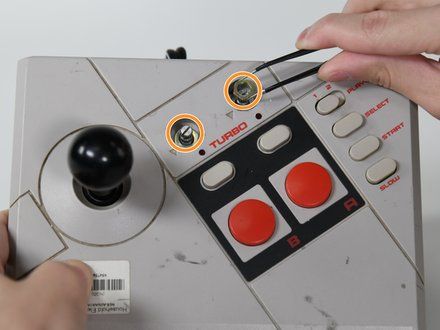
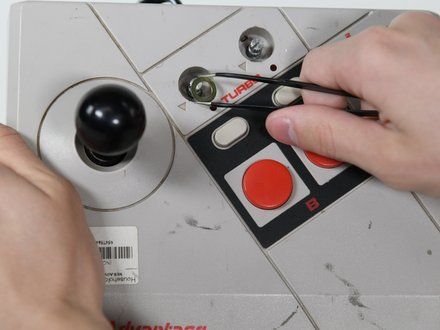
• Remove the two silver knobs on the front of the device.
• Unscrew the two silver nuts using a flathead screwdriver.
• Remove each silver nut and silver washer using a pair of tweezers (https://www.ifixit.com/en-ca/products/tweezers).

STEP 6::
[step 6 photo] [step 6 photo]
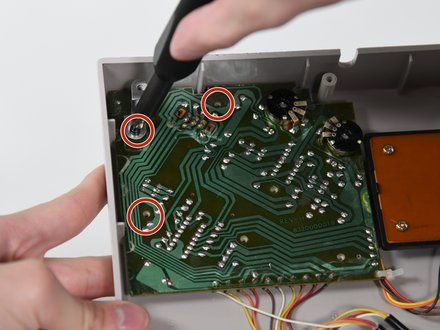
• Remove the remaining three 8 mm screws on the circuit board with a Phillips #0 screwdriver.
• Remove the silver bracket from the top of the circuit board.

STEP 7::
[step 7 photo]
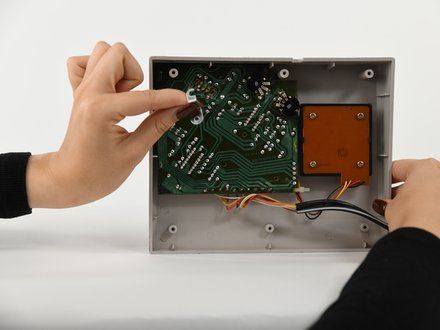
• Remove the circuit board from the controller.

STEP 8::
[step 8 photo]
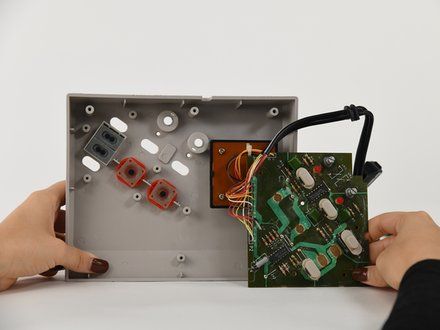
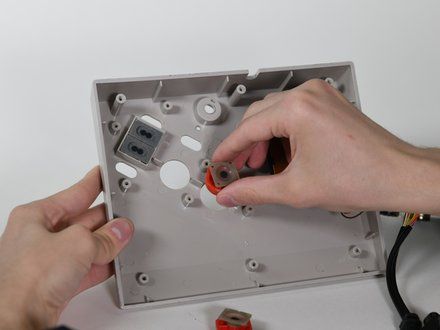
• Remove the B button from the case (or the circuit board if it got stuck).

CONCLUSION::
To reassemble your device, follow these instructions in reverse order.

CREDIT::
This guide is by Aksel Andreassen on iFixit and is licensed under Creative Commons Attribution-NonCommercial-ShareAlike 3.0. ByteRot mirrors it for non-commercial preservation: formatting changed and photos resized for old browsers; full-size photos and the text are on the FTP in /DOCS/REPAIR. Original guide >>
[all repair guides]

[ BYTEROT / OLD BITS FOR OLD MACHINES ]

[ByteRot] [FTP] [IRC] [Any Browser] [HTML 3.2]
© 2026 ByteRot · plain HTML 3.2, no JavaScript: works in Mosaic, Netscape, IE, Lynx and whatever you're using now · best viewed at 800x600 · built 2026-11-18