|  | | Accounts are free. Join #retro on irc.fxnet.org, identify with NickServ and type !req. |
| |
|
|  | | |
| | #retro on irc.fxnet.org
6697 ssl · 6667 plain
modern + vintage clients welcome |
| |
|
| | | |
| | 3 people in #retro
okawari, synmuffin, thelounge76
nobody on the FTP
last upload: Archived Windows 3.0 - 11 ISO B... by archiveorg, 35d ago |
| as of 21:42 EST ·  |
|
|
| | | |
| | | releases | 2,186 | | last 24h | +0 | | online | 1.7 TB | | library | 1.4 TB | | members | 1 | | updated | 2026-11-18 21:42 |
|
|
|
| | | |
| |
| | 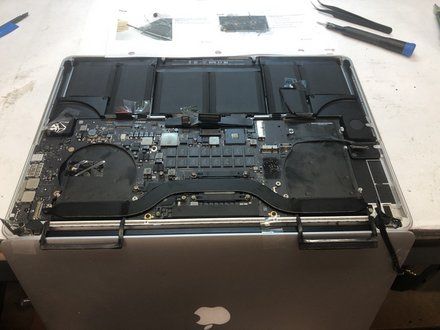
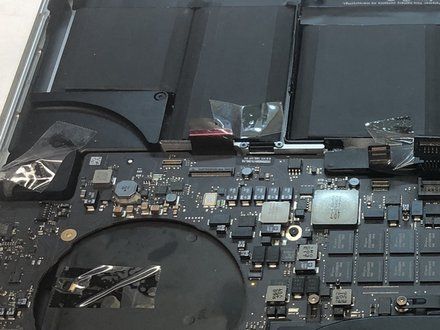
• Before reinstalling the motherboard use tape to hold the underlying cables and connectors out of the way. This prevents the hassle of trying to ensure all the necessary cables are on top of the motherboard once its put down into place.
|
|
|
| | | |
| | 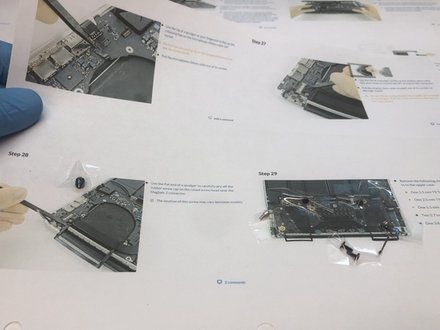
• Print out the repair guide and tape the screws on the picture of where they go.
• NOTE: Have a desk tape dispenser (so you can use one hand to get a piece)
• As you progress through the steps/sheets you can move and stack the sheets to the side.
• NOTE: It is then super easy to reverse the process and know which screw goes where.
|
|
|
| | | |
|

















