|  | | Accounts are free. Join #retro on irc.fxnet.org, identify with NickServ and type !req. |
| |
|
|  | | |
| | #retro on irc.fxnet.org
6697 ssl · 6667 plain
modern + vintage clients welcome |
| |
|
| | | |
| | 3 people in #retro
okawari, synmuffin, thelounge76
nobody on the FTP
last upload: Archived Windows 3.0 - 11 ISO B... by archiveorg, 35d ago |
| as of 21:42 EST ·  |
|
|
| | | |
| | | releases | 2,186 | | last 24h | +0 | | online | 1.7 TB | | library | 1.4 TB | | members | 1 | | updated | 2026-11-18 21:42 |
|
|
|
| | | |
| | | |
| Device | Keyboard |
| Difficulty | Difficult |
| Time | 30 minutes - 1 hour |
| Steps | 12 |
This guide is by Kenny Nguyen on iFixit and is licensed under Creative Commons Attribution-NonCommercial-ShareAlike 3.0. ByteRot mirrors it for non-commercial preservation: formatting changed and photos resized for old browsers; full-size photos and the text are on the FTP in /DOCS/REPAIR. Original guide >>
If your KBParadise V80 TKL Mechanical Keyboard with alps key switches isn't registering key presses or registering double/triple clicks when you try to type, use this guide to replace the key switch.
Key switches are used to detect input when a user clicks a button on a keyboard. A worn/faulty key switch will possibly not register clicks, or send repeated clicks.
Before using this guide, identify all the key switches needing replacement, noting which keys need replacing. Possibly try using different mini-usb cables to make sure the issue is not related to cross talk in the cable.
Before beginning, make sure to remove the mini-usb cable.
Tools: Keycap Removal Tool; iFixit Opening Tool; iFixit Opening Picks (Set of 6); Phillips #1 Screwdriver; Soldering Iron; Lead-Free Solder; Desoldering Pump
Parts: Alps Key Switch |
|
|
| | | |
| | 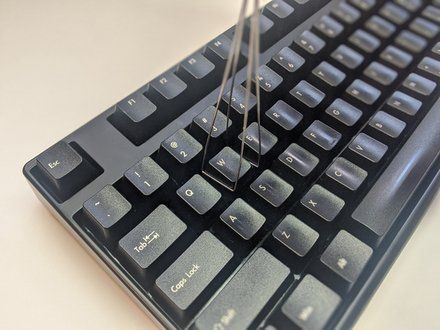
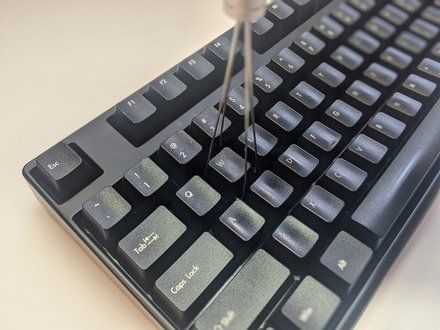
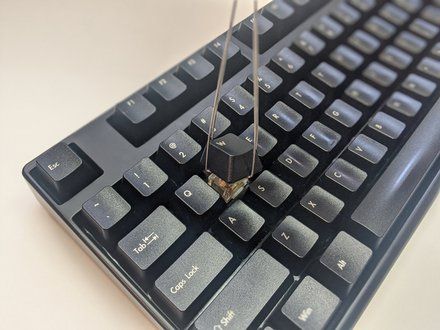
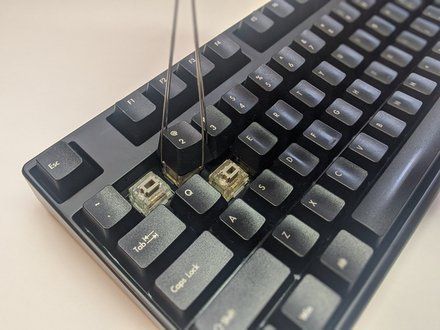
• Insert the key cap puller into the cracks around the keycap.
• Twist the tool around the bottom of the keycap.
• Hold the keyboard down, and pull on the keycap slowly.
• Pull up as straight as possible.
• NOTE: Force required to pull a keycap may vary from soft to heavy.
|
|
|
| | | |
| | 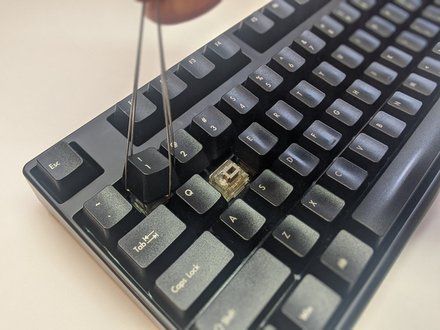
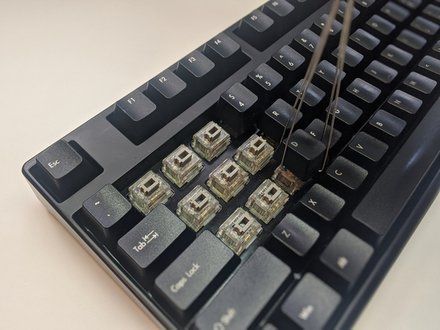
• Proceed to remove the surrounding keycaps.
|
|
|
| | | |
| | 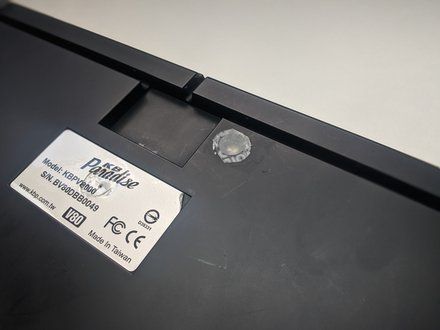
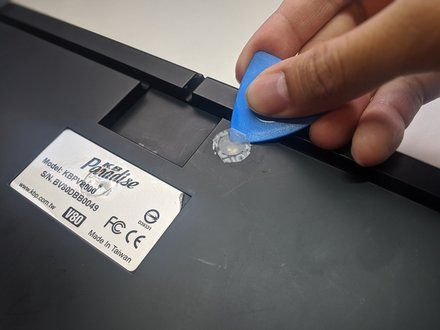
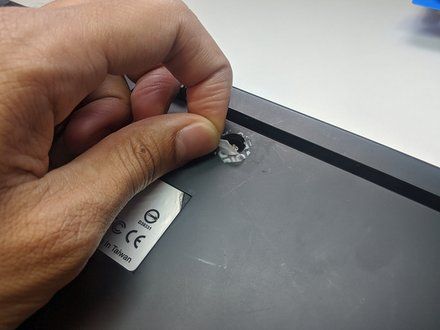
• Flip the keyboard over so that the bottom is facing upward.
• Slip an opening pick beneath the warranty sticker.
• Proceed to pull the sticker off to reveal the hole.
|
|
|
| | | |
| | 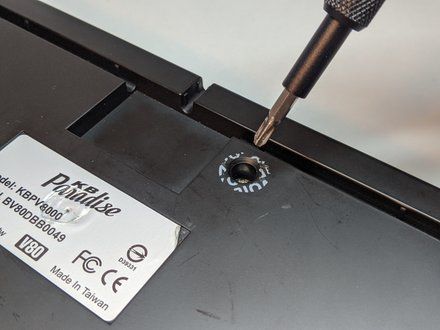
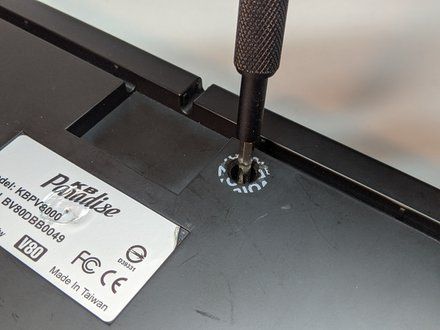
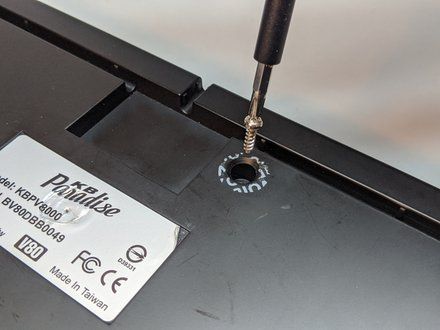
• Use a Phillips #1 Screwdriver to remove the 10 mm screw.
|
|
|
| | | |
| | 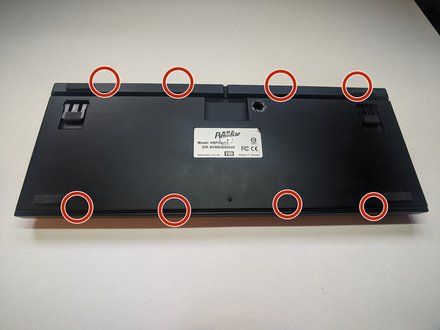
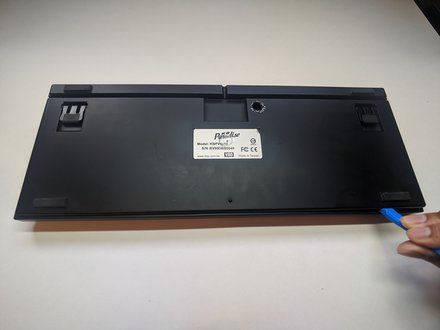
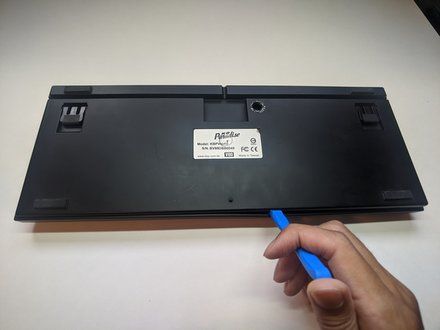
• Slip an opening tool into the cracks at the indicated points.
• Pry open carefully.
|
|
|
| | | |
| | 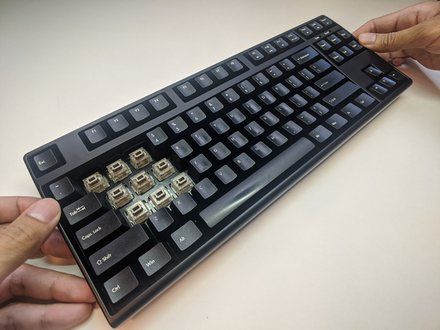
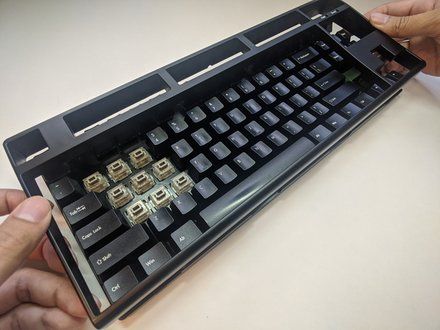
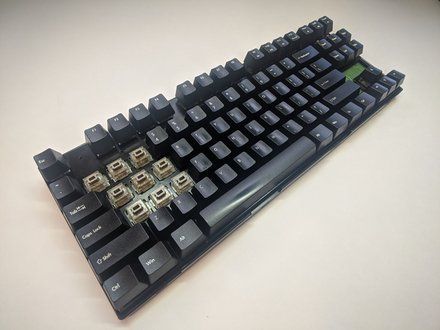
• Flip the keyboard so that the keys are facing upward.
• Grab the sides of the top case and pull up gently.
|
|
|
| | | |
| | 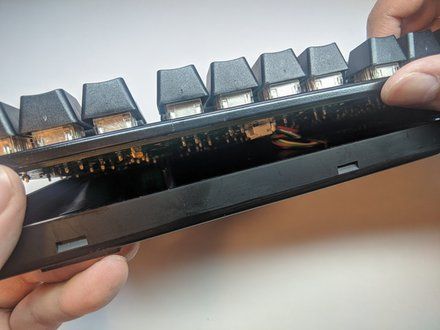
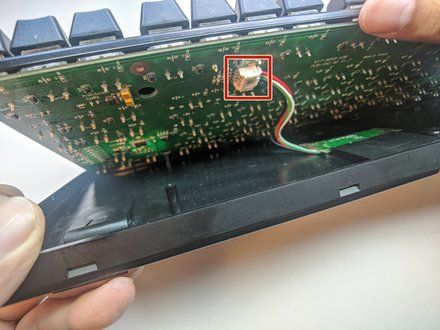
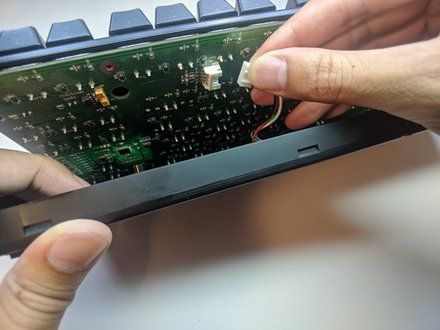
• Separate the plate from the bottom case slightly.
• Reach within and remove the daughterboard cable.
|
|
|
| | | |
| | 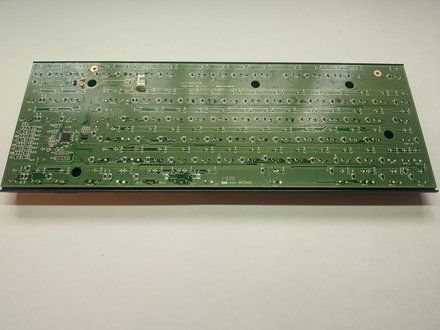
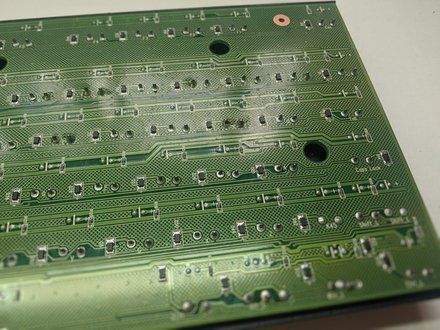
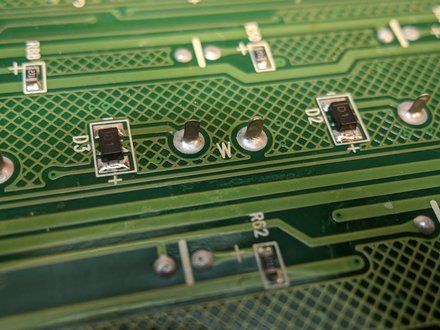
• Turn the plate over.
• Locate the pins for the key switch.
• NOTE: All the key switches are labeled with their ASCII designation.
|
|
|
| | | |
| | 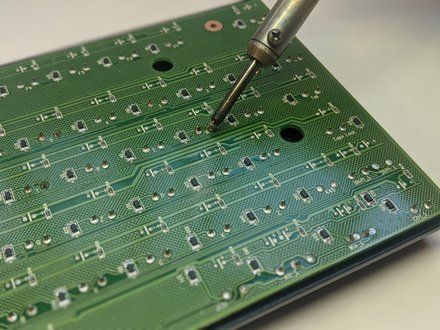
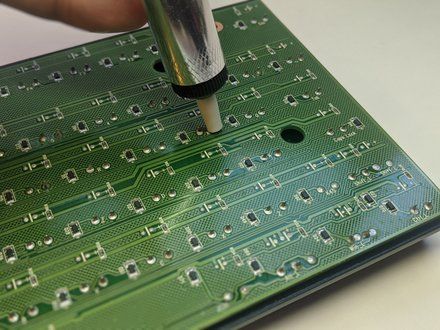
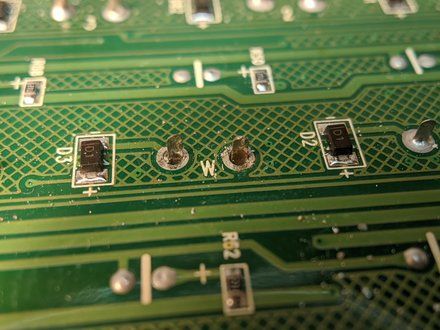
• Desolder (https://www.ifixit.com/Guide/How+To+Solder+and+Desolder+Connections/750) the pins with a soldering iron and a desoldering pump (https://www.ifixit.com/en-ca/products/desoldering-pump).
• Repeat until the pins freely move inside the wells without heat.
• CAUTION: Placing the soldering iron too close to the PCB may damage it.
|
|
|
| | | |
| | 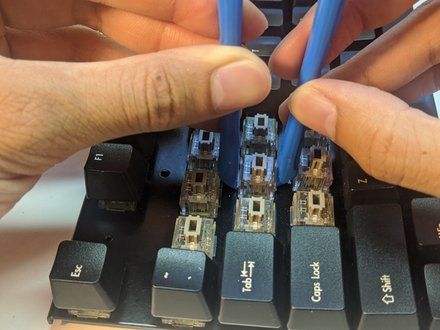
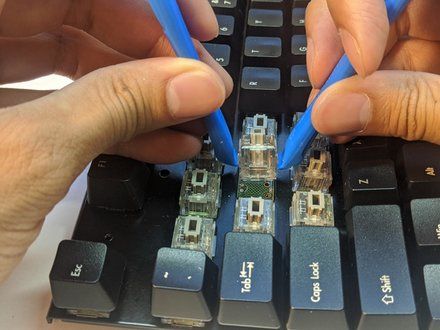
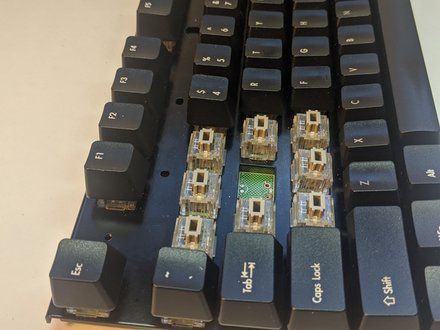
• Wedge two opening tools under the key switch.
• Pull up gently.
• NOTE: If the key switch appears to be immovable, consider repeating step 9.
|
|
|
| | | |
| | 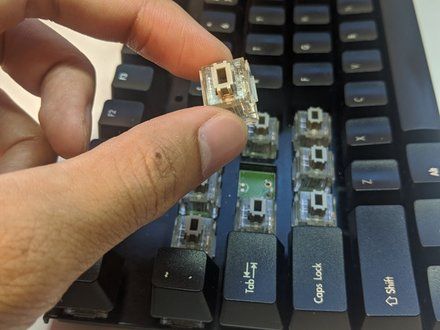
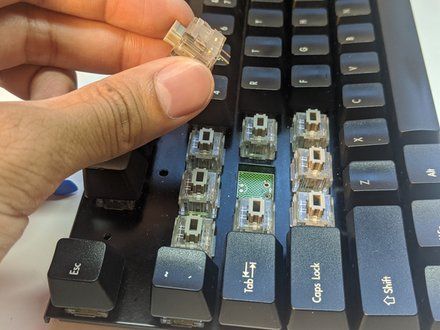
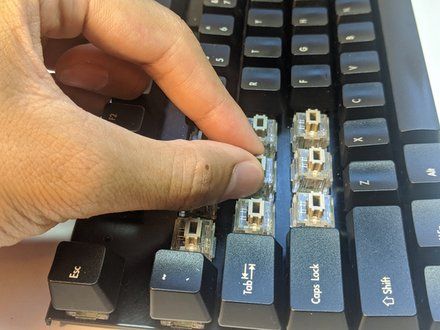
• Insert a new key switch into the well with pins corresponding to that of the PCBs.
|
|
|
| | | |
| | 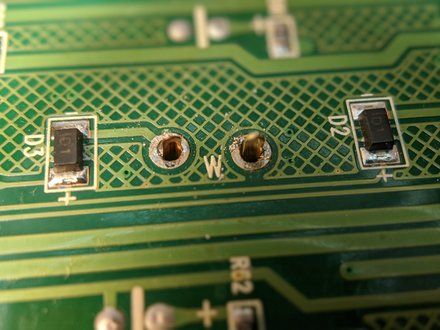
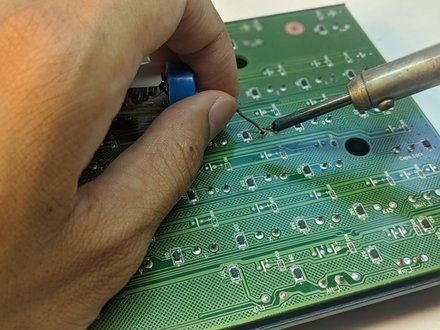
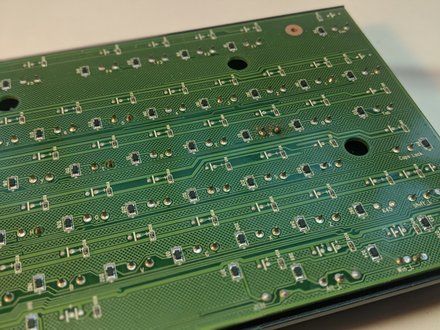
• Solder the pins onto the PCB ensuring the solder stays within the wells of the pins.
• NOTE: Ensure the pins do not freely move after soldering.
• CAUTION: Ensure that there is no solder connecting the two pins, as this can possibly cause a short circuit.
|
|
|
| | | |
| | | To reassemble your device, follow these instructions in reverse order starting at step 7. |
|
|
| | | |
|


















