|  | | Accounts are free. Join #retro on irc.fxnet.org, identify with NickServ and type !req. |
| |
|
|  | | |
| | #retro on irc.fxnet.org
6697 ssl · 6667 plain
modern + vintage clients welcome |
| |
|
| | | |
| | 3 people in #retro
okawari, synmuffin, thelounge76
nobody on the FTP
last upload: Archived Windows 3.0 - 11 ISO B... by archiveorg, 35d ago |
| as of 21:42 EST ·  |
|
|
| | | |
| | | releases | 2,186 | | last 24h | +0 | | online | 1.7 TB | | library | 1.4 TB | | members | 1 | | updated | 2026-11-18 21:42 |
|
|
|
| | | |
| | | |
| Device | Nintendo Game Boy Advance SP |
| Difficulty | Moderate |
| Time | 10 - 15 minutes |
| Steps | 14 |
This guide is by DJ Pantone on iFixit and is licensed under Creative Commons Attribution-NonCommercial-ShareAlike 3.0. ByteRot mirrors it for non-commercial preservation: formatting changed and photos resized for old browsers; full-size photos and the text are on the FTP in /DOCS/REPAIR. Original guide >>
The brightness switch is the circular button with a sun symbol engraved into it. The brightness switch is located at the top of the button panel.
Tools: Phillips #00 Screwdriver; iFixit Opening Tool; Tri-point Y00 Screwdriver
Parts: Nintendo Game Boy Advance SP Brightness Button |
|
|
| | | |
| | 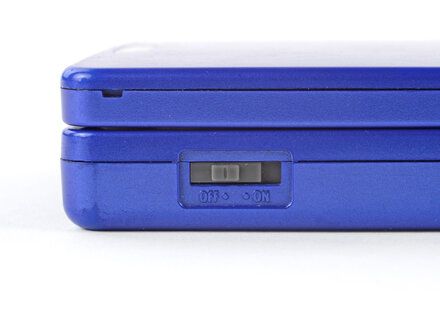
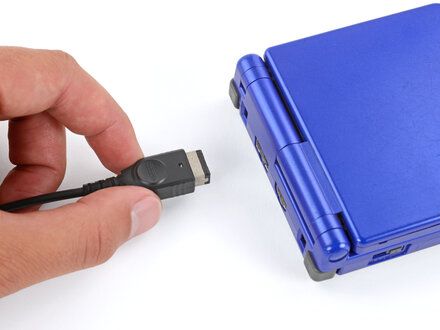
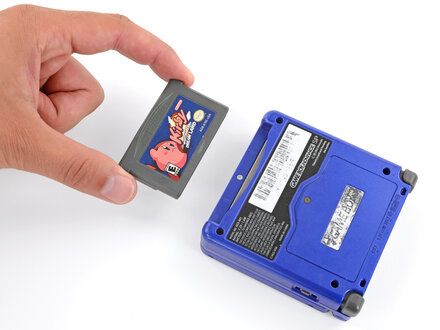
• Slide the power switch to the OFF position and unplug any cables.
• If you have a game cartridge in, remove it.
|
|
|
| | | |
| | 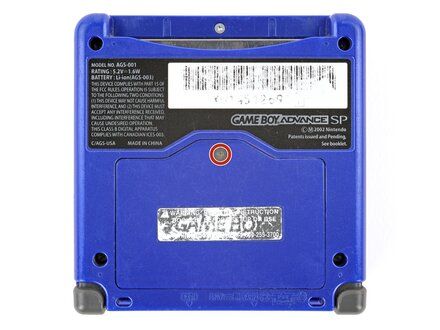
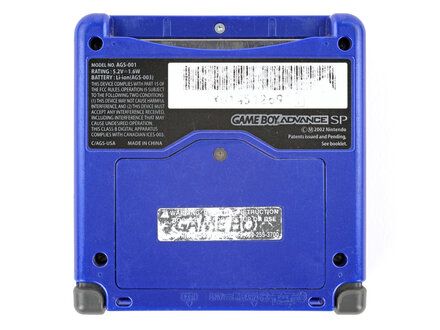
• Use a JIS 00 screwdriver to loosen the captive screw securing the battery cover.
• NOTE: You can try to use a non-iFixit Phillips driver in a pinch, but you risk damaging or stripping the screw. Push down firmly on the driver and twist slowly.
|
|
|
| | | |
| | 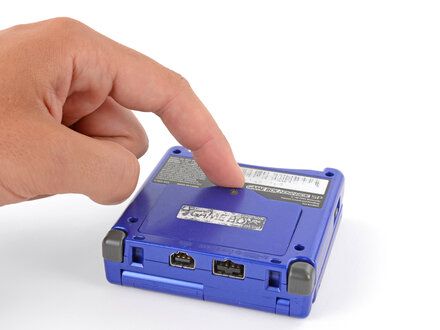
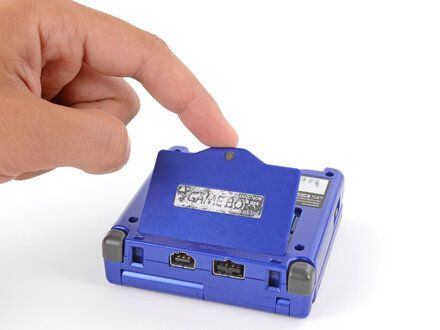
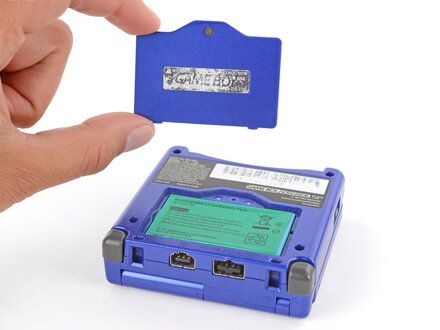
• Lift the edge of the cover near the screw and remove the cover.
• REMINDER: During reassembly, hook the tabs on the bottom edge of the cover into their slots and lay the cover into place.
|
|
|
| | | |
| | 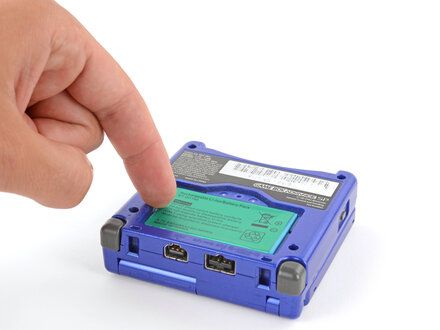
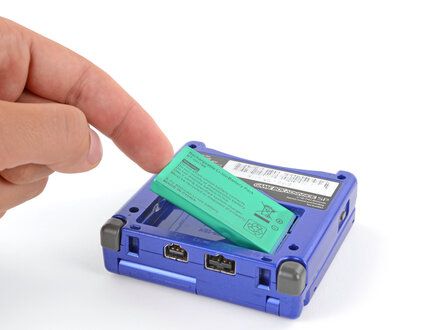
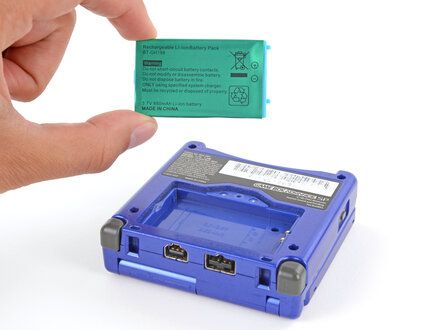
• Use your finger to lift the battery by the tab on its left edge, then remove it.
• REMINDER: During reassembly:
• CAUTION: Never reuse a deformed or damaged battery--it's a fire hazard. Replace it with a new battery.
• NOTE: Your replacement battery may come with a plastic enclosure (https://guide-images.cdn.ifixit.com/igi/AjbNiXYo4IjHmjmi.full) that slides over the battery.
• Insert the edge of the battery with contacts (https://guide-images.cdn.ifixit.com/igi/cJ4ZcVQRCO6Kk1Jg.full) at a slight downward angle--aligning the contacts with their prongs (https://guide-images.cdn.ifixit.com/igi/N2qYpL2LmeRFSh1F.full) in the recess--and press the battery into place.
|
|
|
| | | |
| | 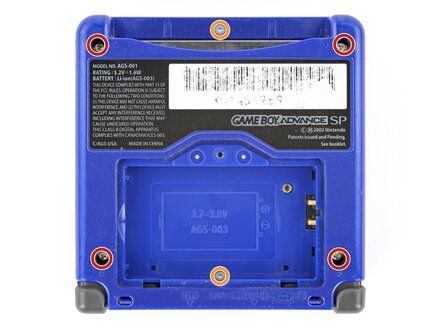
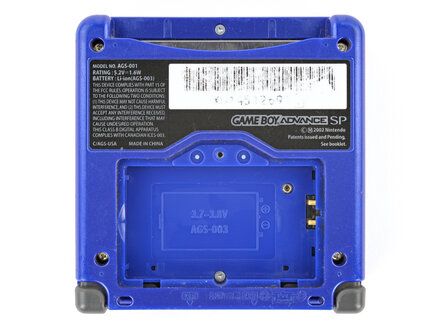
• Use a tri?point Y0 screwdriver to remove the six screws securing the bottom shell:
• Four 6.3 mm?long recessed screws
• Two 4.6 mm?long screws
|
|
|
| | | |
| | 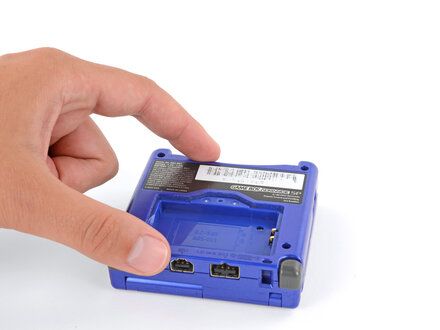
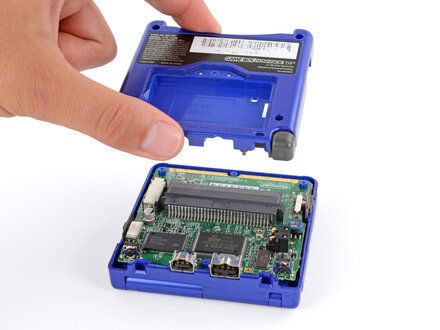
• Lift the bottom shell straight up and remove it.
|
|
|
| | | |
| | 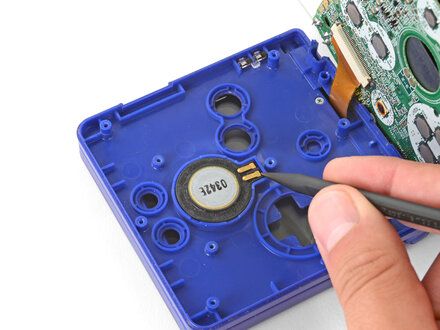
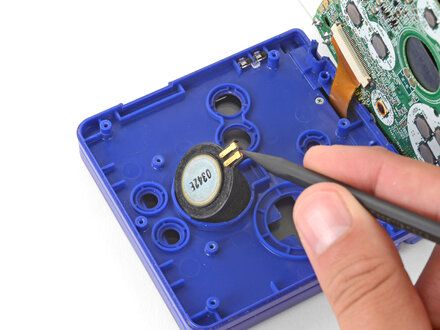
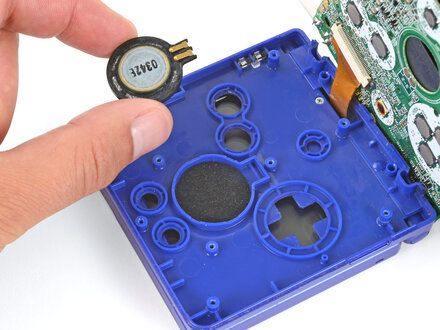
• Use the point of a spudger or a clean fingernail to lift the speaker until you can grip it with your fingers.
• Remove the speaker.
|
|
|
| | | |
| | 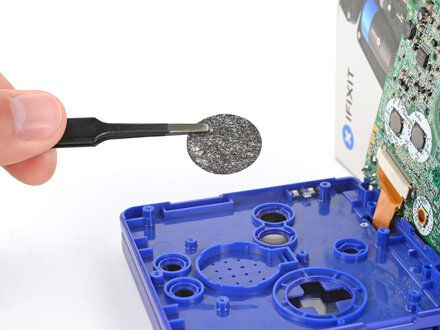
• Remove the circular mesh from the speaker recess and set it aside--the piece can easily fall out and get lost when working.
|
|
|
| | | |
| | 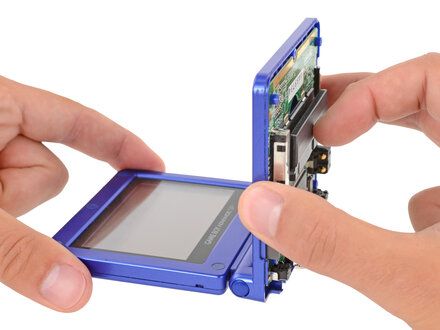
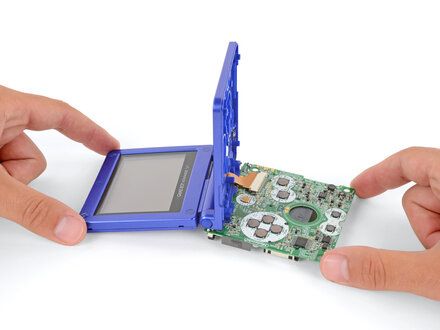
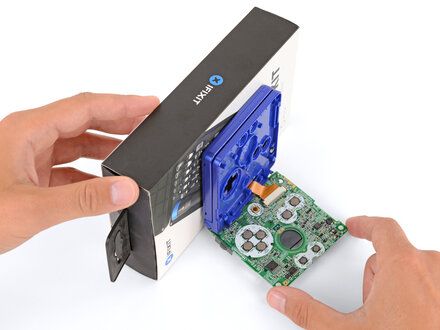
• CAUTION: Be careful not to strain the screen cable during the next few steps--it has very little slack.
• NOTE: You need to prop up the main body of your Game Boy in order to disconnect the screen cable without straining it. Here are two ways to do so:
• Option 1: Open the main body of your Game Boy to a 90?degree angle and gently lay the motherboard down. Make sure the main body is resting on top of the motherboard to give the cable slack.
• Option 2: Keep the main body closed and prop it up on the edge of the logic board, using a sturdy object to hold it up.
|
|
|
| | | |
| | 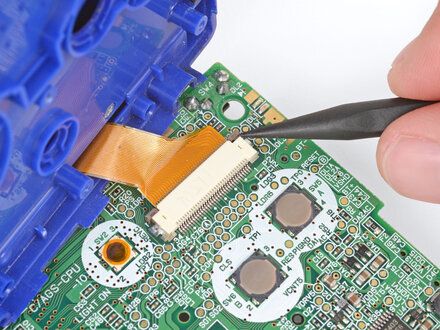
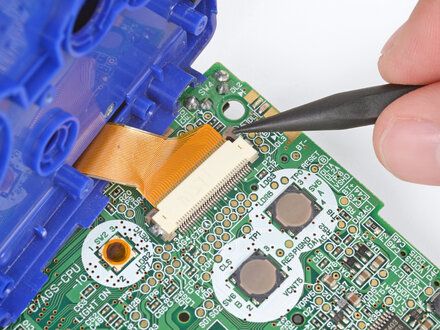
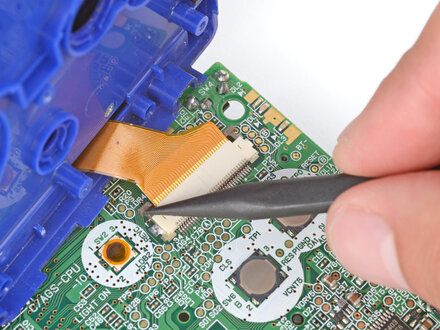
• Use the point of a spudger to push the two tabs on either side of the screen cable connector into the unlocked position.
• NOTE: Only push the tabs until they stop. If you push them too far, you may slide the locking tab off the connector.
|
|
|
| | | |
| | 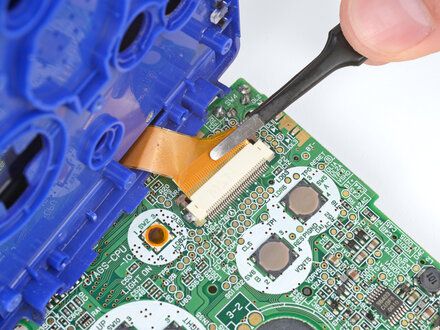
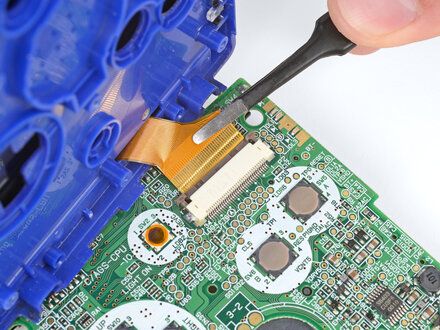
• Use a pair of tweezers to gently slide the screen cable out of its socket.
|
|
|
| | | |
| | 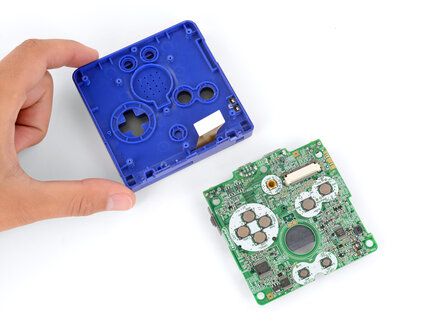
• Remove the main body from the motherboard.
• REMINDER: During reassembly, prop up the main body for enough slack reconnect the screen cable.
|
|
|
| | | |
| | 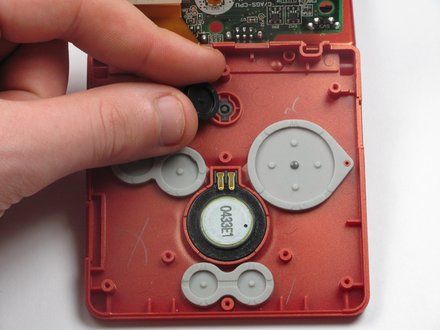
• With your fingers, lift the track pad out off the brightness switch.
• NOTE: Keep the track pad clean. A dirty or dusty track pad will lead to the brightness switch not working when you press it.
|
|
|
| | | |
| | 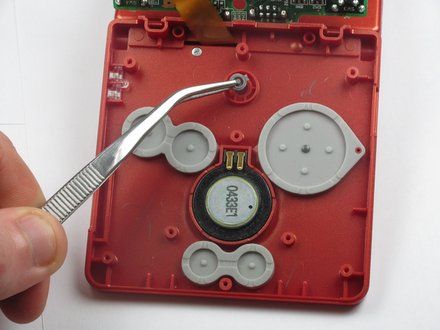
• Using tweezers (https://www.ifixit.com/en-ca/products/tweezers), lift the brightness switch out of the Game Boy Advance SP.
|
|
|
| | | |
| | | To reassemble your device, follow these instructions in reverse order. |
|
|
| | | |
|































