|  | | Accounts are free. Join #retro on irc.fxnet.org, identify with NickServ and type !req. |
| |
|
|  | | |
| | #retro on irc.fxnet.org
6697 ssl · 6667 plain
modern + vintage clients welcome |
| |
|
| | | |
| | 3 people in #retro
okawari, synmuffin, thelounge76
nobody on the FTP
last upload: Archived Windows 3.0 - 11 ISO B... by archiveorg, 35d ago |
| as of 21:42 EST ·  |
|
|
| | | |
| | | releases | 2,186 | | last 24h | +0 | | online | 1.7 TB | | library | 1.4 TB | | members | 1 | | updated | 2026-11-18 21:42 |
|
|
|
| | | |
| | | |
| Device | Sega Saturn |
| Difficulty | Moderate |
| Time | 10 minutes |
| Steps | 11 |
This guide is by Matthew Russell on iFixit and is licensed under Creative Commons Attribution-NonCommercial-ShareAlike 3.0. ByteRot mirrors it for non-commercial preservation: formatting changed and photos resized for old browsers; full-size photos and the text are on the FTP in /DOCS/REPAIR. Original guide >>
Follow this guide if you want to replace the power button on your Sega Saturn. This guide is almost a carbon copy of replacing the Power Supply Board with a few extra steps. So, before you begin disassembling: I advise getting the detailed tools together, as the screws on the Power Supply Board have bad plastic sockets and a Standoff screwdriver really helps get those rigid screws in and out. The toughest part of this guide will be removing the Power Supply Board, as the last thing holding it in place are pins directly from the motherboard. Breaking those can lead to replacing two parts of the Sega Saturn, and it doesn't help that it takes a good amount of force to unplug the pins either... Just take your time on that step and this repair should go fine.
Tools: ESD Safe Blunt Nose Tweezers; iFixit Opening Tool; JIS #1; Standoff Screwdriver for iPhones
Parts: CR2032 Lithium Battery |
|
|
| | | |
| | 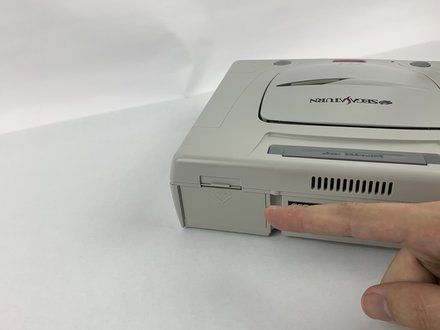
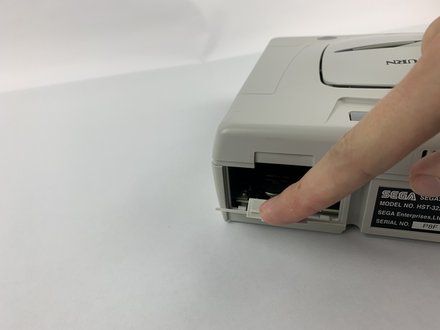
• Press on the plastic lever on the back of the Sega Saturn to pop open the battery slot.
|
|
|
| | | |
| | 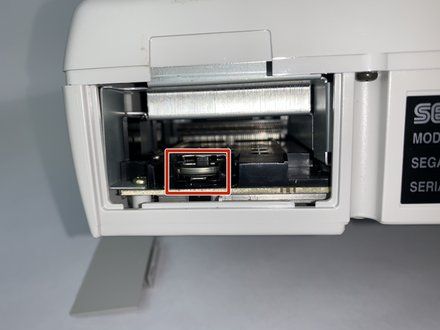
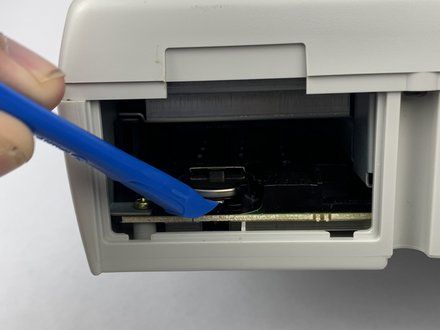
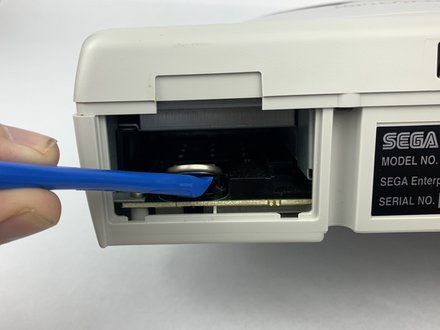
• Push up the edge of the battery with the iFixit opening tool to get the battery out of its socket.
|
|
|
| | | |
| | 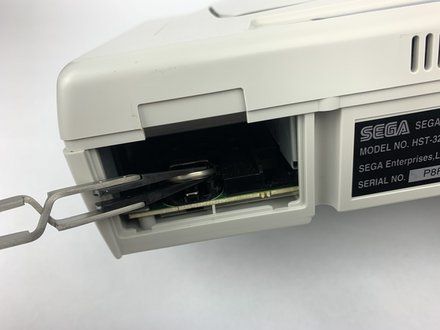
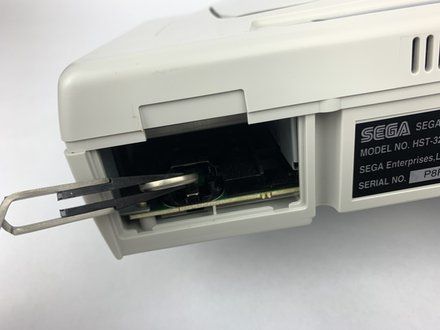
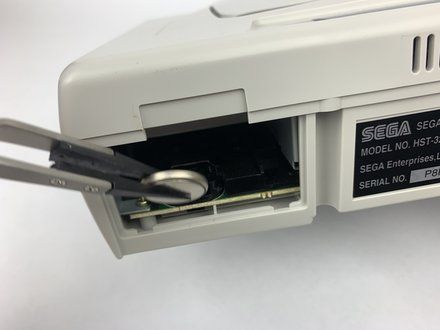
• Use the ESD safe tweezers (https://www.ifixit.com/en-ca/products/tweezers) to pull the battery out of its slot.
|
|
|
| | | |
| | 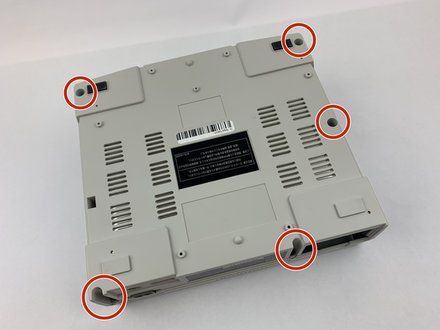
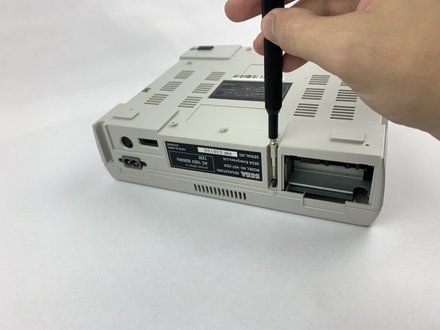
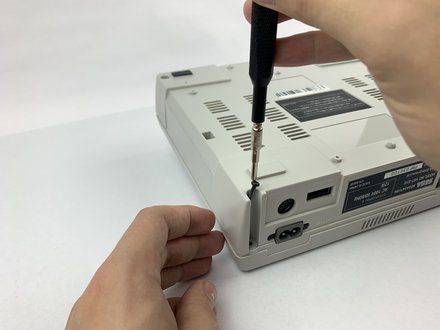
• Remove the five black 13.5mm JIS#1 screws on the bottom of the device. One might be hidden by a sticker.
|
|
|
| | | |
| | 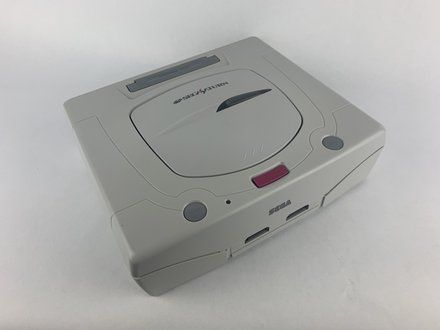
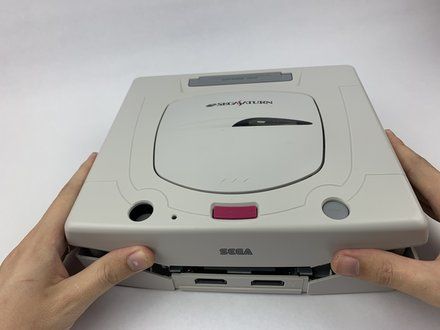
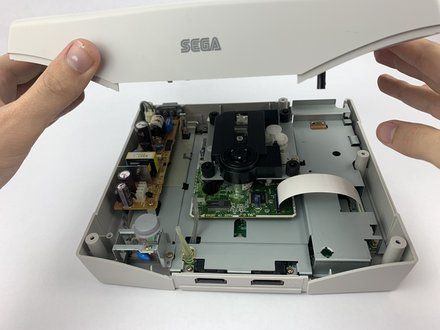
• Flip the device over so it rests right side up.
• Lift gently across the seam of the Sega Saturn. If parts get stuck, a light shake or prying with the iFixit opening tool should free it up. Do not use any brute force, as this can damage the case so it doesn't close again.
|
|
|
| | | |
| | 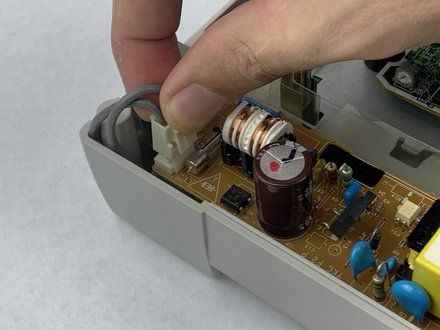
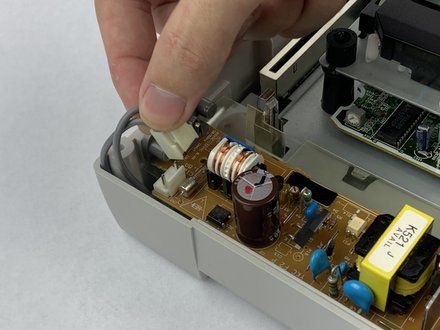
• Unplug the power button plug on the power supply board. Use the iFixit opening tool if necessary.
|
|
|
| | | |
| | 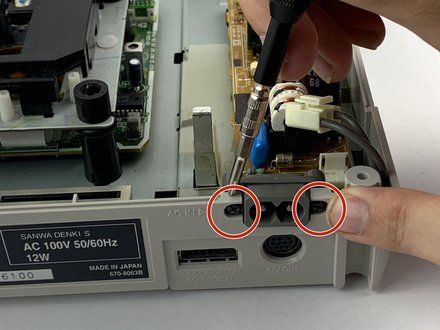
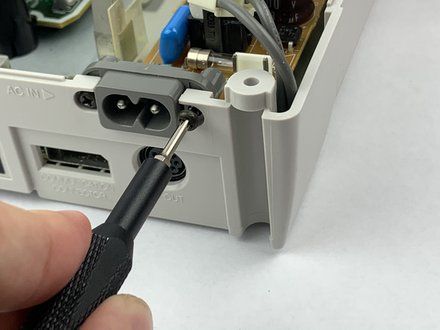
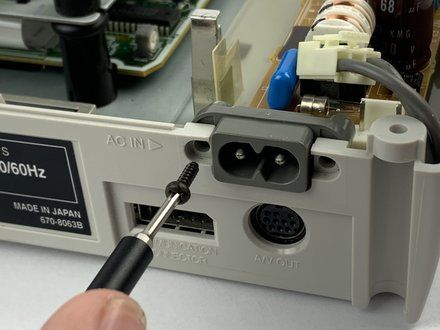
• Remove the two black 11.4mm standoff screws on the back of the Sega Saturn holding the power socket in place. These screws are tight and easily stripped, so it's suggested to use a standoff screw head.
|
|
|
| | | |
| | 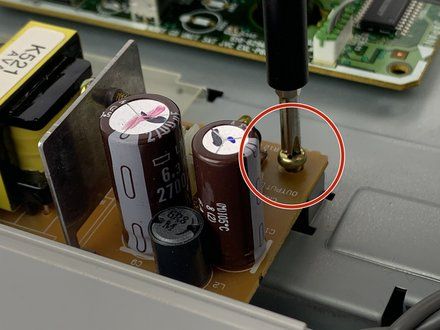
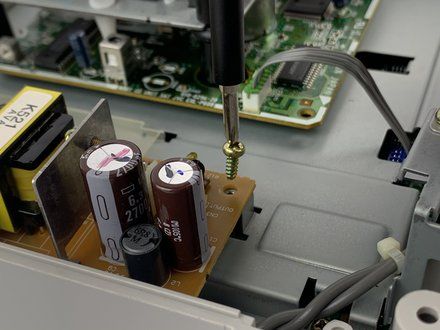
• Remove the metallic 12.3mm JIS#1 screw holding down the power supply board.
|
|
|
| | | |
| | 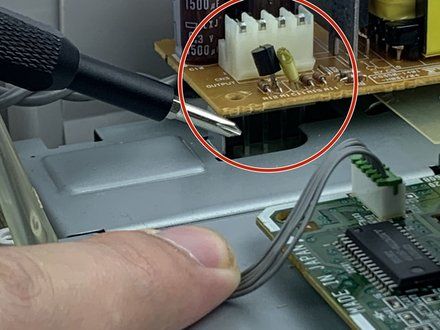
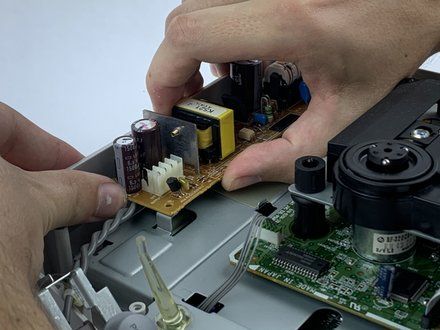
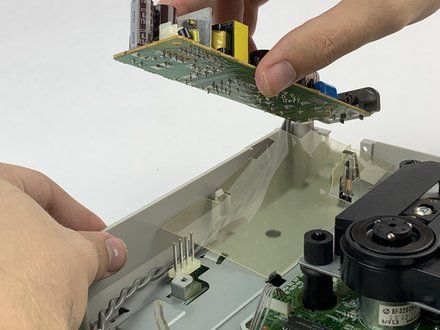
• Lift the power supply board out of its socket, minding the pins that connect it to the motherboard. Some force will be required, but be careful when lifting or shaking the power supply board out.
|
|
|
| | | |
| | 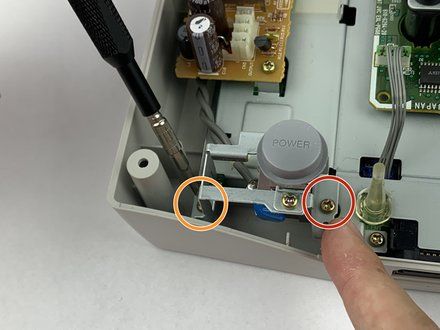
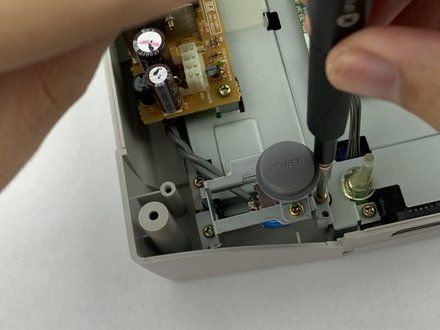
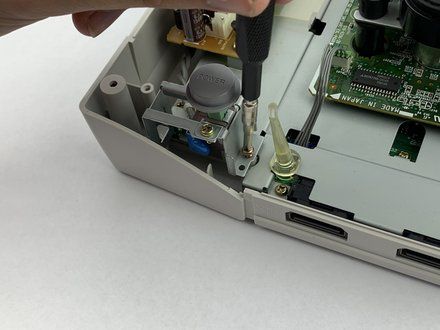
• Remove the metallic 13.7mm JIS#1 screw on the right of the Power Button.
• Remove the metallic 12.4mm JIS#1 screw on the left of the Power Button.
|
|
|
| | | |
| | 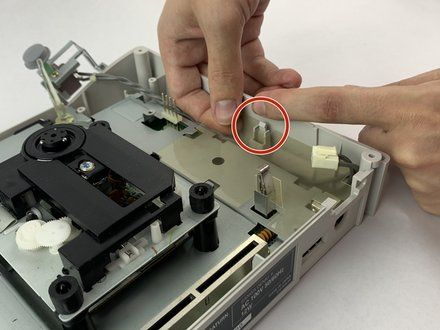
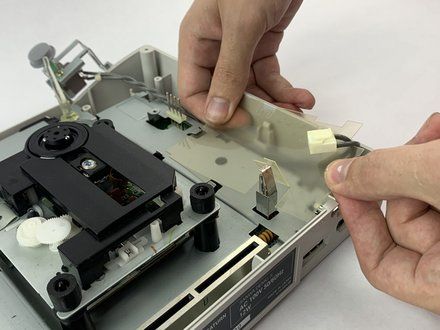
• Push the plastic resting tray's pin located here.
• Remove the plastic resting tray to free the wire between the power supply board and the button.
• Remove the power button when the wire is free.
|
|
|
| | | |
| | | To reassemble your device, follow these instructions in reverse order. |
|
|
| | | |
|

















